Scanning At Scale: Burp Suite Enterprise Edition
Portswigger’s Burp Suite Enterprise Edition is a powerful tool that can be added to your application security program that allows you to integrate application vulnerability scanning within your Continuous Integration (CI) pipeline or to perform ad-hoc or scheduled application security scanning at enterprise scale. In the post we will exploring the following topics:
Throughout, we’ll also look at various tips and tricks we encountered along the way.
Install
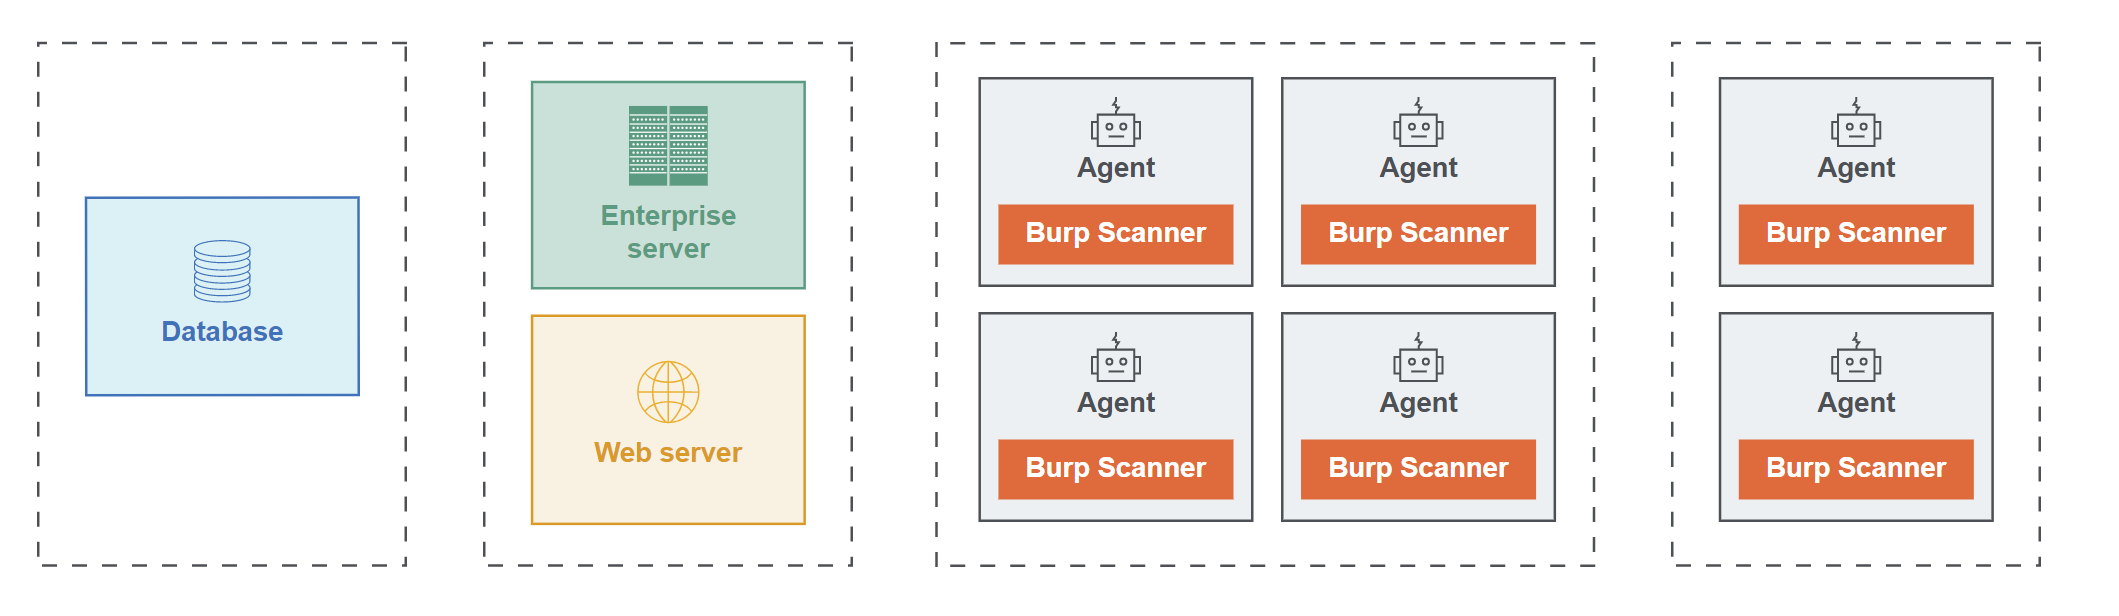
The components for Burp Suite Enterprise Edition consist of a web server, the Burp Suite Enterprise Edition application server, a database, and Burp Scanner agents. The Burp Suite Enterprise Edition application and web server should be installed on the same machine. The database can be installed on a separate machine, as well as the Burp Scanner agents. This is useful for installing in n-tier environments where there may be data segments, DMZ segments, or other segmented application architectures. However, service ports will need to be opened within the environment’s firewalls between segments to allow communication between components of the deployment:

Burp Suite Enterprise Edition can be installed on 64-bit Windows, Linux, or MacOS operating systems and can consist of components being installed in a heterogeneous environment, where the Enterprise server may be installed on Windows with Linux agents for example. The following databases are also supported:
- MariaDB
- Microsoft SQL server
- MySQL
- Oracle
- PostgreSQL
For detailed system requirements, please see:
https://portswigger.net/burp/documentation/enterprise/getting-started/system-requirements
For the purposes of this demonstration, we’ll install all components on an Ubuntu Server virtual machine with a desktop environment installed. To run the installer in headless mode, run:
sudo sh burpsuite_enterprise_linux_v1_1_02.sh -c
To start the install process with the graphical install wizard, unzip the installer and run the following command from the terminal:
sudo sh burpsuite_enterprise_linux_v1_1_02.sh
After reviewing and accepting terms and conditions, you are given the opportunity to select which components to install.
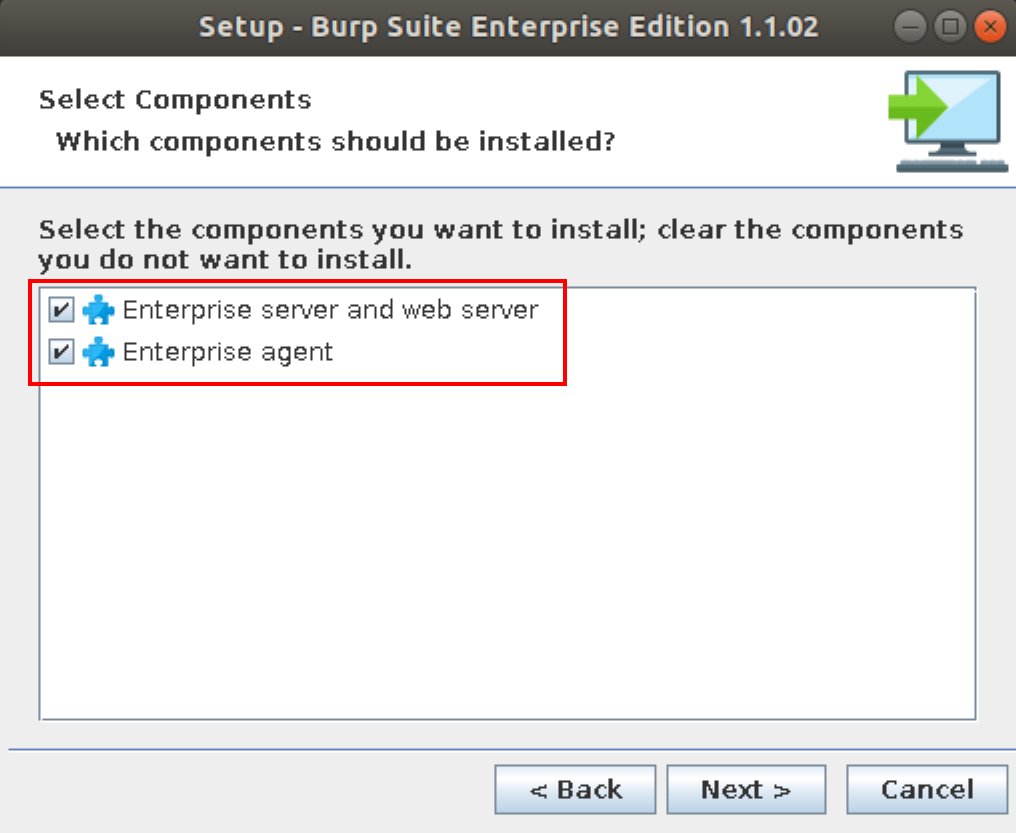
The Enterprise server and web server must always be installed on the same machine. The Enterprise agent can be installed on other machines around the network independently if you have different zones or can be installed in regions closer to your target applications. Multiple logical agents can run on a single physical machine which we’ll explore later when configuring agents.
Choose a web server port next. The default is 8080. This is the port where users and API clients will connect to for managing scans:

You’ll also need to choose a ‘run-as’ user that the server’s processes will execute as. This user will be created on the system automatically if it doesn’t exist already on the system.

Next we’ll setup the database. For our purposes, we’ll use the embedded database as this is recommended for evaluation or demo purposes. If choosing an external database, have the database connection details ready to enter. As a rough guide for sizing the database storage, assume that a single scan will consume at least 500KB of storage in the database. In this case, preparing to store data for 100,000 scans would consume approximately 50GB of storage in the database. Of course, mileage may vary depending on the size of the individual scans.

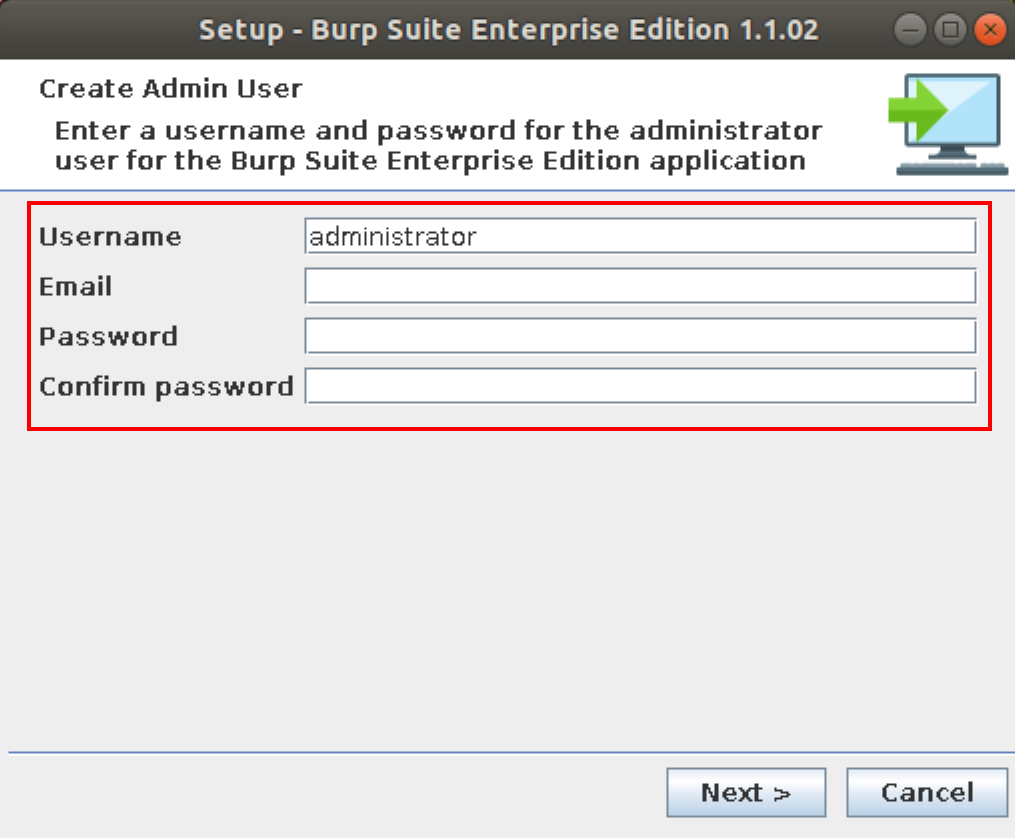
Next we setup the initial admin user. By default this is ‘administrator’, but any username can be used here. A valid email address should be used as password recovery emails are sent to this address in the event of forgetting the password.
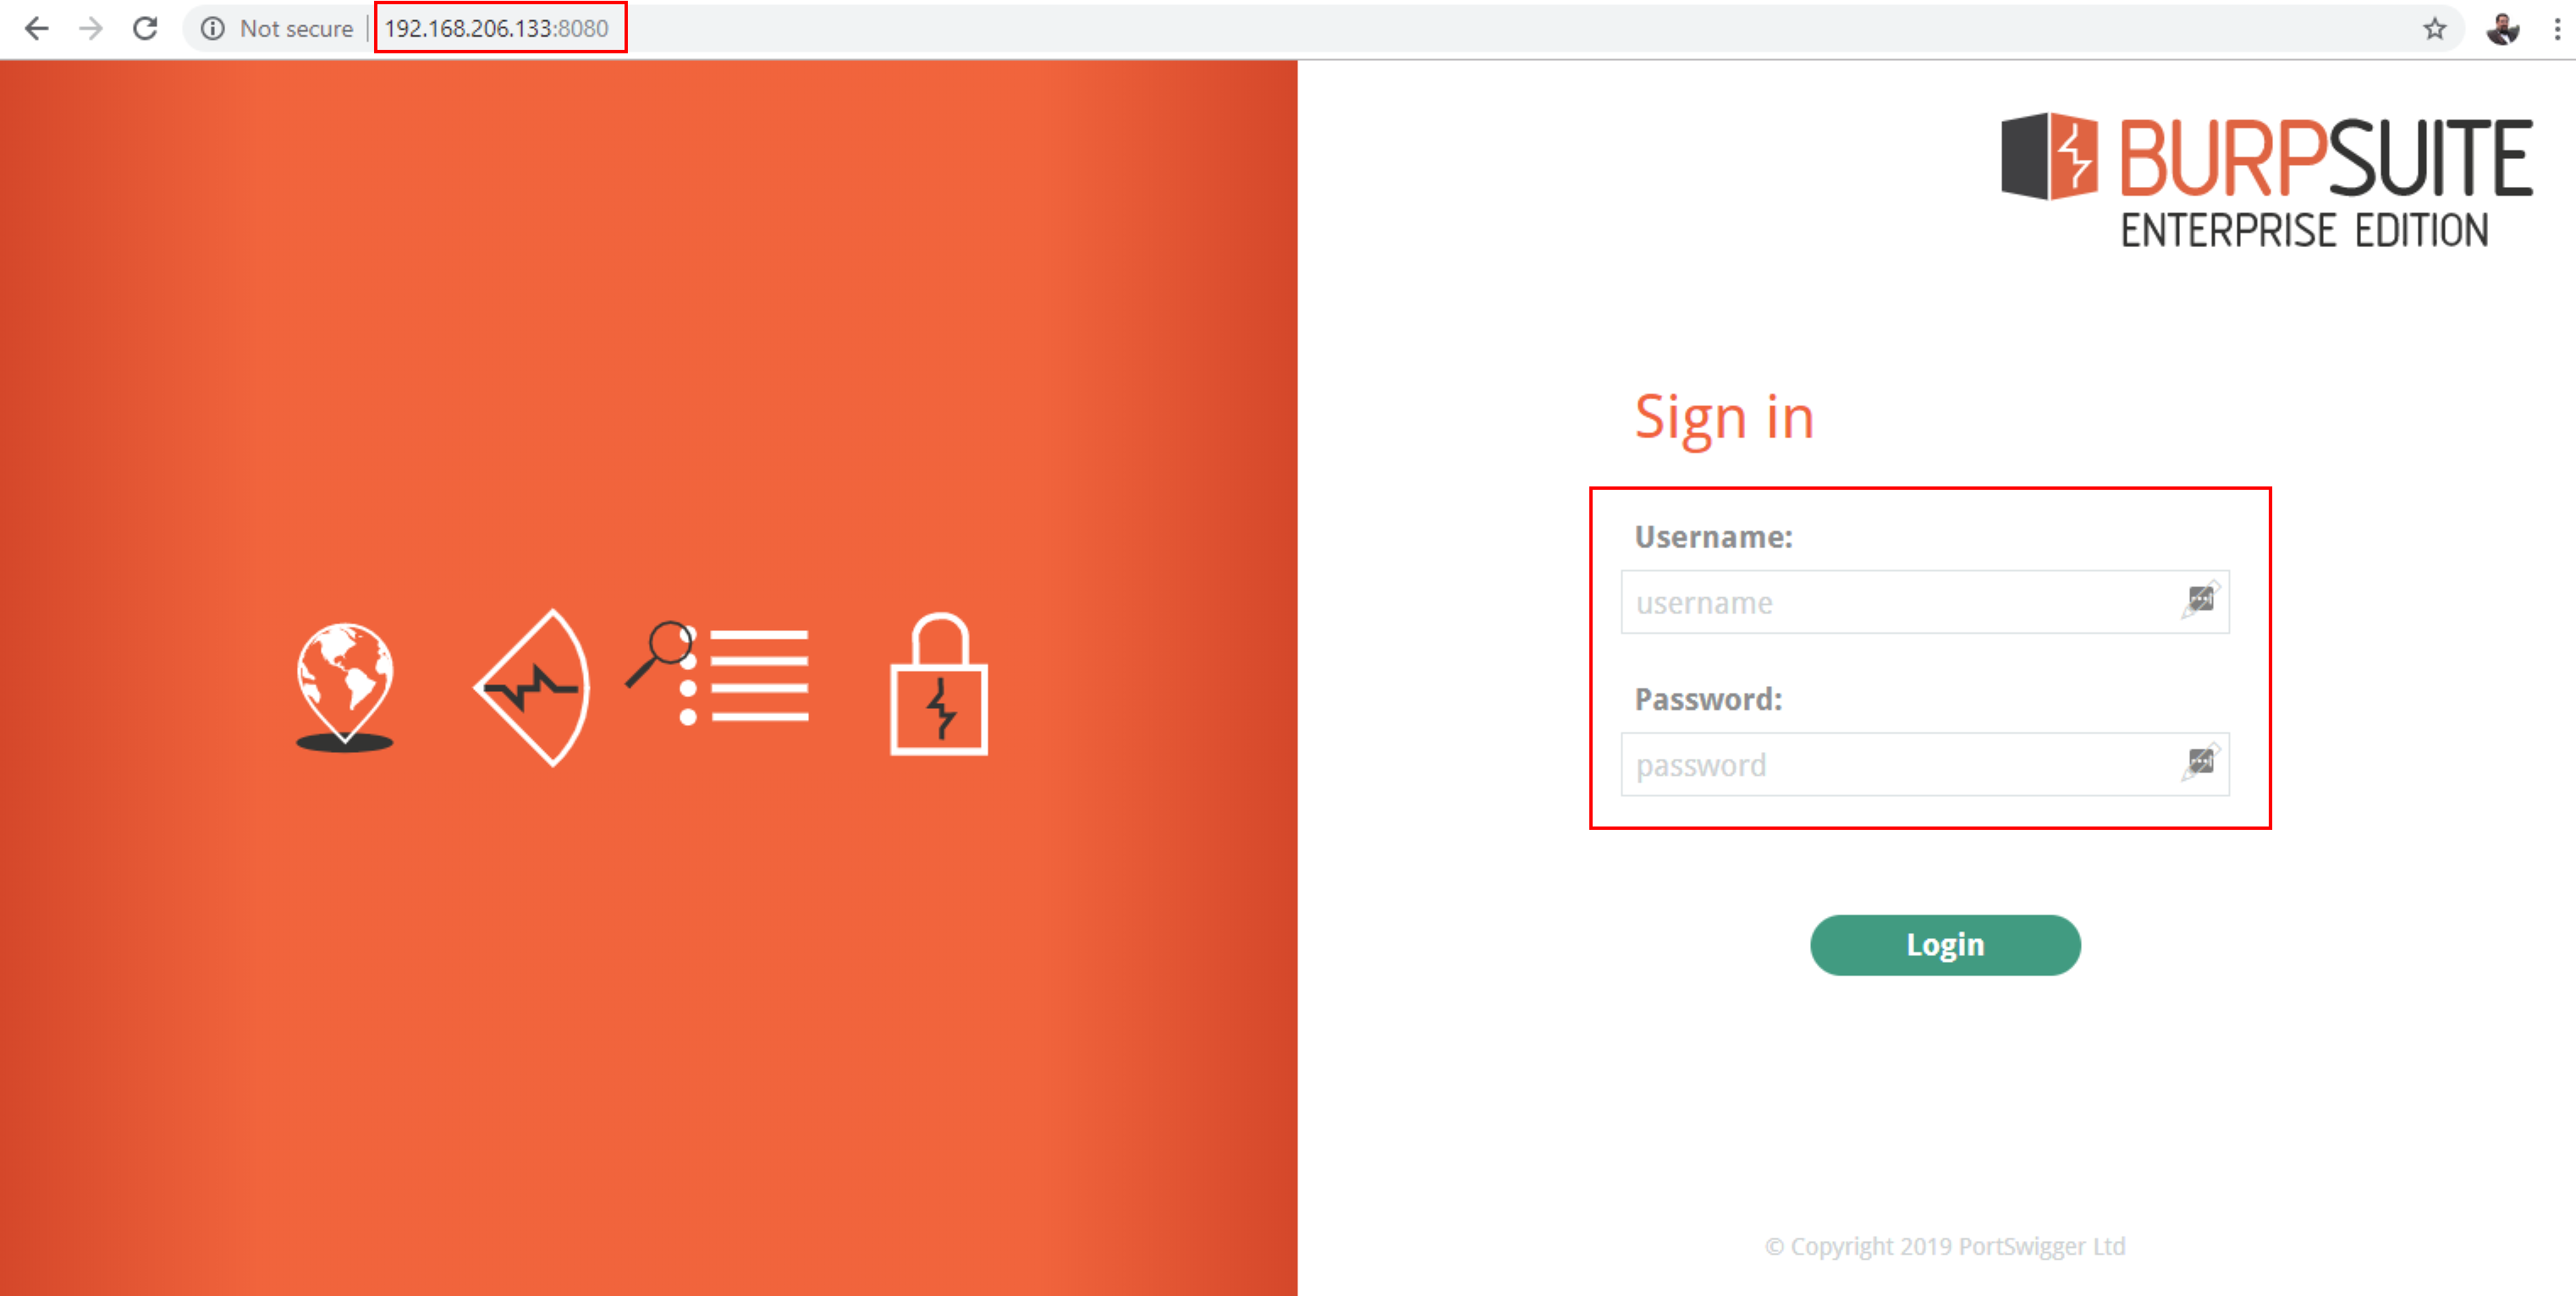
Setup is now finished and you can login to the Enterprise server at https://:8080/ with the admin credentials.
Setup
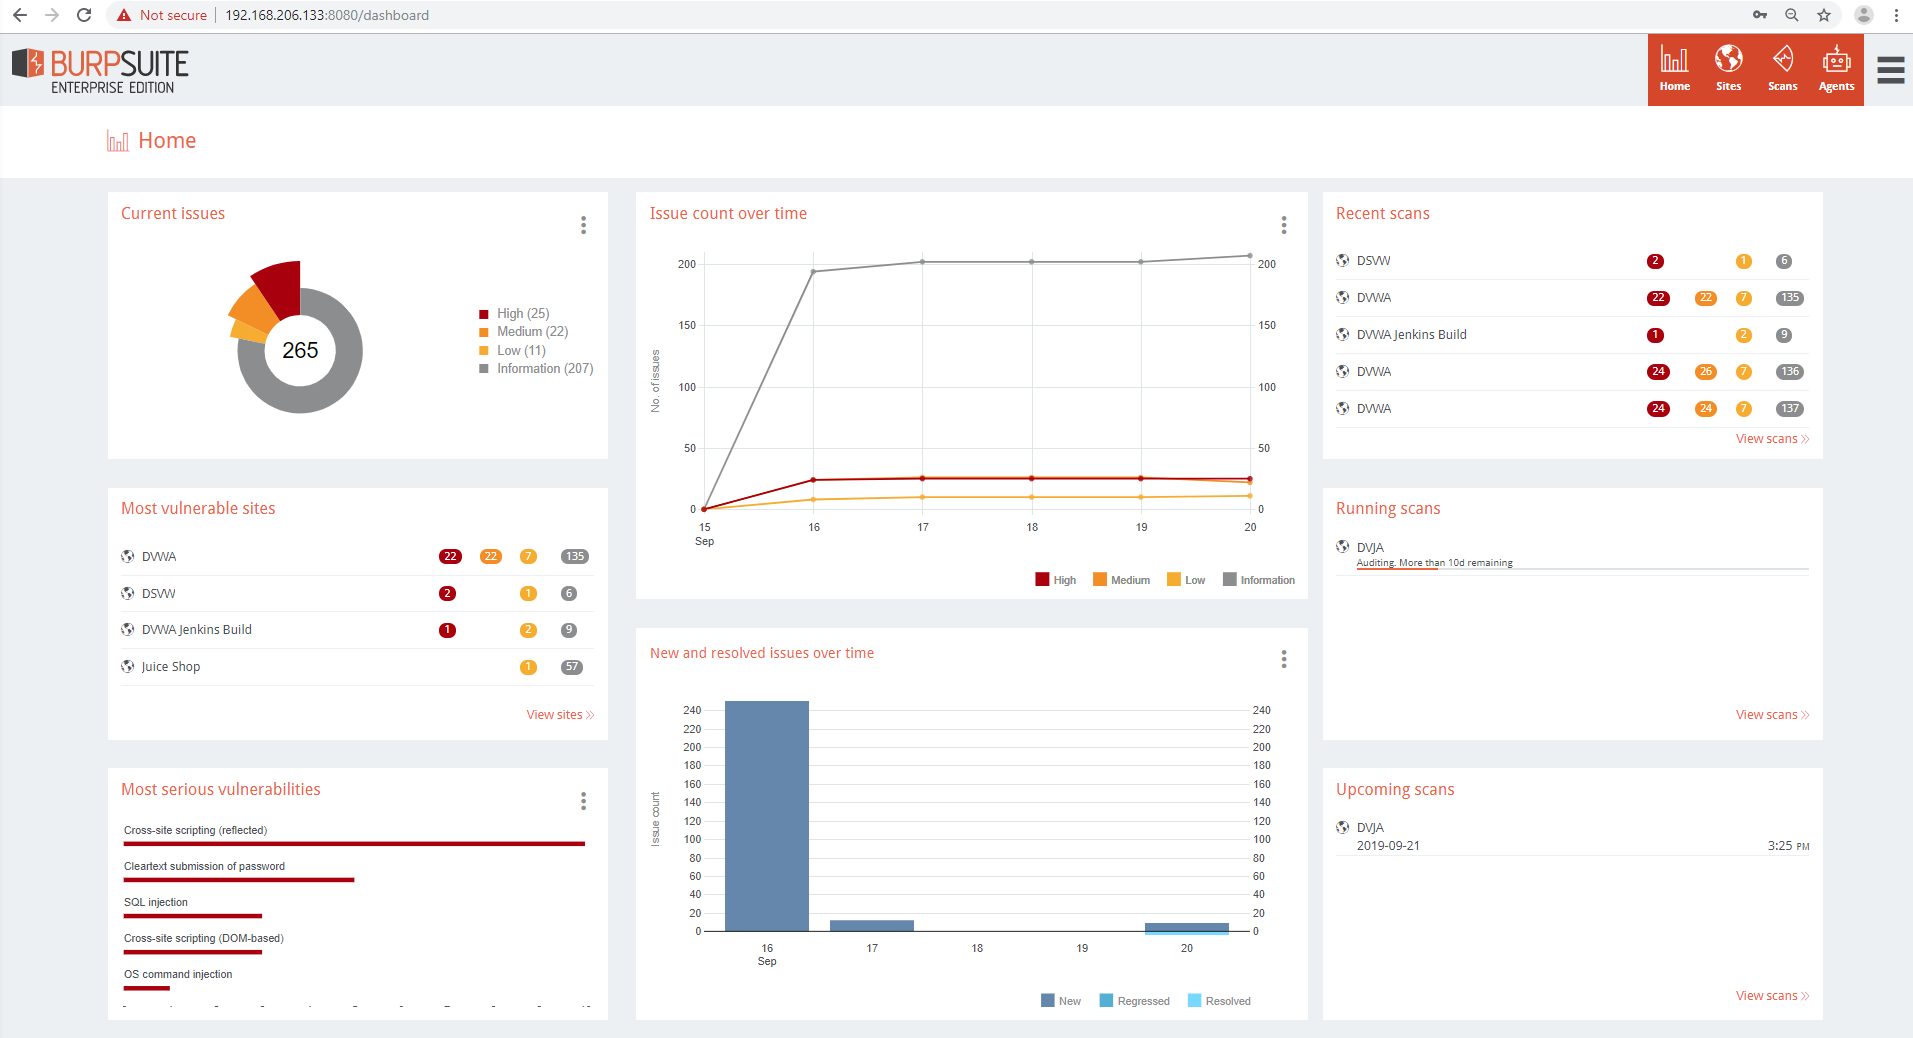
Upon logging into the Enterprise server, you’ll be presented with the Home Dashboard that shows metrics, graphs, and statuses for:
- Current Issues
- Most Vulnerable Sites
- Most Serious Vulnerabilities
- Issue Count Over Time
- New and Resolved Issues Over Time
- Recent Scans
- Running Scans
- Upcoming Scans
You can download the graph images with the “more options” icon next to each section title.
However, when it’s your first time logging in, the Home dashboard will not have any data populated yet and will instruct you to setup sites and scans. Before doing this however, you’ll need to do a few preliminary steps to get started:
- Add a license key
- Setup the Network Server URL
- Setup the Email Server Settings
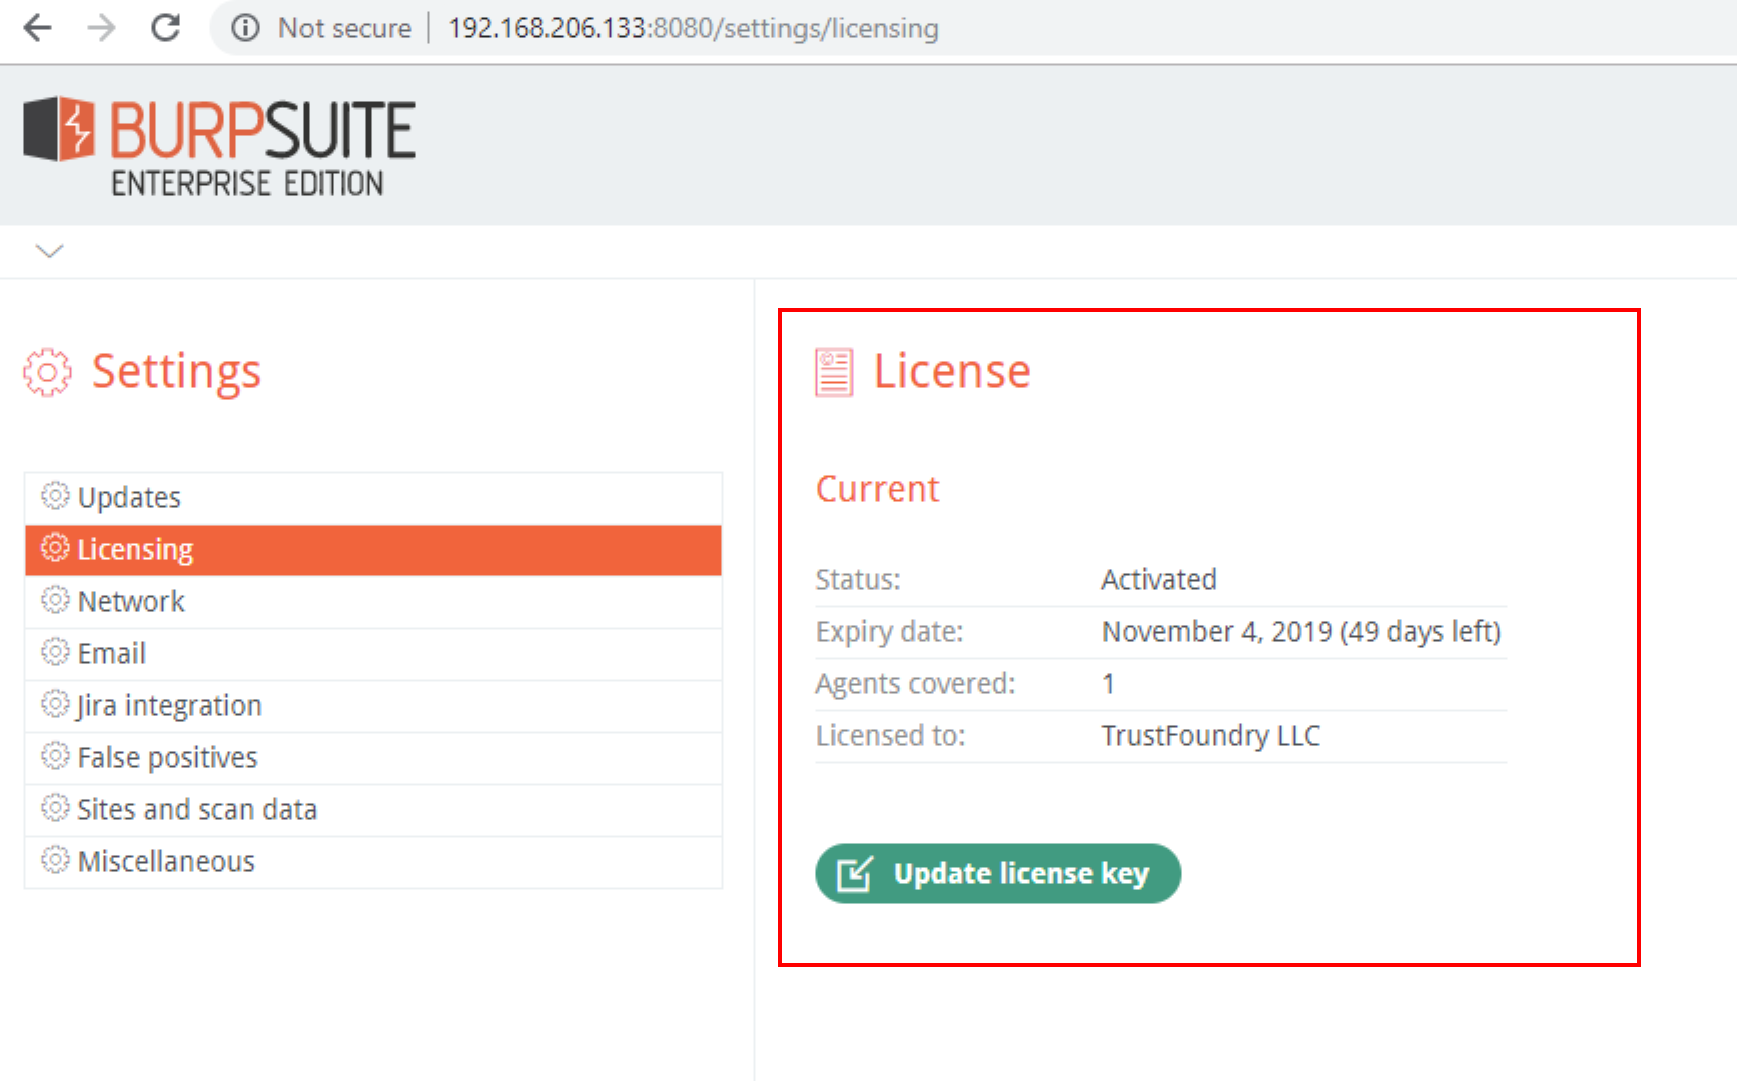
Adding a license is the first step you’ll need to do when first logging into the Enterprise server. It will unlock the other settings and menu items to perform the rest of configuration:
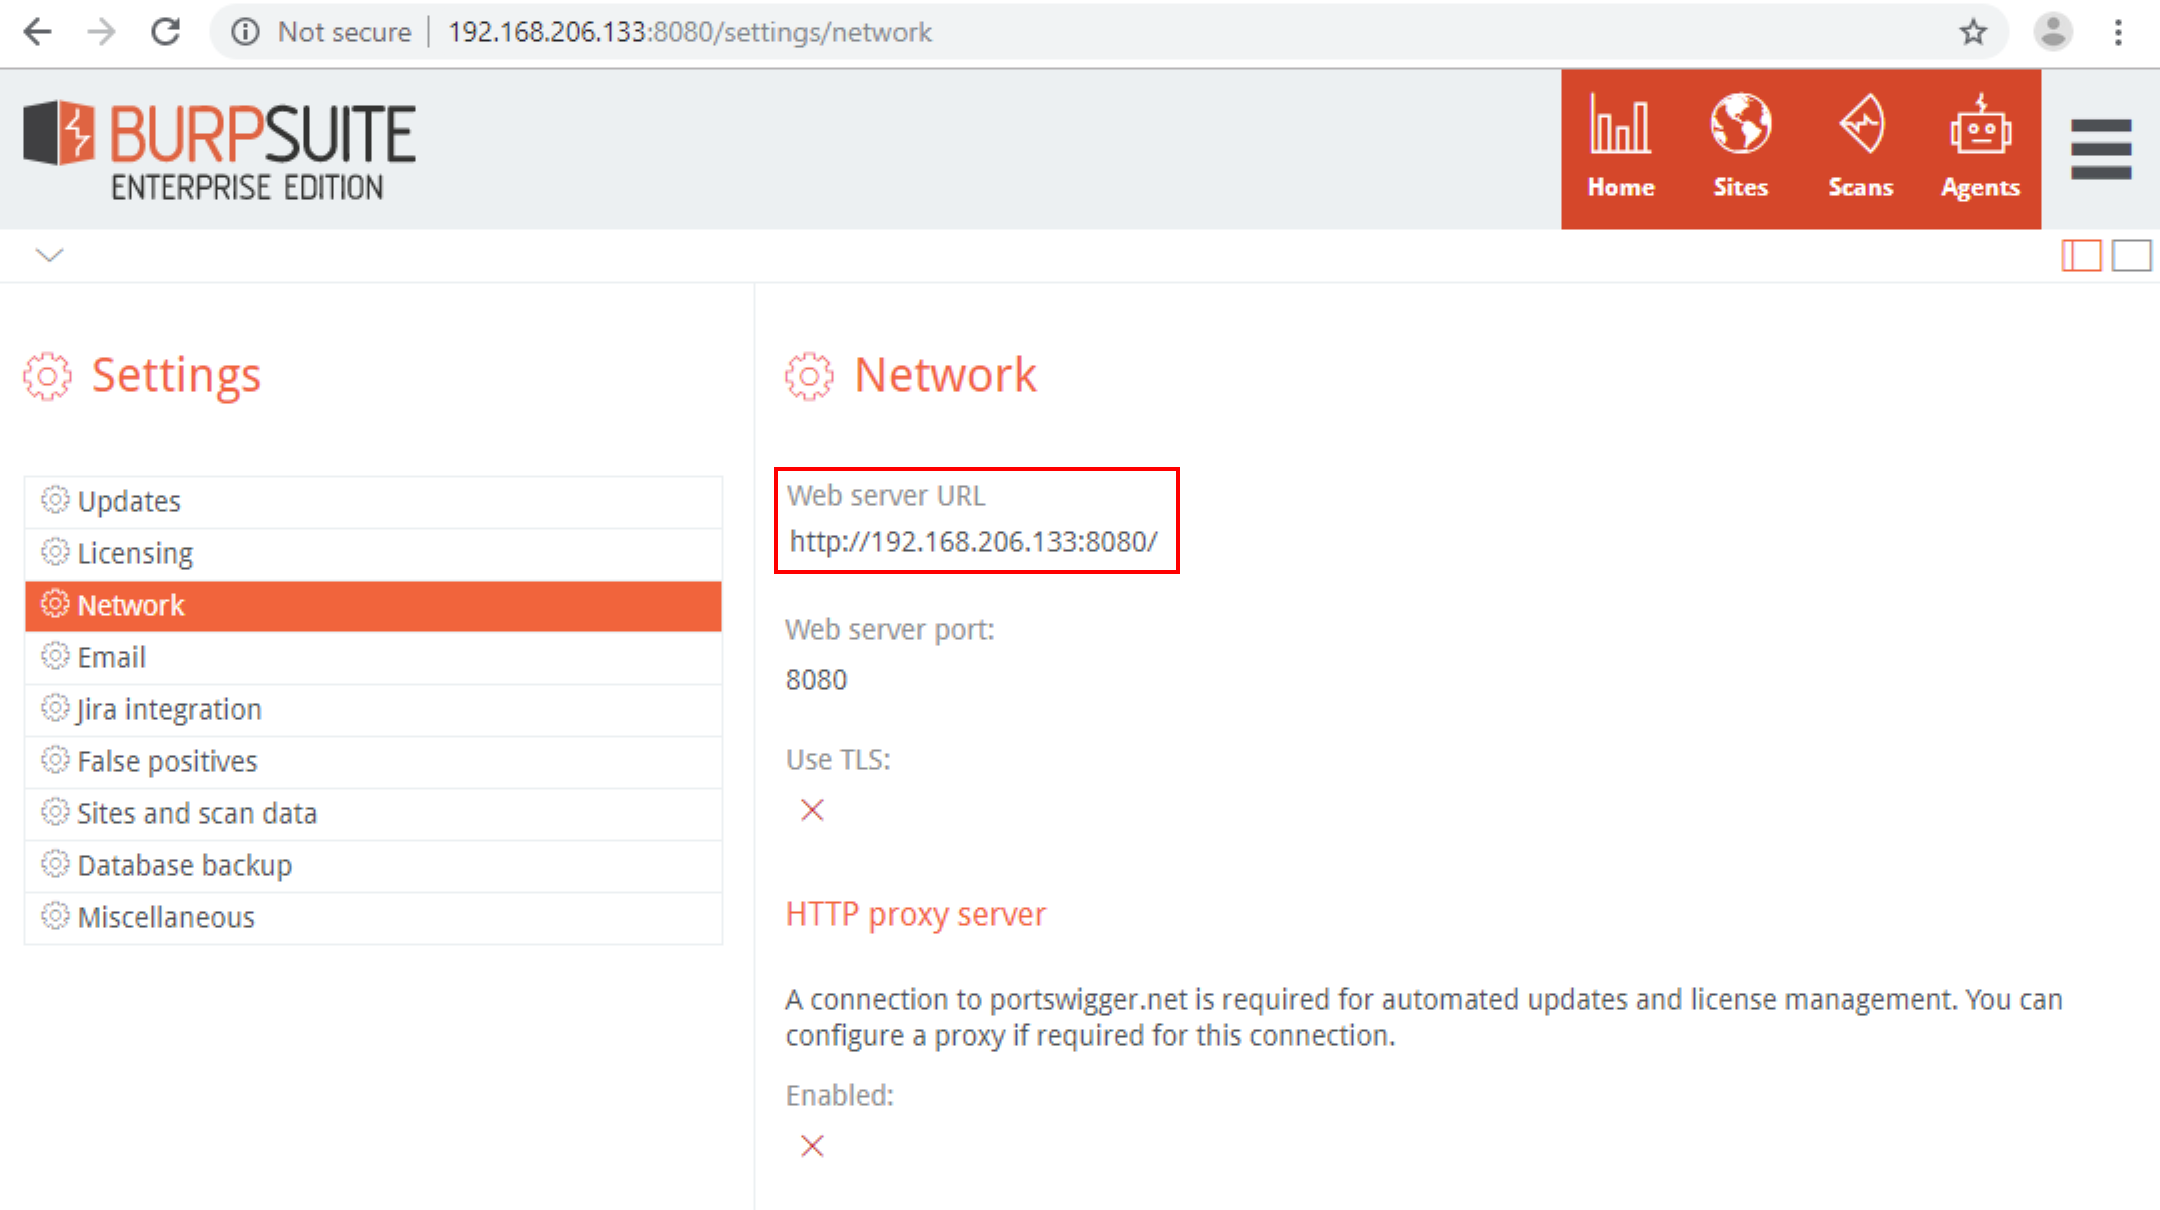
Next, you’ll need to setup a valid Web Server URL as this is used in all emails that originate from the server, such as password reset and account activation emails.
Next, you’ll need to setup Email settings with your company’s SMTP server settings (or if just evaluating, like we are, you can use Google’s SMTP server settings). Be sure to send a test email before moving on. It will also contain a link using the Web Server URL you set previously to verify it is valid.

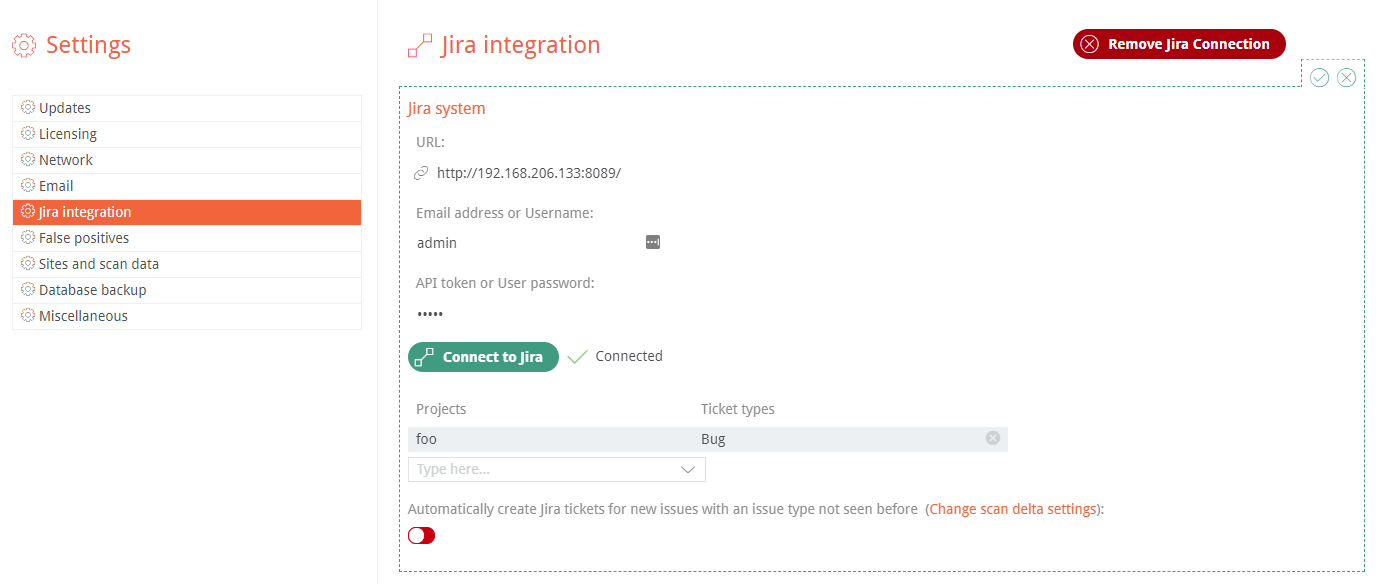
If your developers use Jira to manage projects, you can setup Jira integration with your Jira server’s settings. You’ll need the server’s URL, email address, password or API token to authenticate to your Jira instance. You can setup multiple Jira projects and ticket type combinations. When you link an Issue to a Jira ticket, it will prompt you to choose the Jira project and ticket type combination for your project. Test the connection with Connect to Jira to verify it is successful.
Team
The Team menu item is where you can define your organization’s role-based access controls using Users, Groups, and Roles.

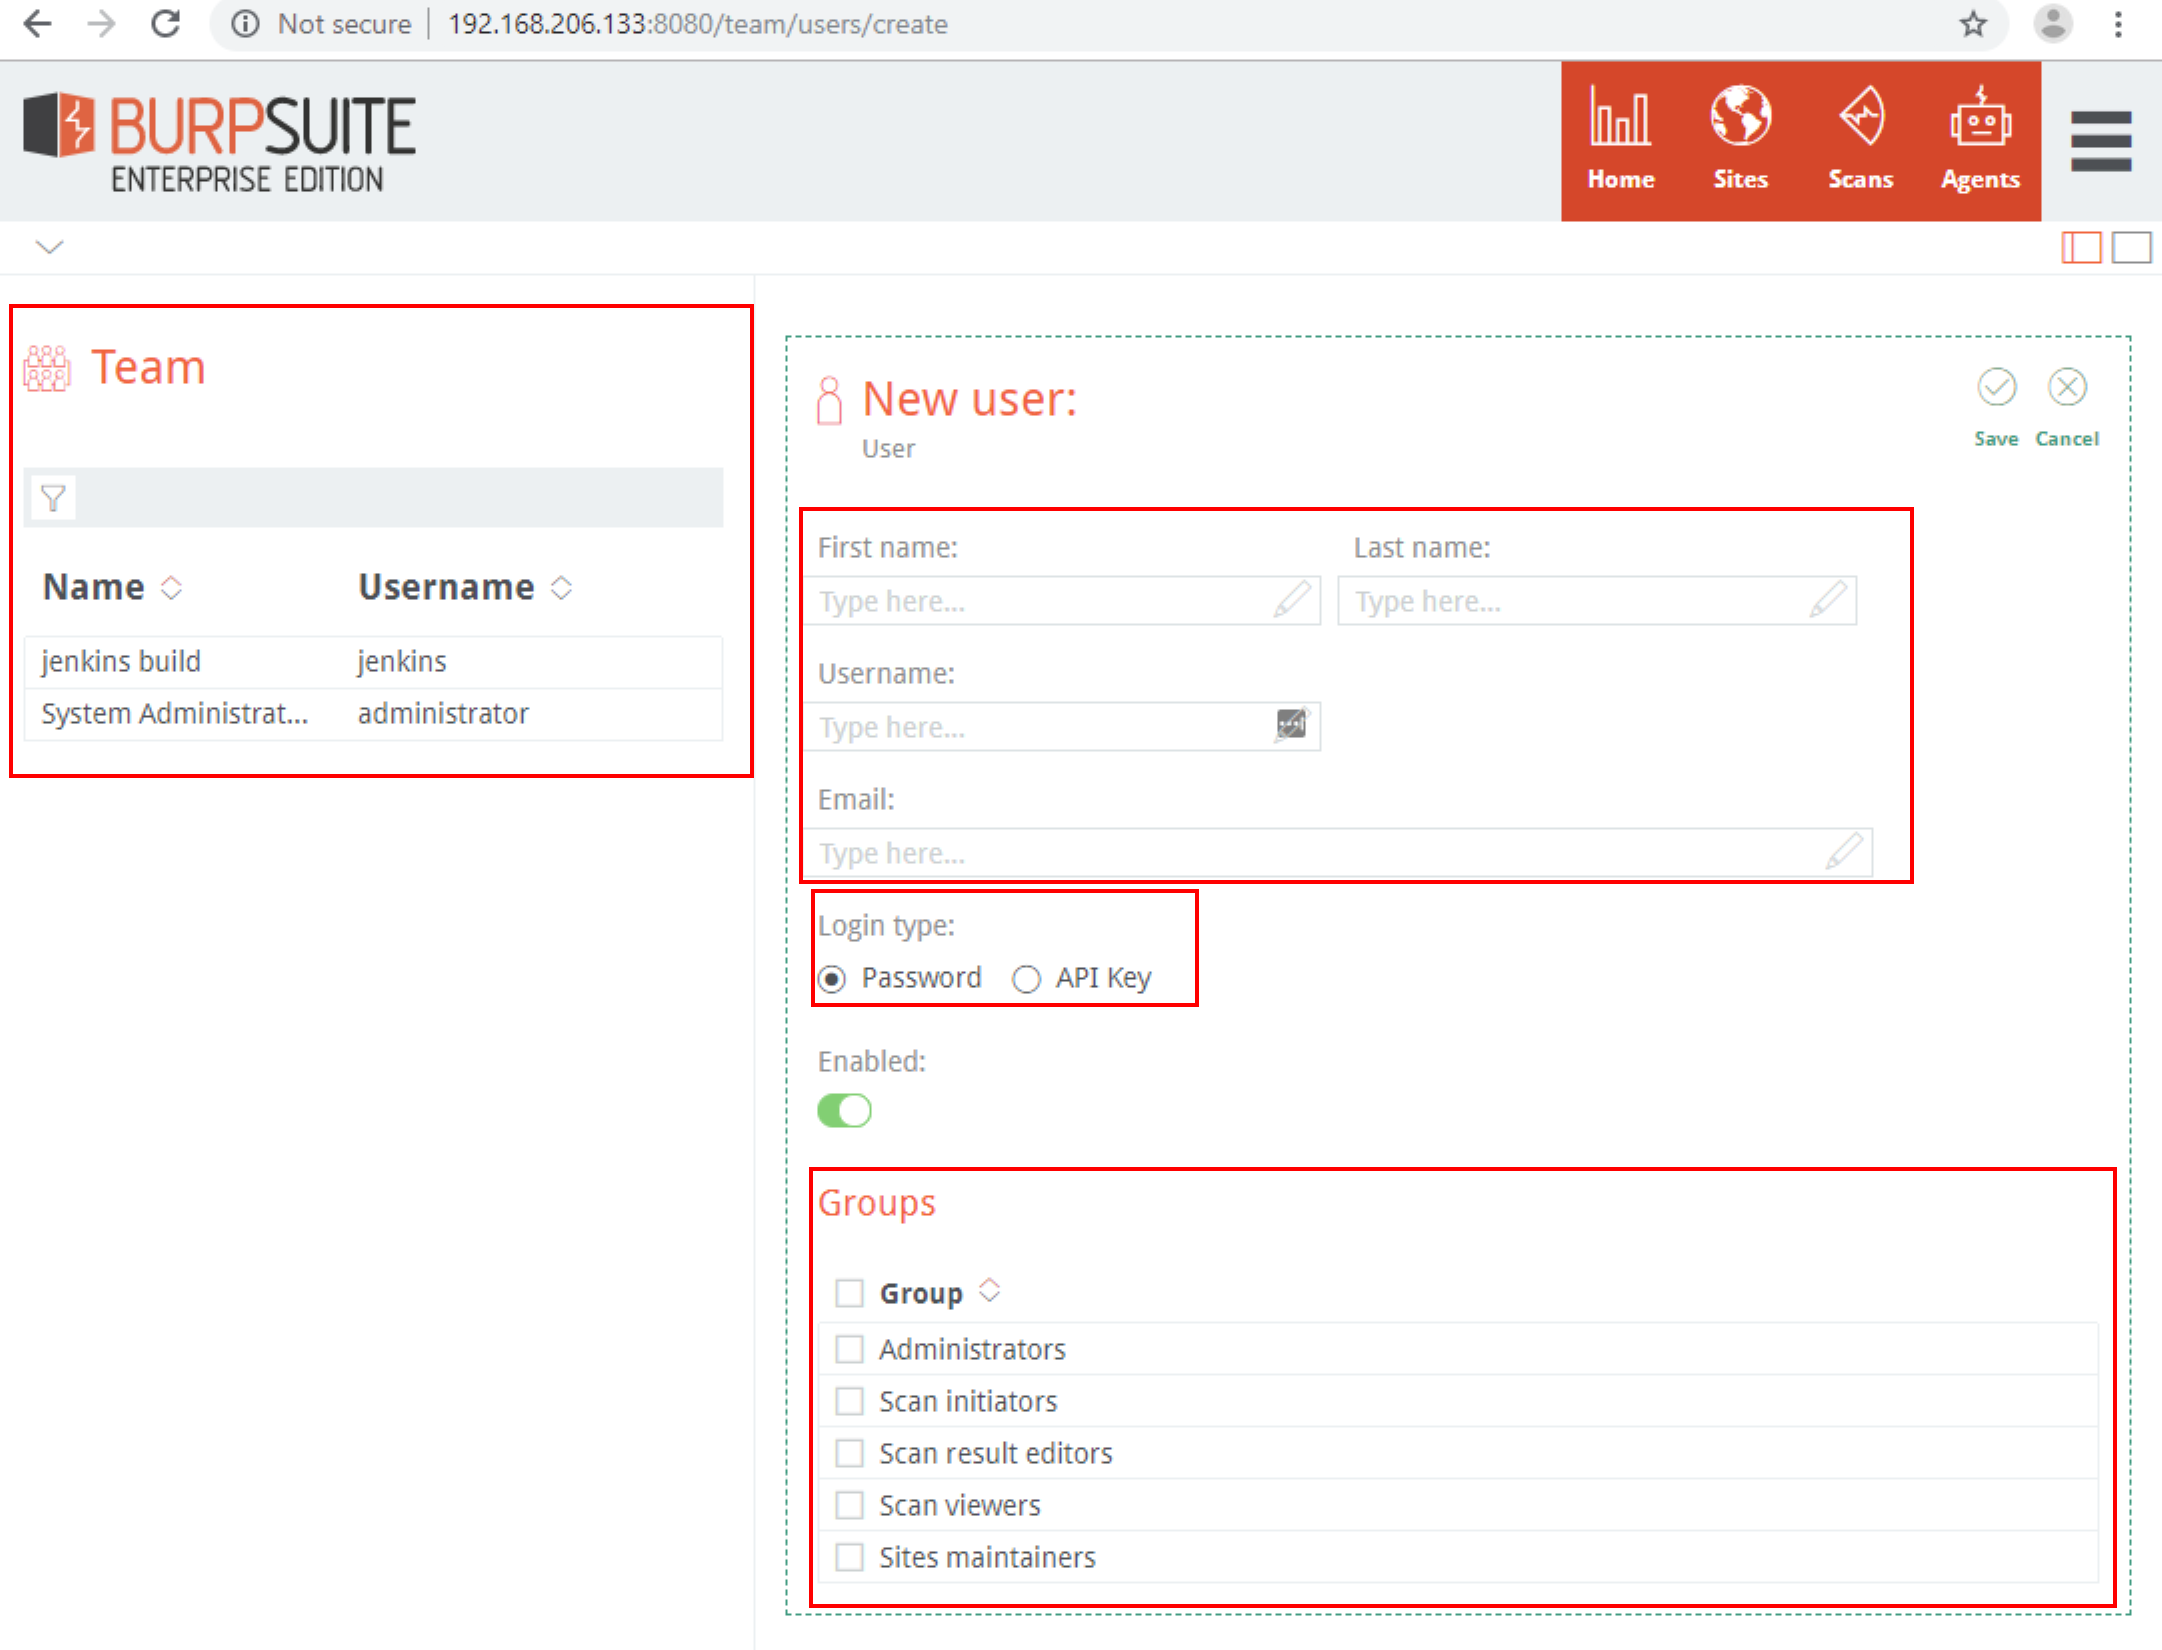
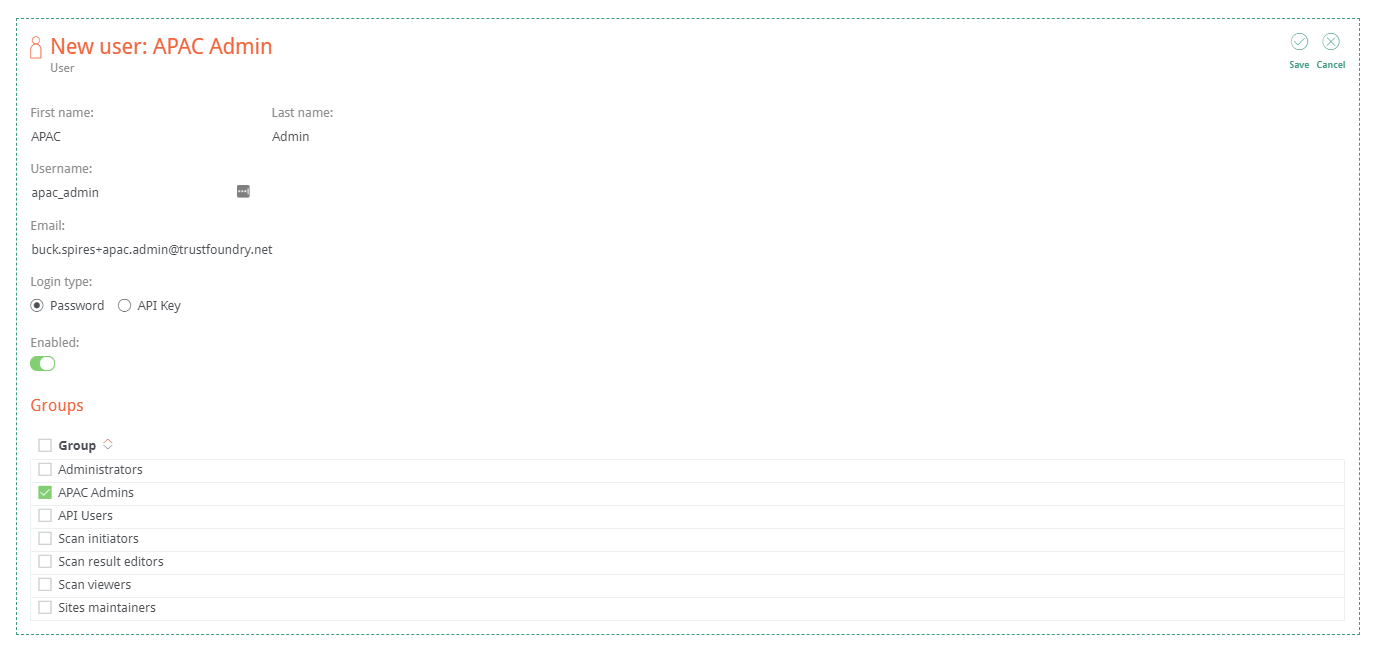
To create a new user, use a valid email address and username, choose a strong password, and assign the user to a group. If you are setting up an API user, choose API Key instead of password. We’ll revisit this when we integrate into our Jenkins CI pipeline later.
To create a new group, click on New group.
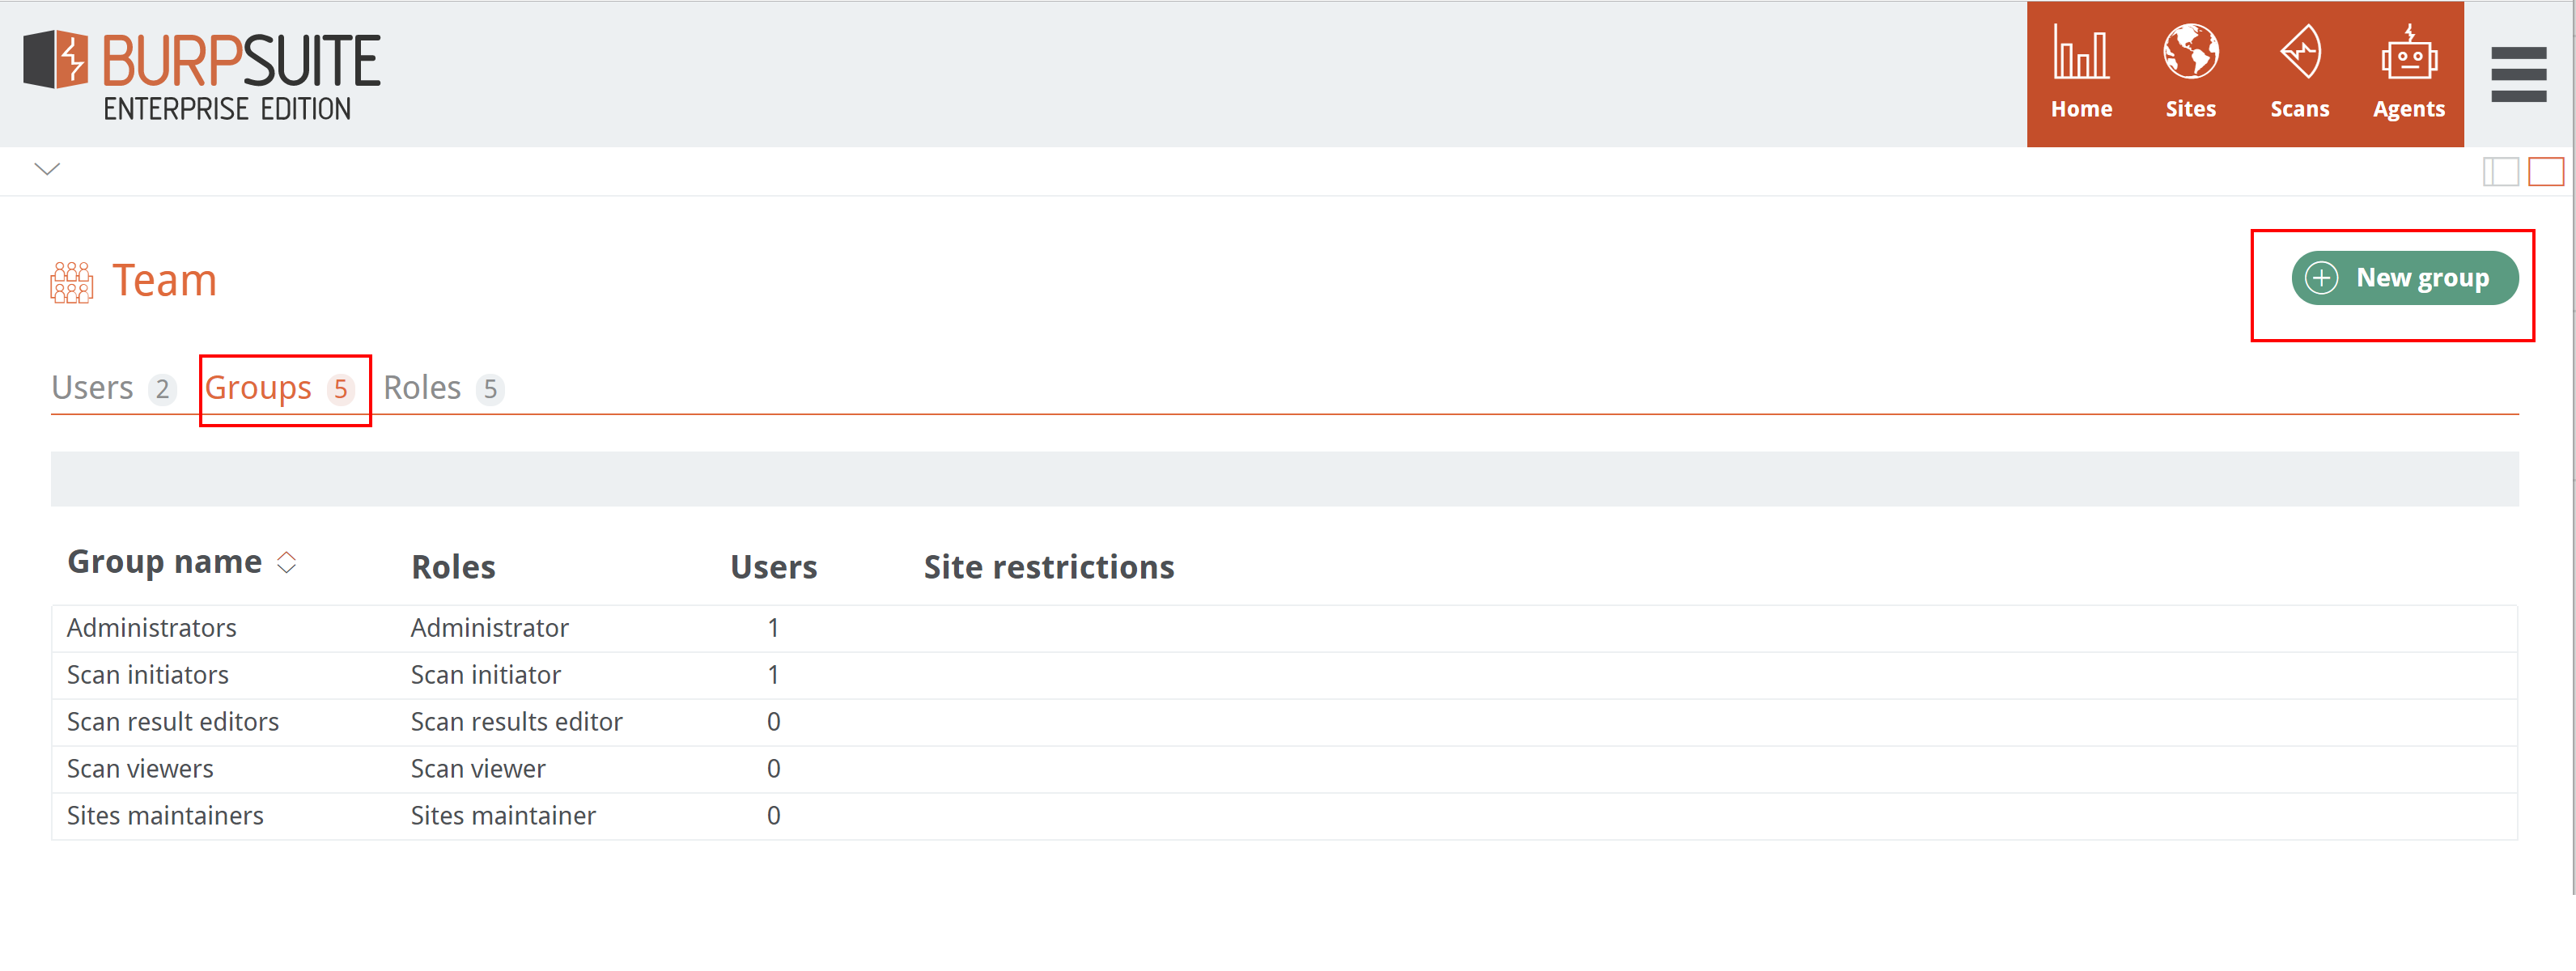
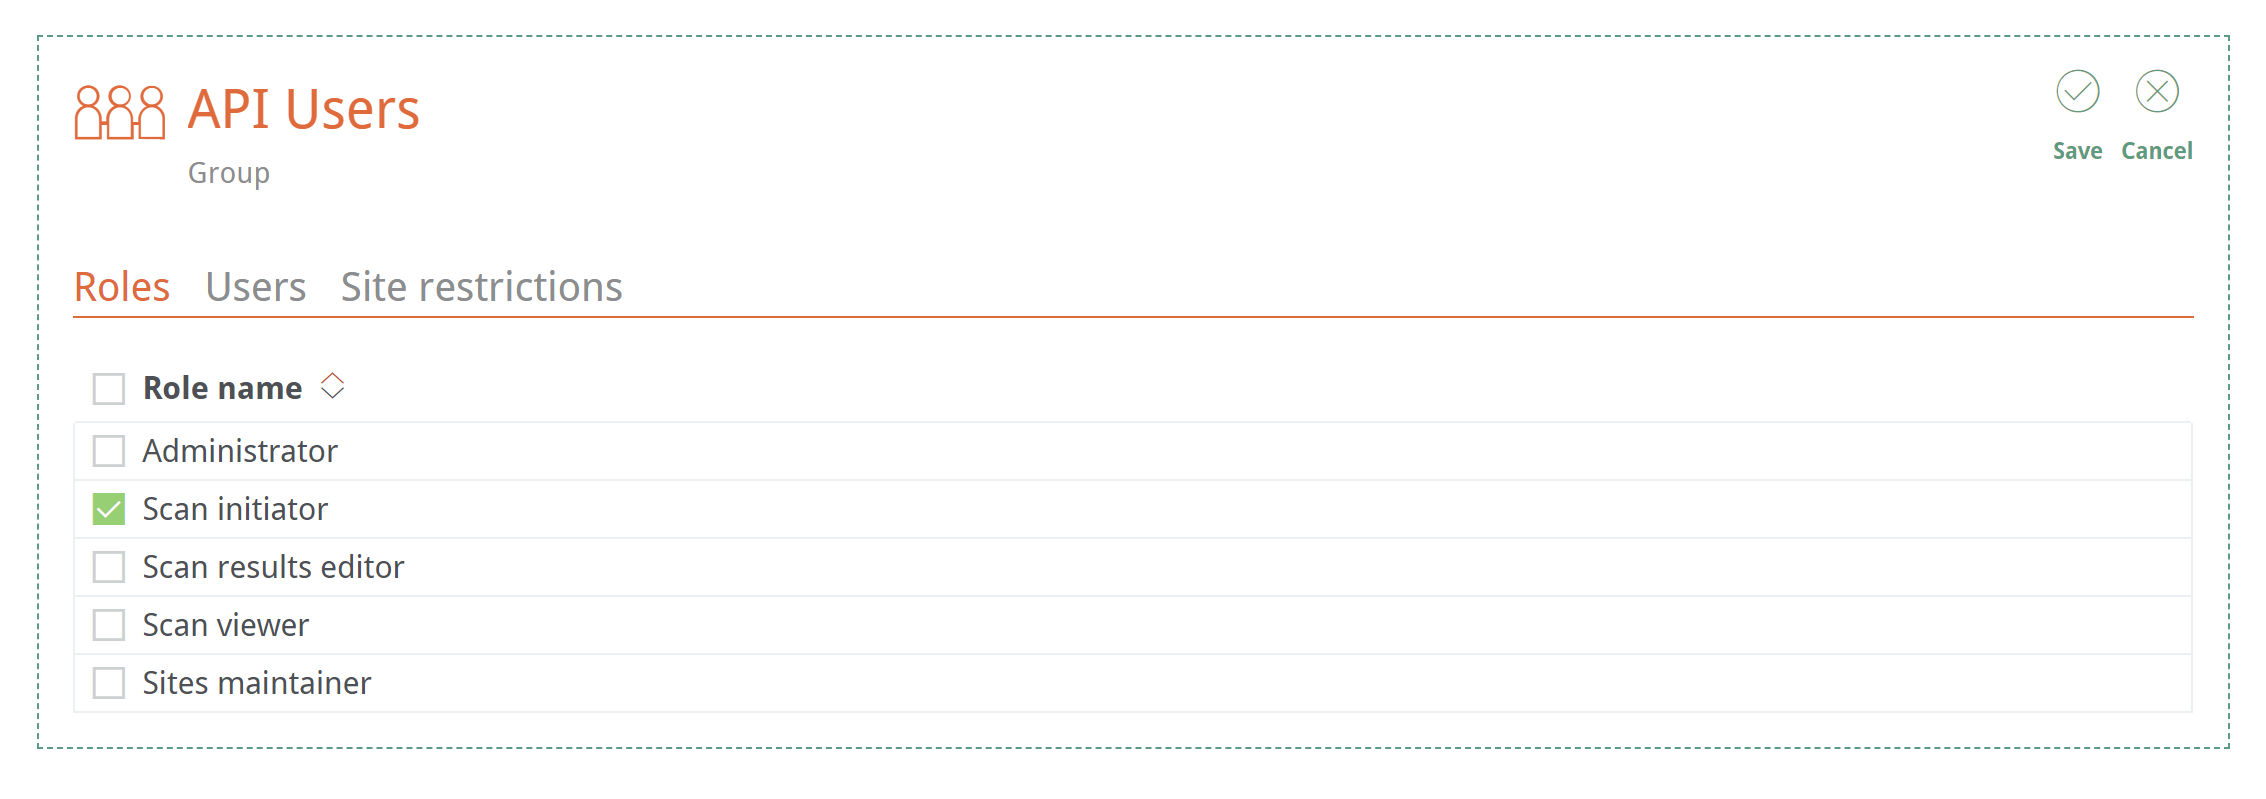
Then, you can enter in the group name and choose from any of the custom or predefined Roles.
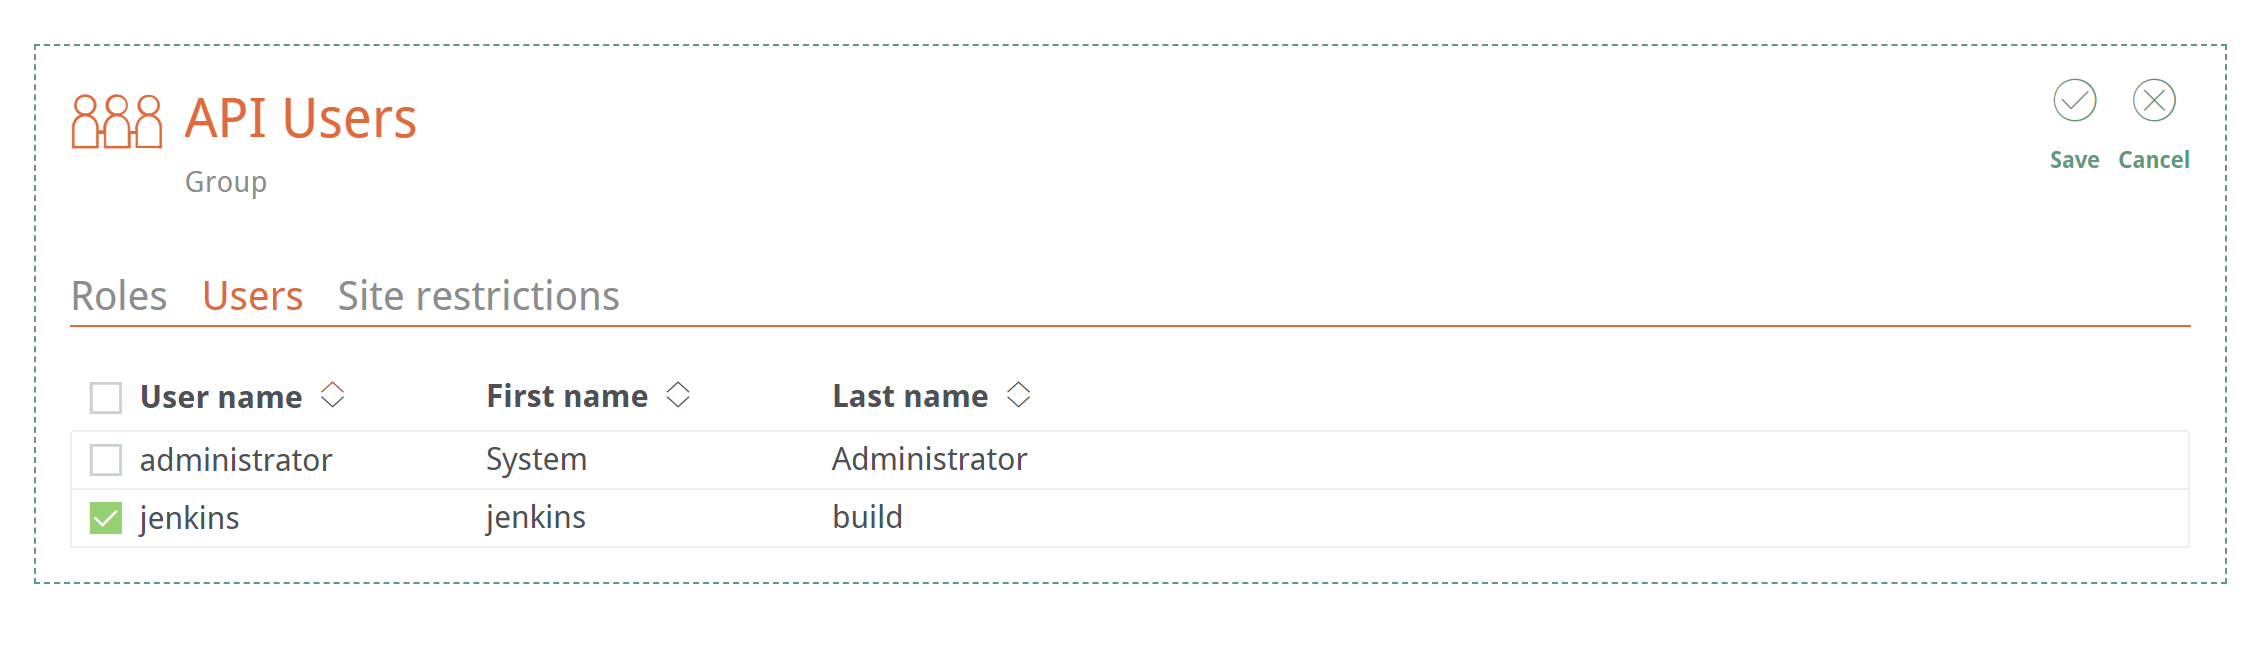
Next, choose which users to include within the group.
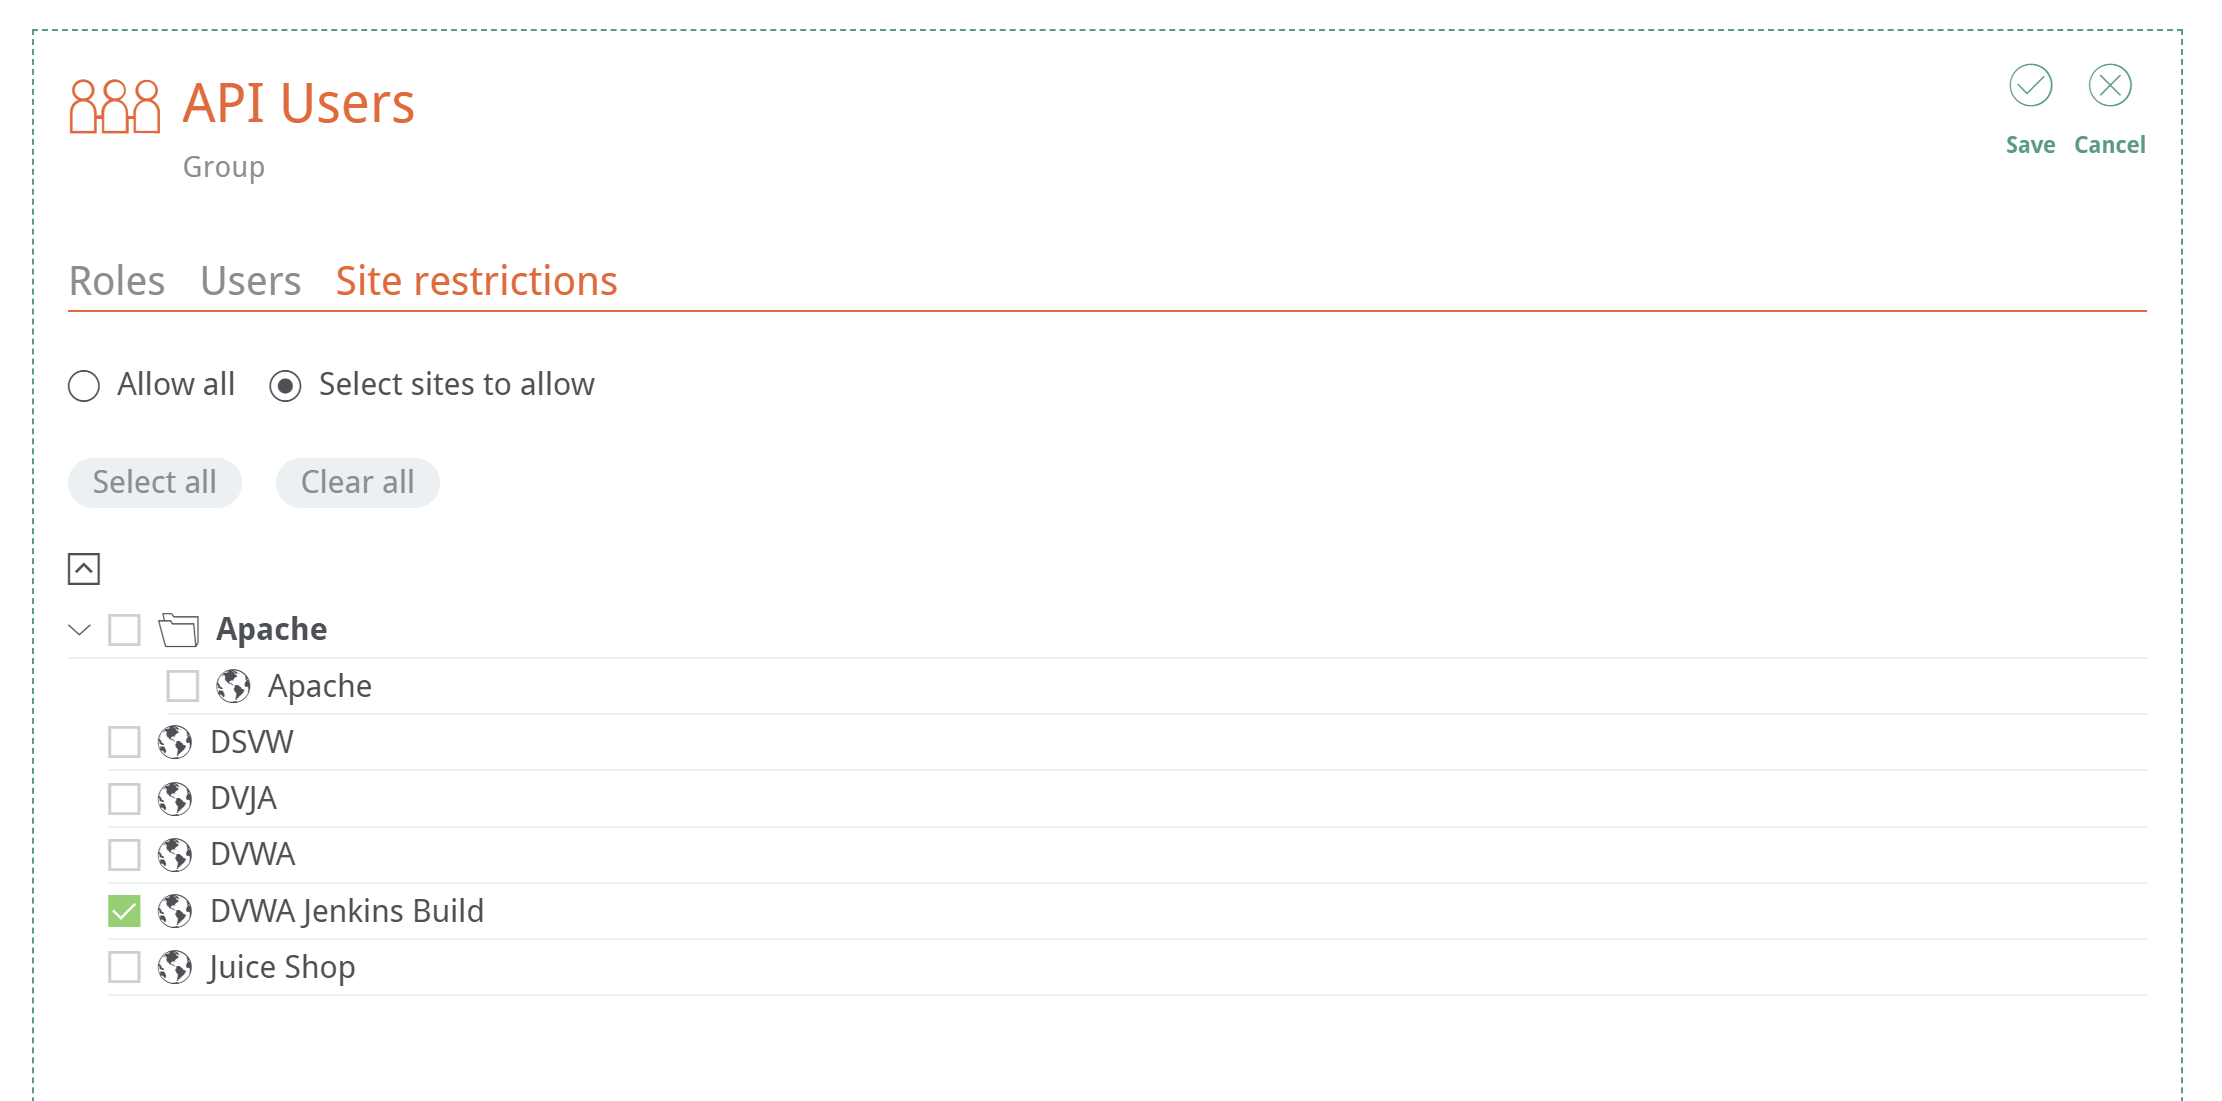
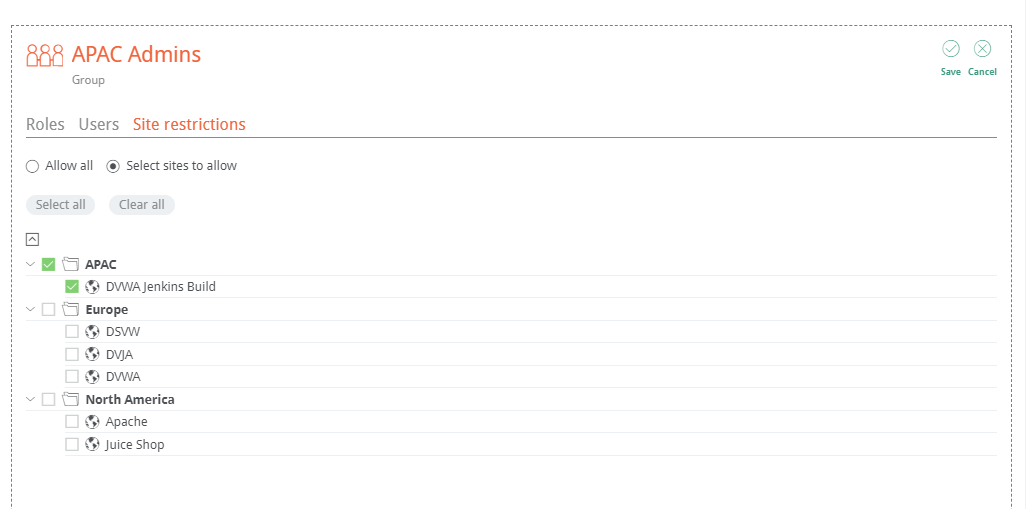
Finally, you can restrict the users to certain sites.
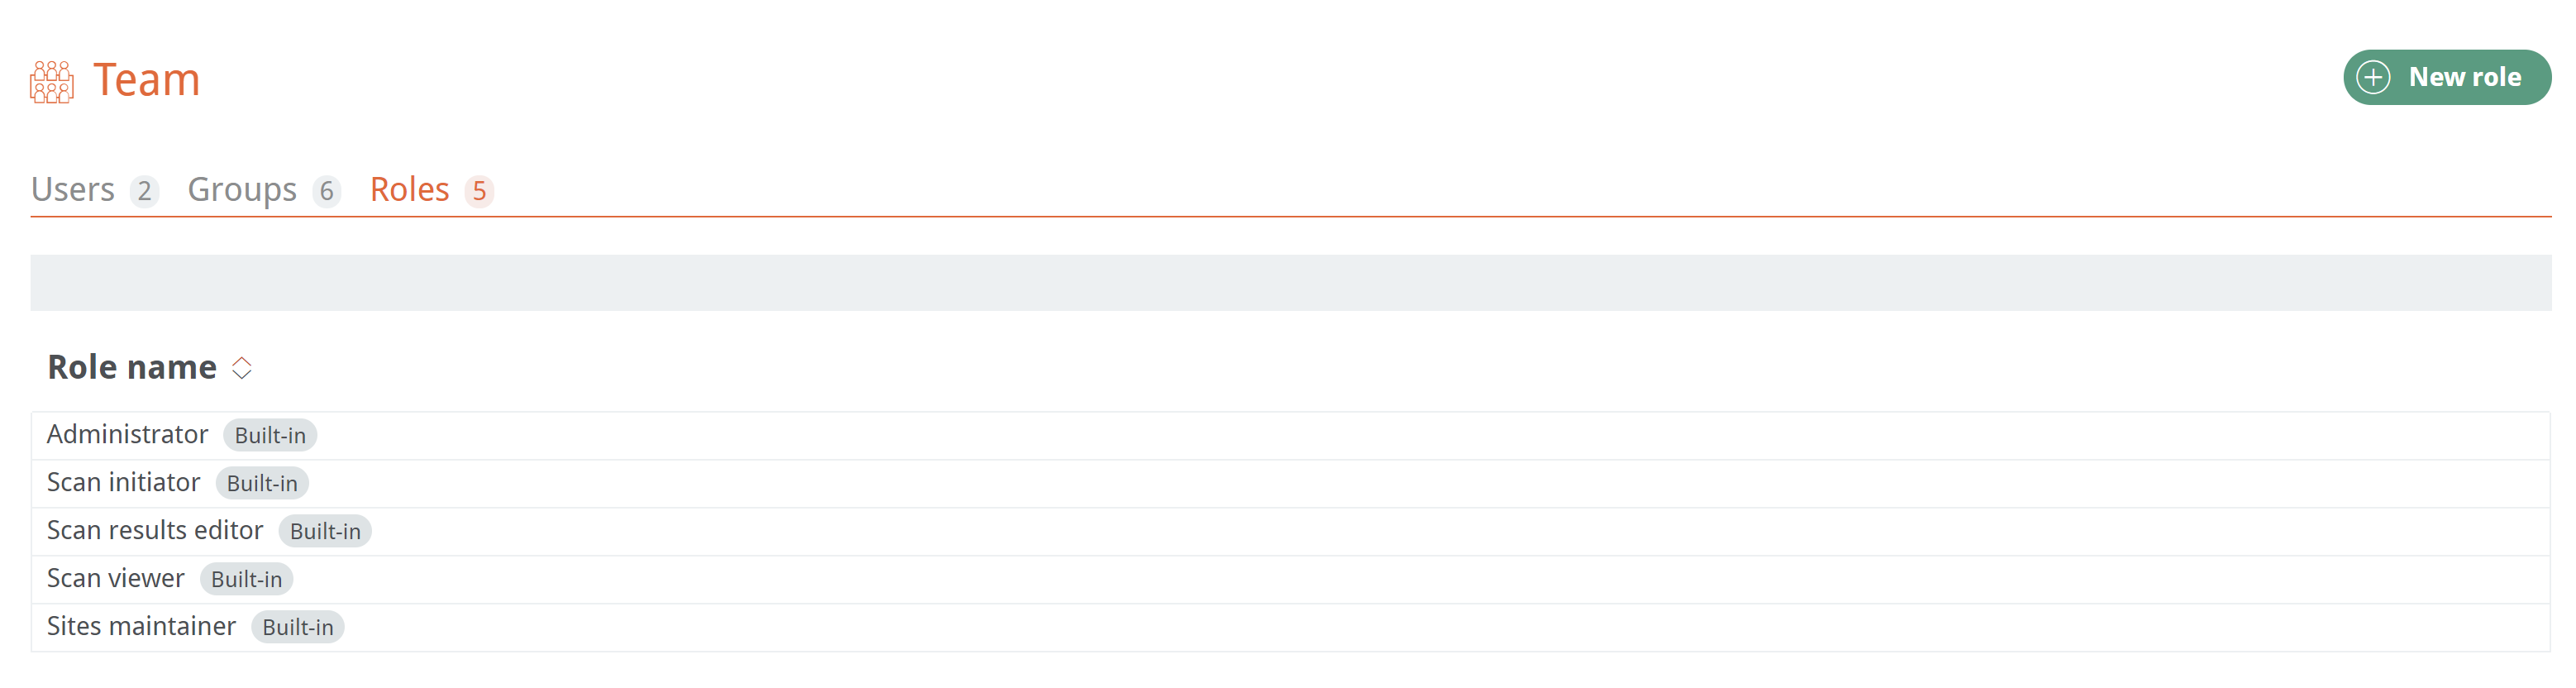
There are five predefined Roles with various levels of access:
- Administrator
- Scan initiator
- Scan results editor
- Scan viewer
- Sites maintainer
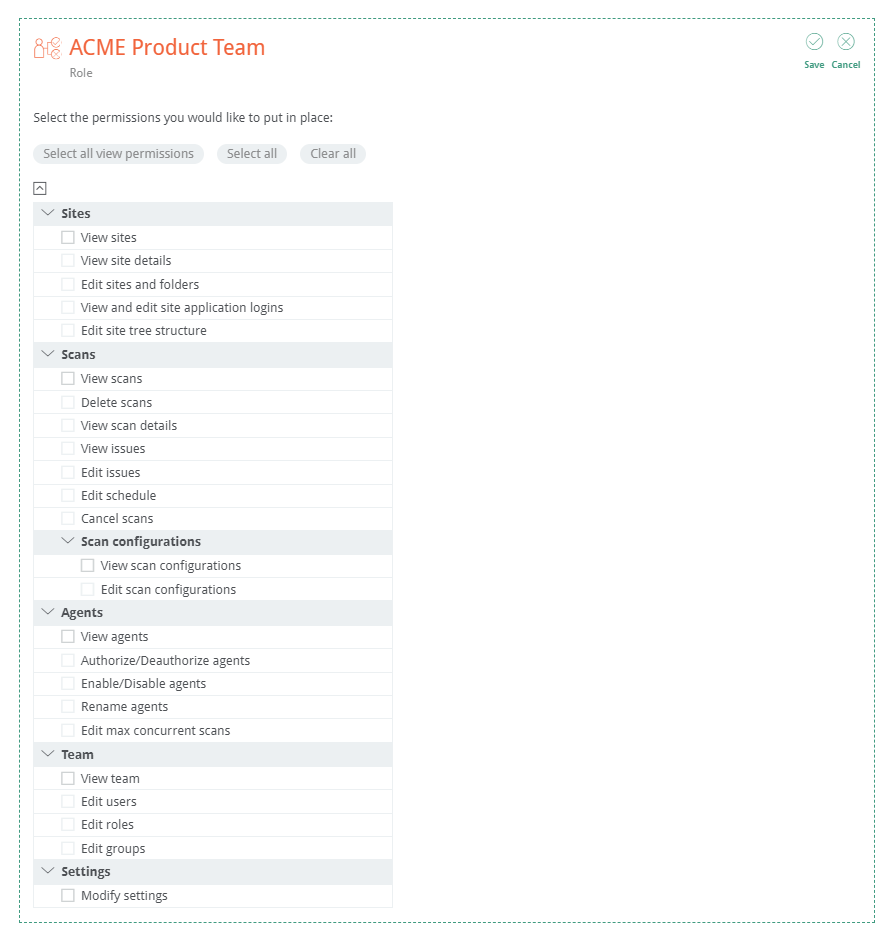
However, you can create custom roles with a very granular level of control of which permissions you want that role to have access to:
Agents
Agents are the core of Burp Suite Enterprise Edition’s ability to scale to your organizational needs. Your license determines how many agents can run scans within your deployment. As can be seen here with “Agents covered” we are only licensed for a single agent:

An increased agent count means you can scan multiple targets in parallel. Also, with additional agents added to our license, you could potentially install agents geographically to where they are closest to the targets they will be scanning. This could reduce network latency issues and increase scan times if that is a concern. Multiple logical agents could be installed on each agent machine to meet demand in particular locations. This means you can run more parallel scans from that physical machine.
After an agent has been installed on a physical machine, the agent needs to be authorized to perform scans for the deployment of the Burp Suite Enterprise Edition server. In the Agents tab you should see the following request to authorize the agent:
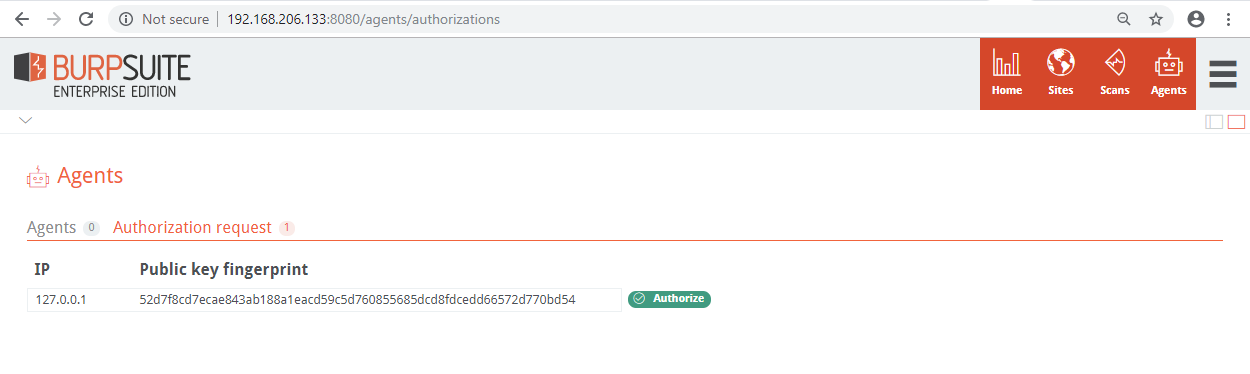
The IP Address of the agent and the Public key fingerprint that was shown during the agent installation process will be displayed. Please note that agents installed on the localhost of the Burp Suite Enterprise Edition server are automatically trusted and this authorization process is not required.
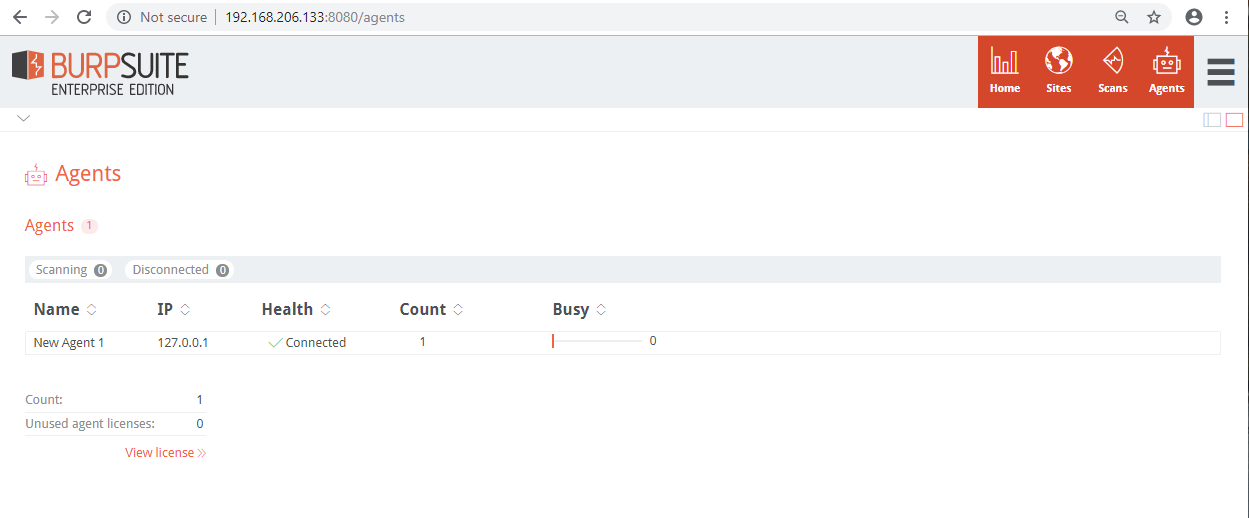
From the Agents screen, you can view the total licensed agent count and increase the number of logical agents install on an agent machine using the Count option. Agents can also be enabled, disabled, and deauthorized from this screen:
You can also drill down into a particular agent’s details by clicking on the agent:
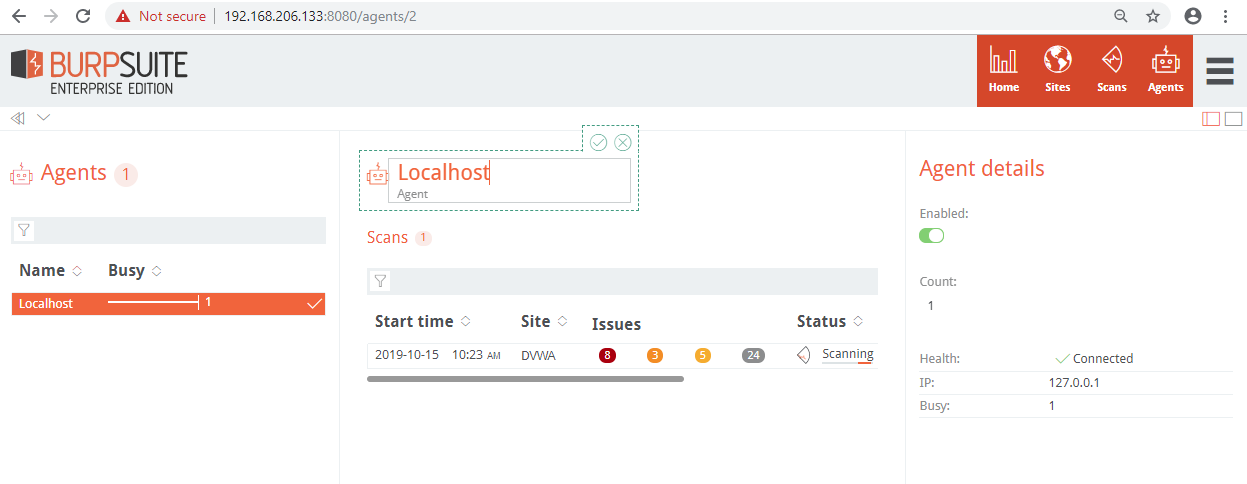
From this screen, you can see the status of the agent, which scans have been run on the agent, and disable the agent.
Sites
Sites are containers for that site’s scans. Each site contains the base configuration for the site, such as site name, include/exclude URLs, and scan configurations.
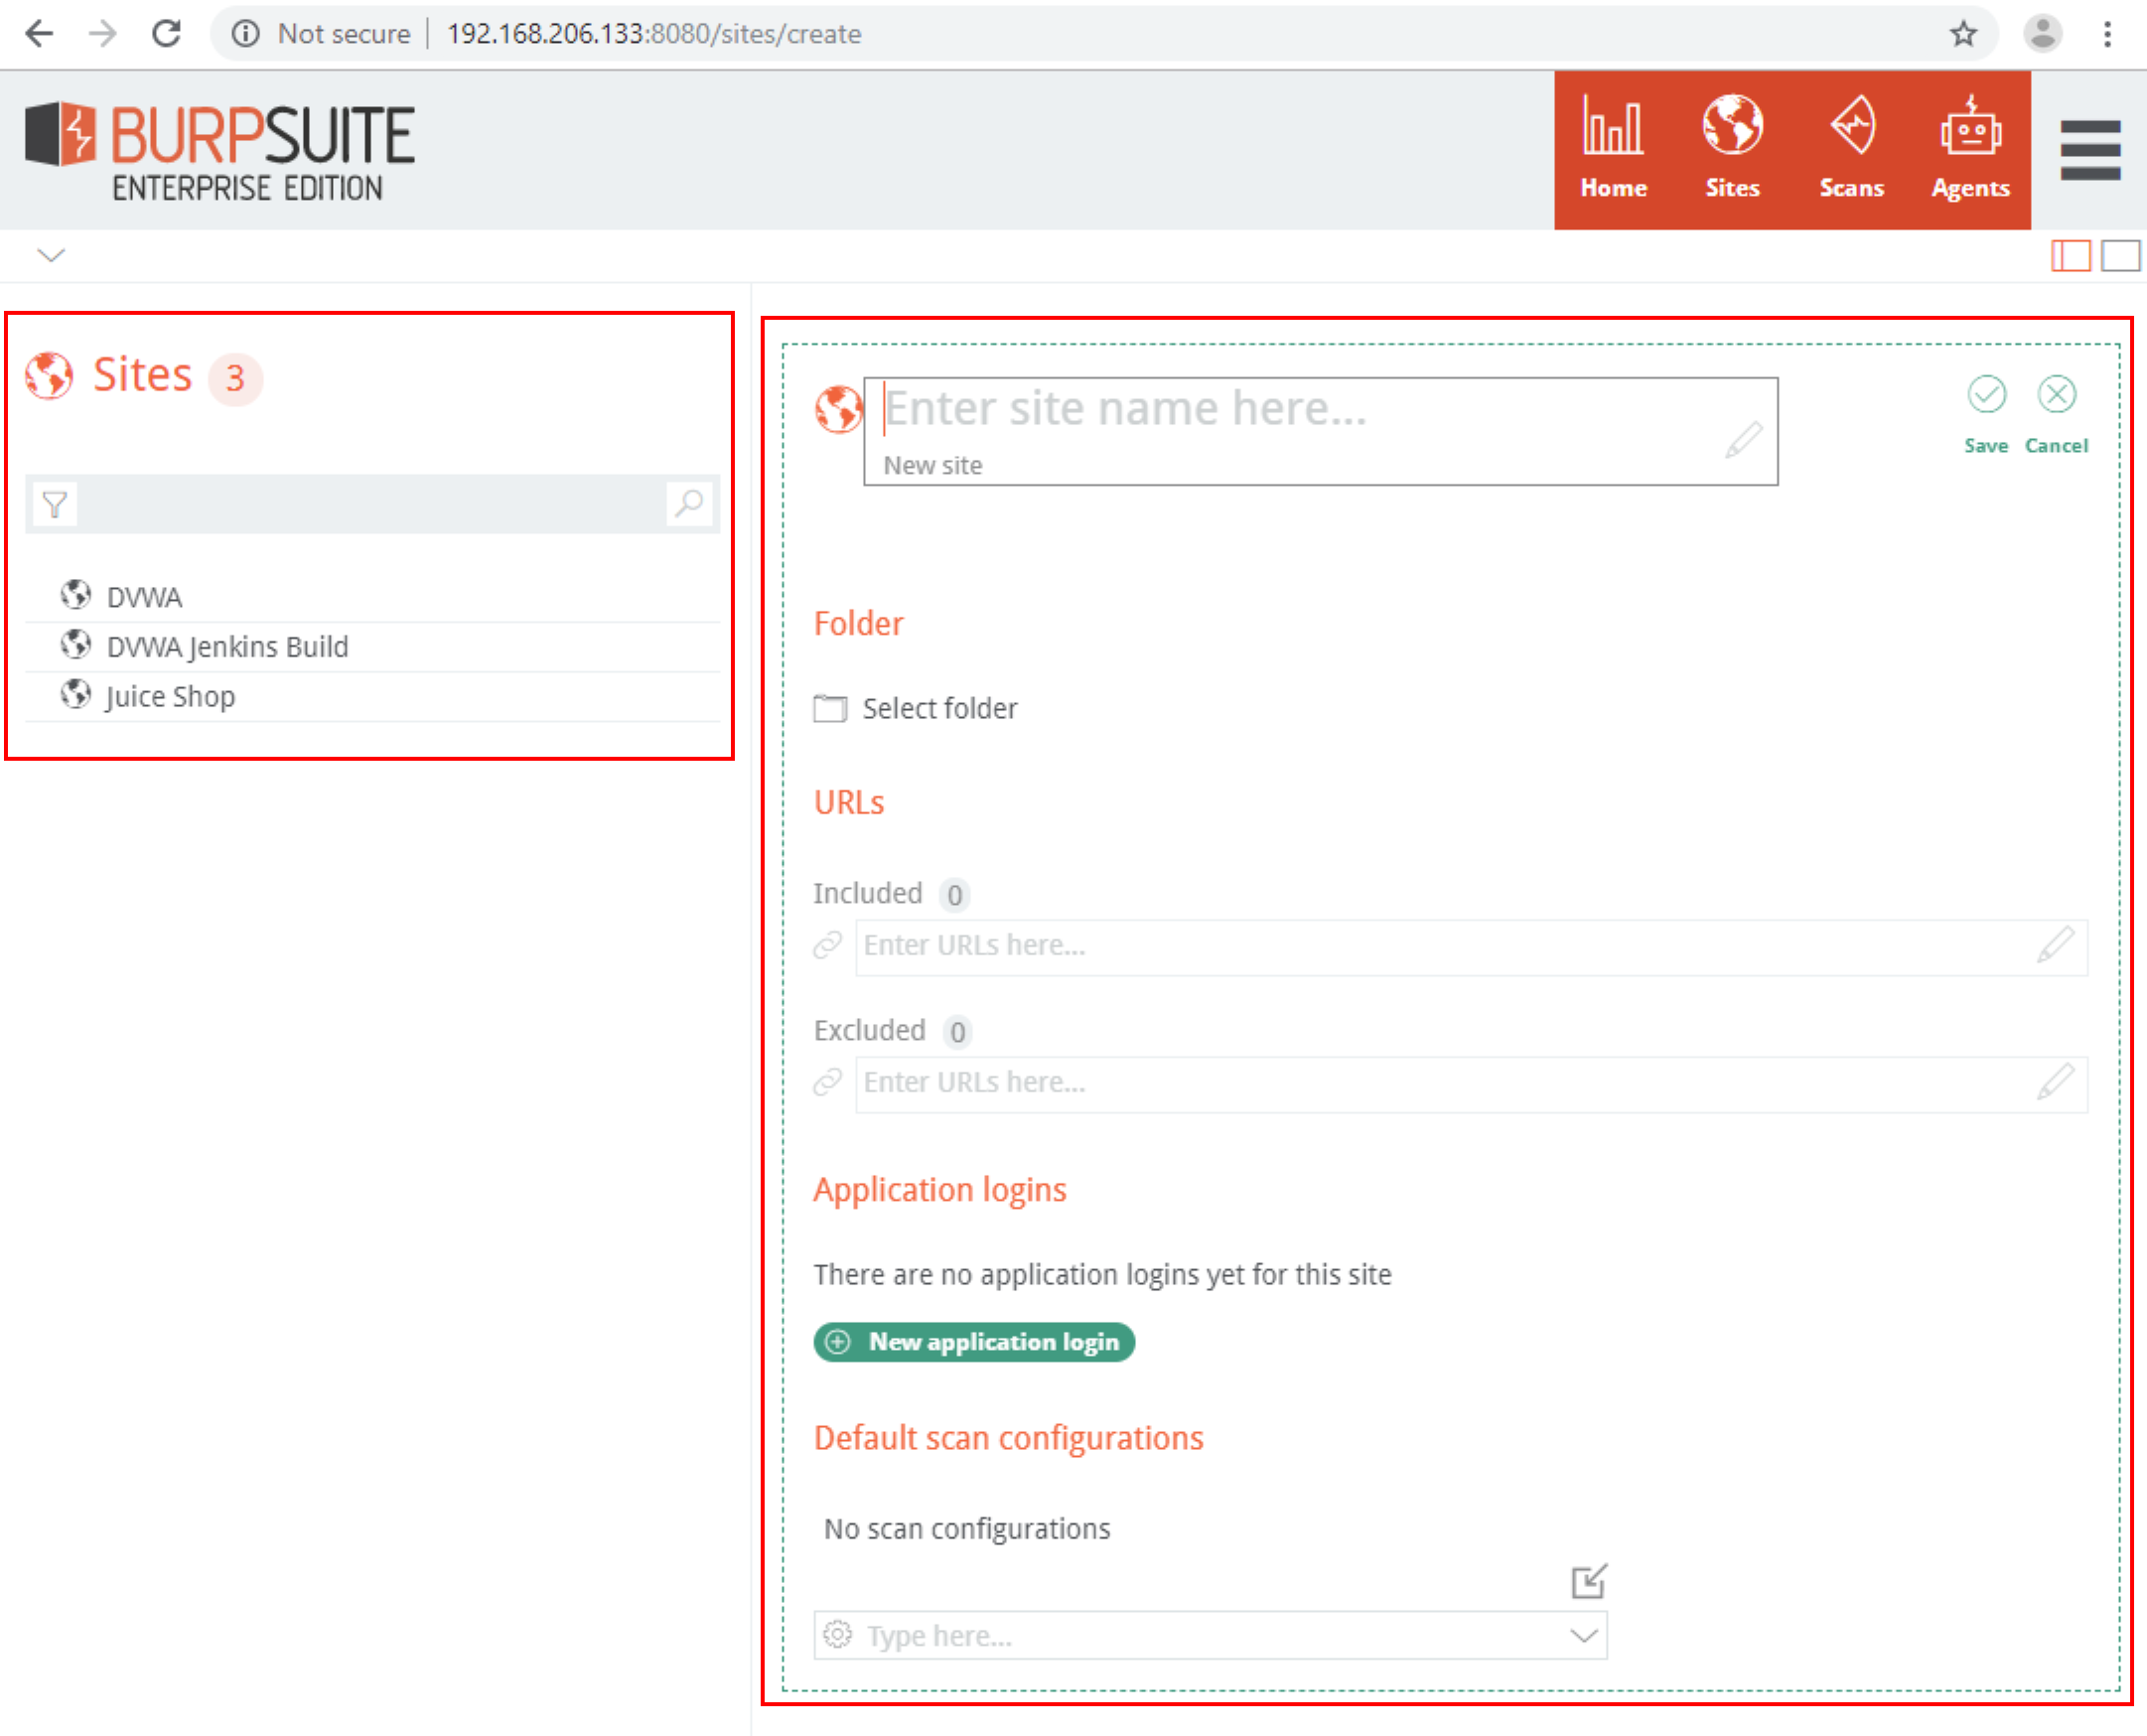
To add a new site, click on New Site under the folder hierarchy where you want the site to exist. The site tree folder should be populated under Folder.
The Included URLs and Excluded URLs should be added next. At least one Included URL must be specified as this is the location where the crawl starts. Anything under this path that you would like excluded from the scan, should be specified under Excluded URLs. The combination of the Included URLs and Excluded URLs controls the scope of the scan. For example you could have the following:
Included URLs
Excluded URLs
In this case, http://target/app/ would be the start URL for the crawl, however the /admin and /secret sub-paths would not be crawled.
Application login configurations may also be added with a username and password pair. This works to authenticate for most applications, however some applications have specialty login functionality that the scan agents are unable to authenticate to. These cases should be reported to Portswigger as they will be addressing these in future releases.
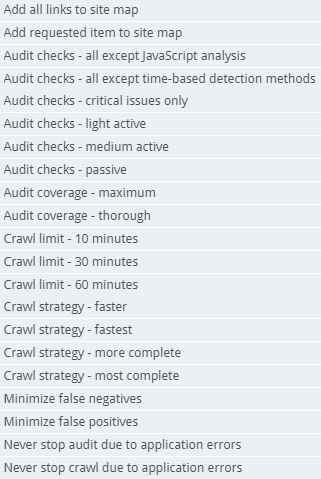
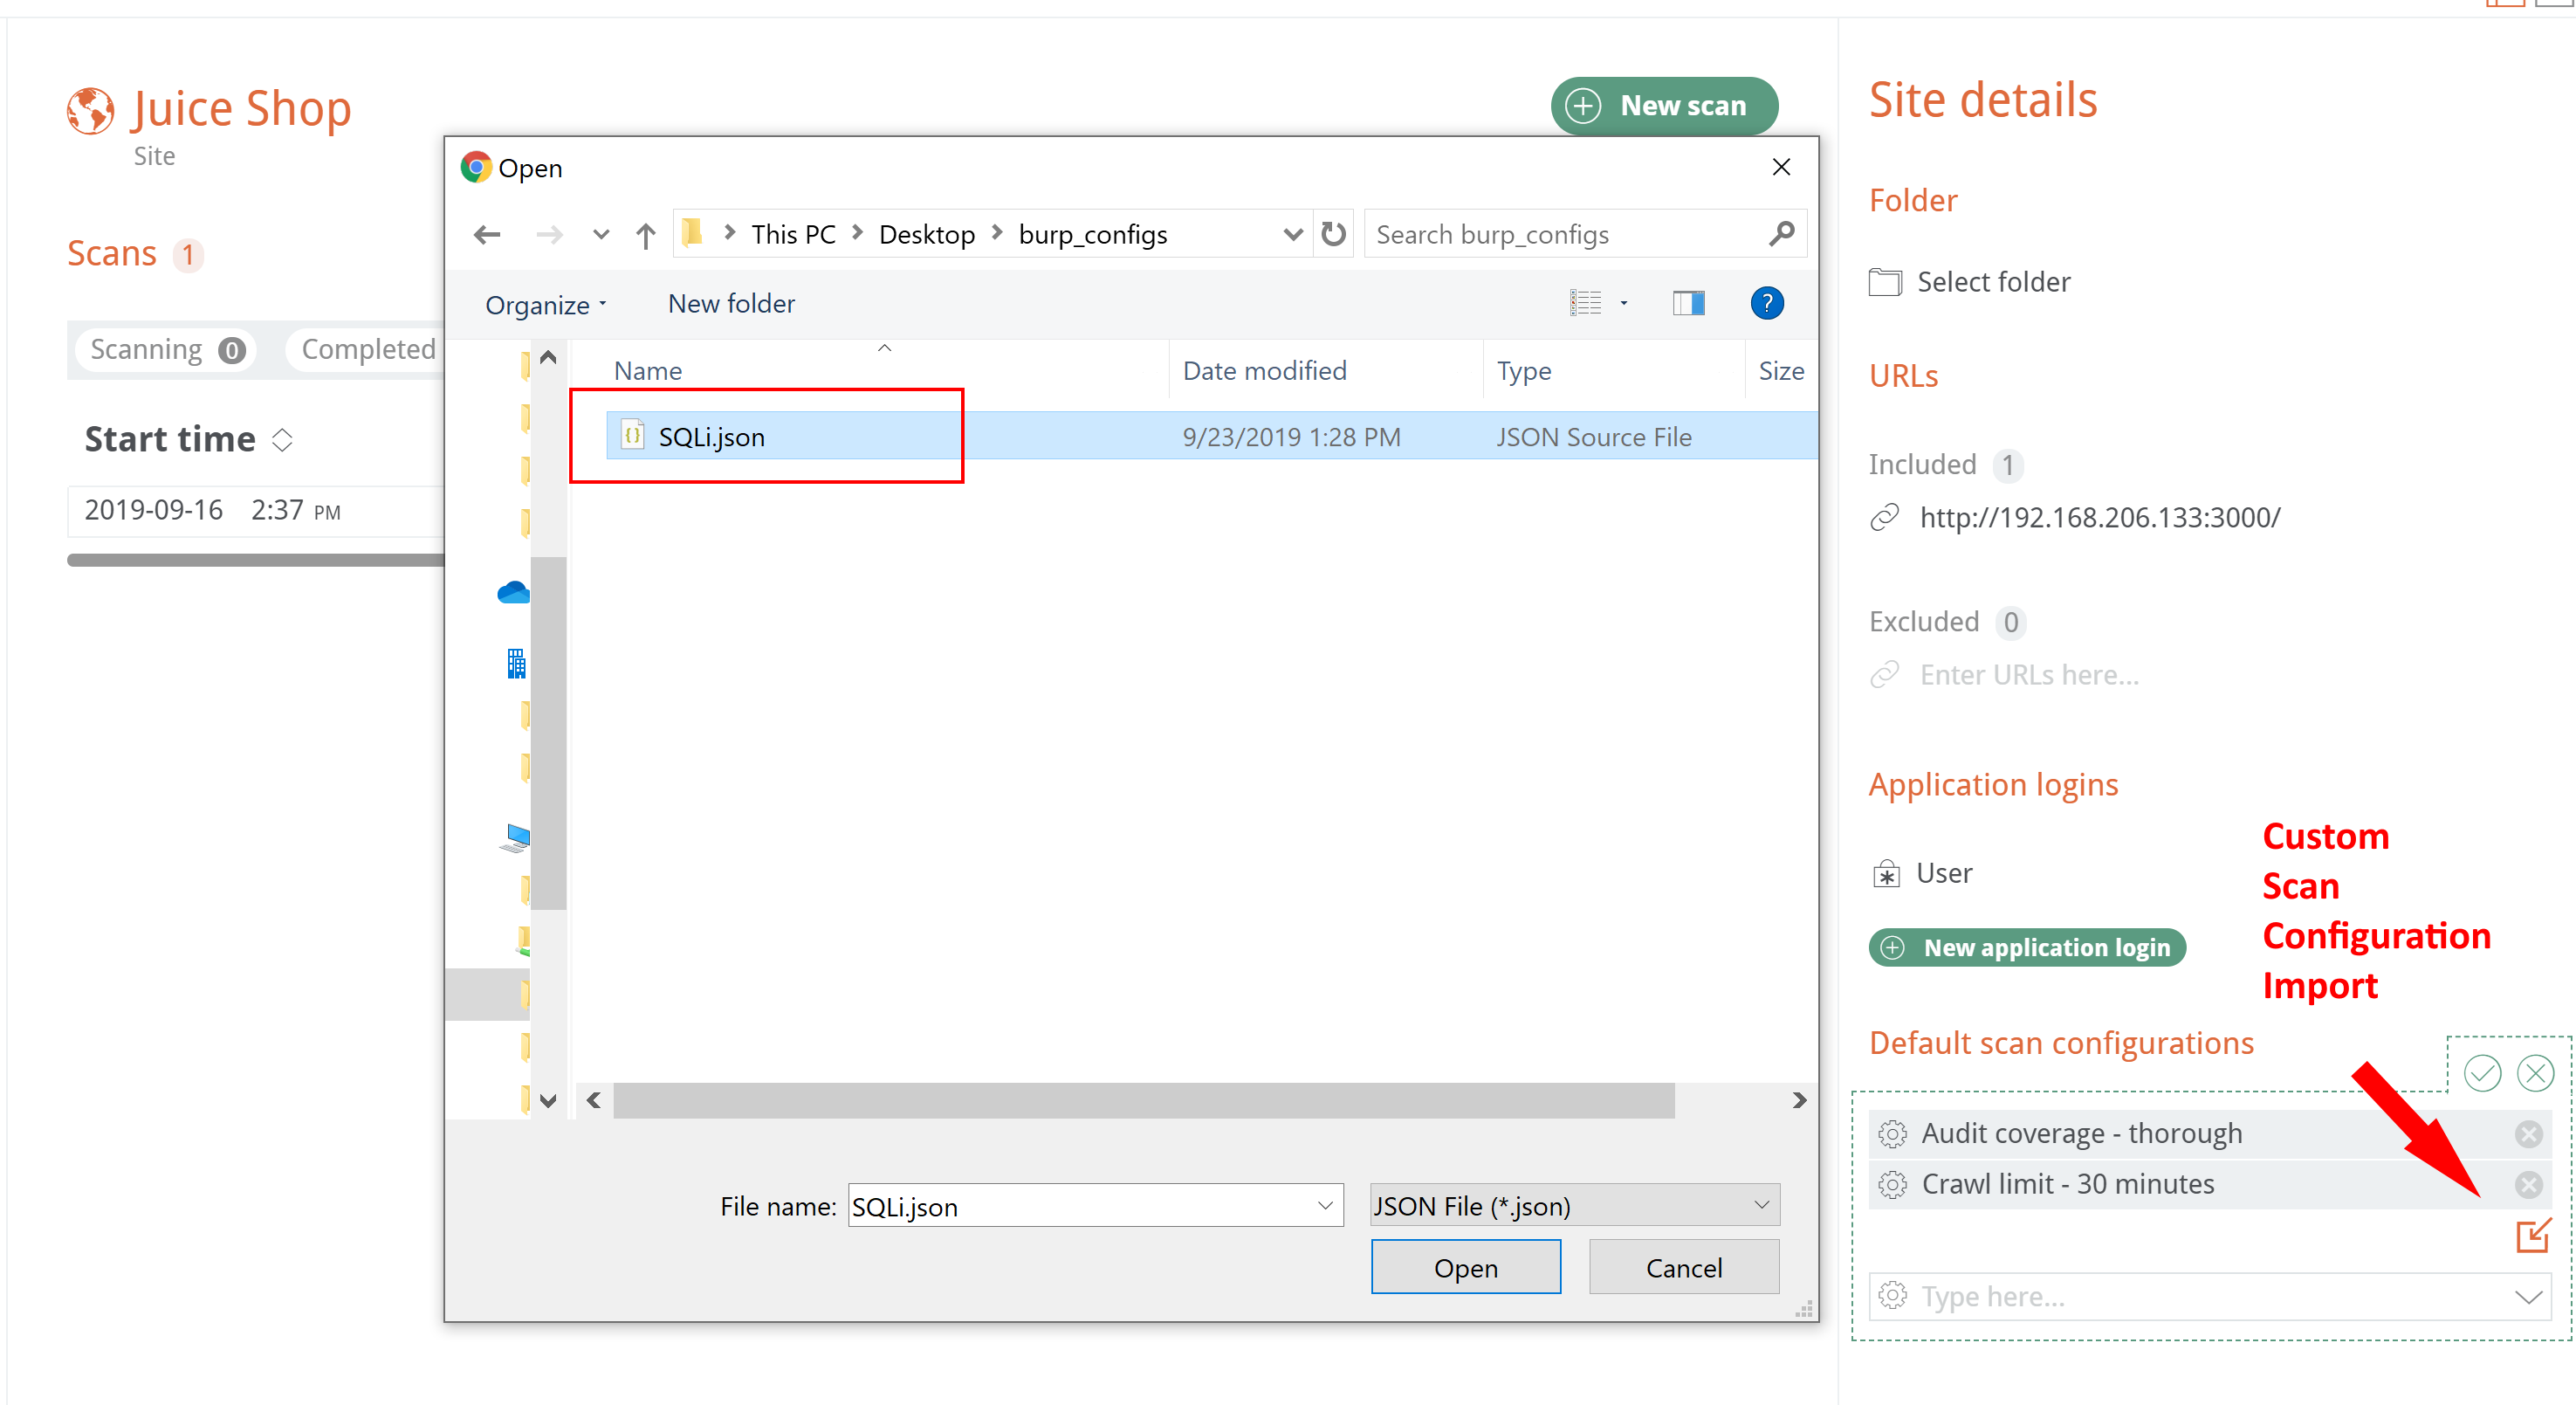
Most of the default scan configurations from Burp Pro’s Configuration Library are also available in Burp Enterprise, with the exception of “Audit checks – extensions only” since Burp Enterprise agents do not have extensions like Burp Pro.
Custom scan configurations can also be exported from Burp Pro’s configuration library and imported into the Site Details or New Scan workflows:
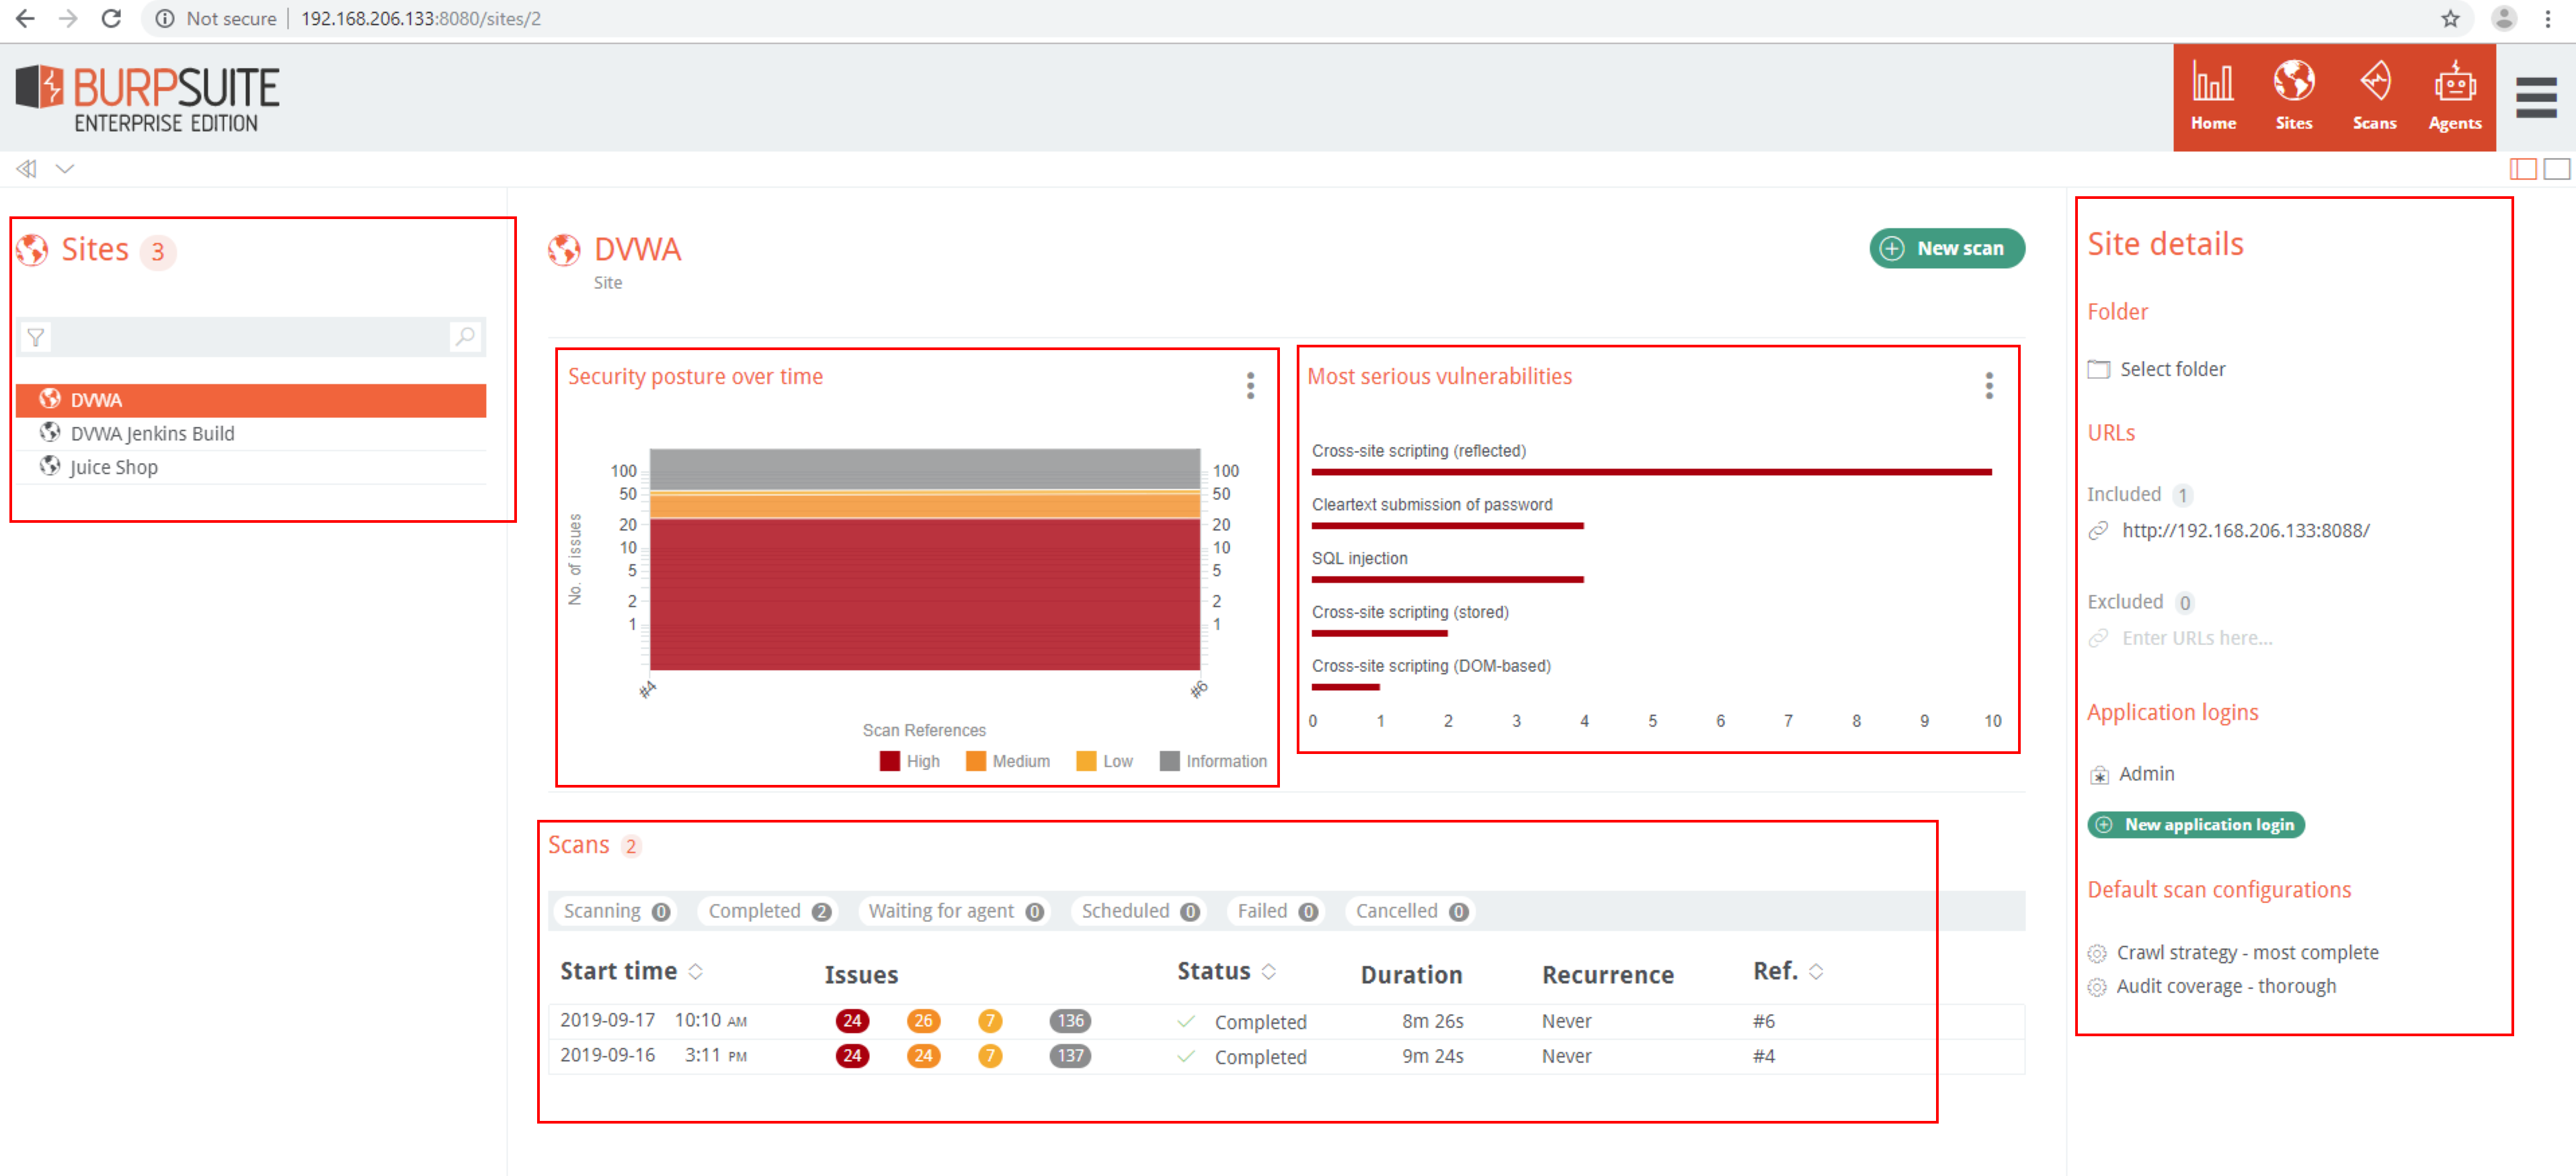
Sites have their own dashboard views:
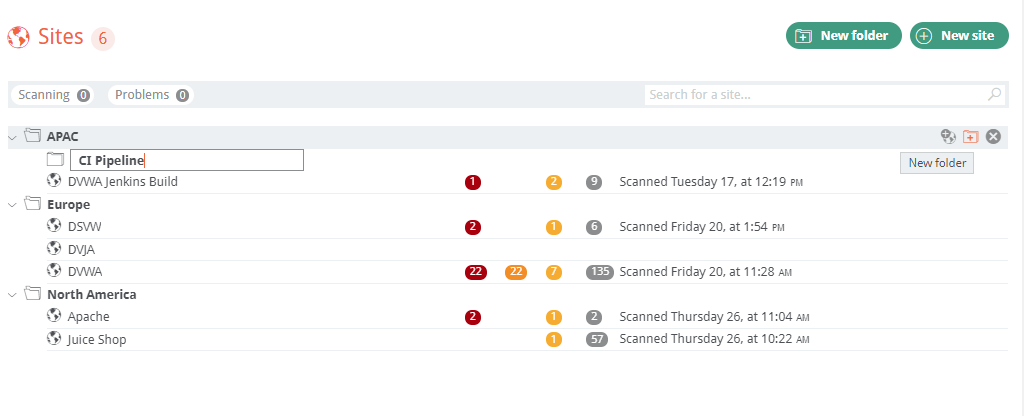
Site folders can be configured to organize and restrict access to a sites’s scan data. In the following example, the folder structure has been organized by geographical regions, however any organizational or infrastructure folder structure is possible here.
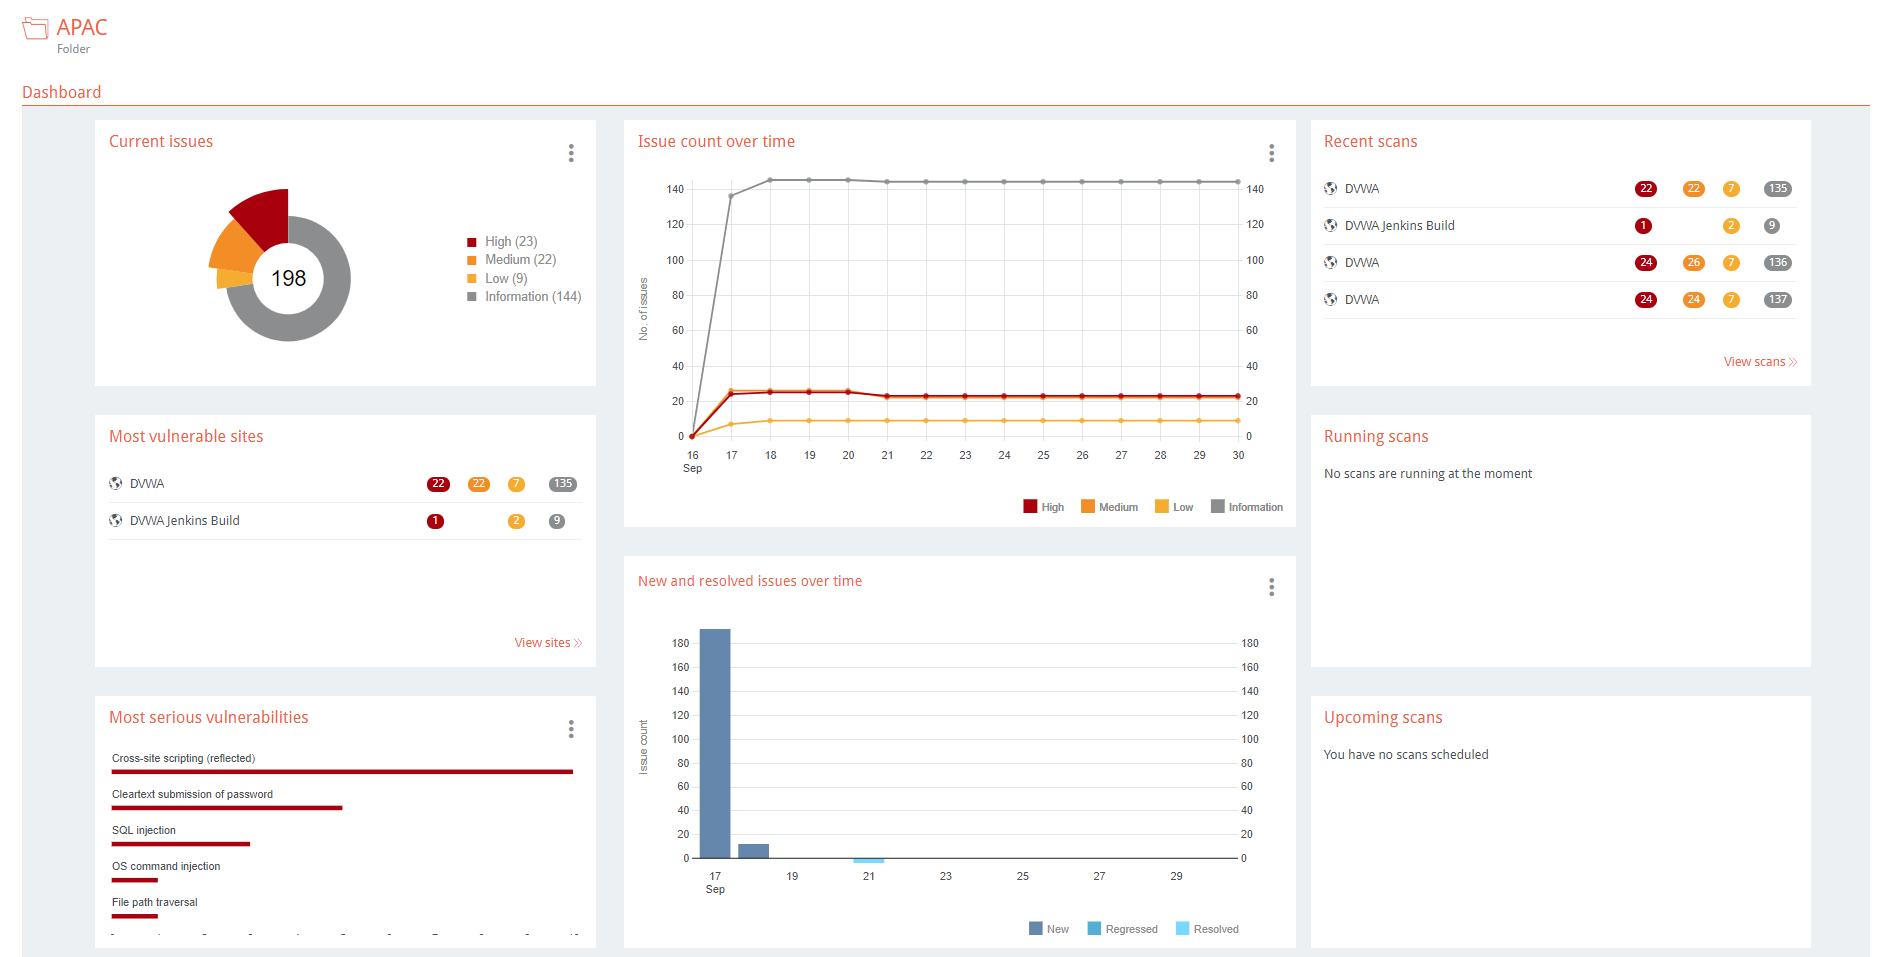
Site folders also have their own dashboards:
The Folder property under Site details can be chosen to move a site under the specified folder.
When creating new groups under Teams, you can restrict users within the group to specified sites.
You can then add members to the newly created group:
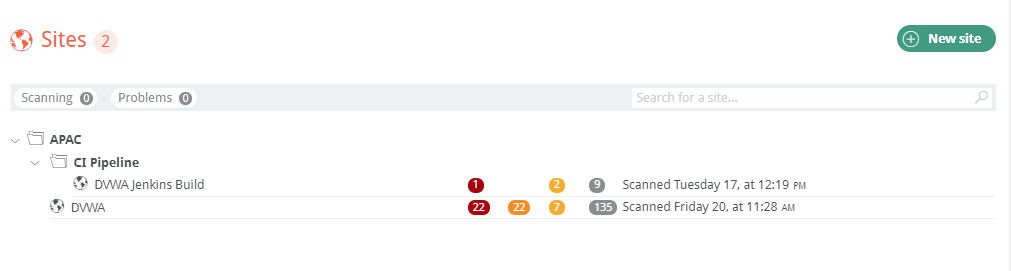
Logging in as the newly created user, the user can only see the Sites they are restricted to:
If the user tried to create a new site, they are also restricted to the sites they are allowed to access:

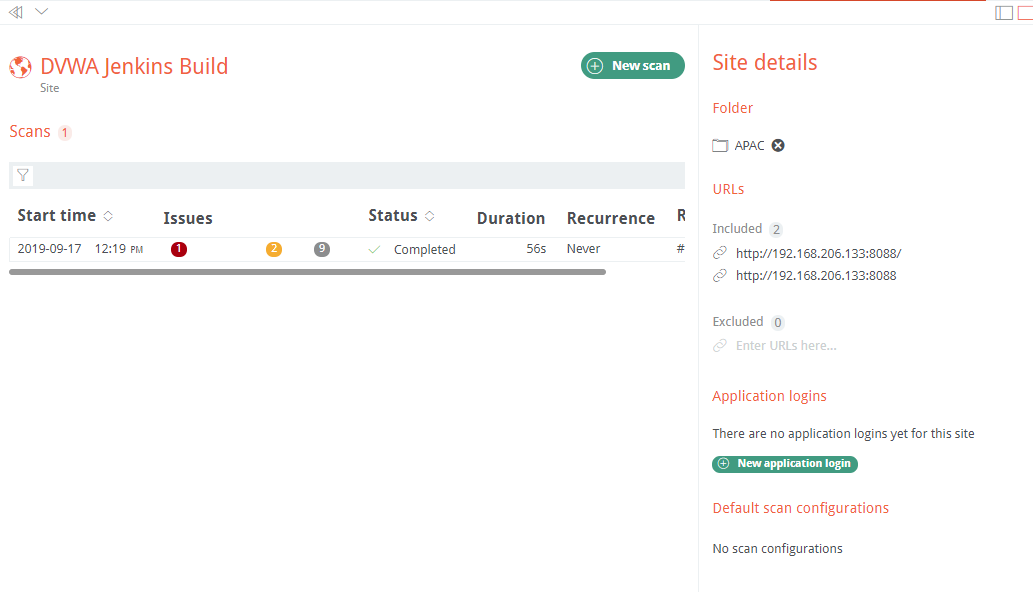
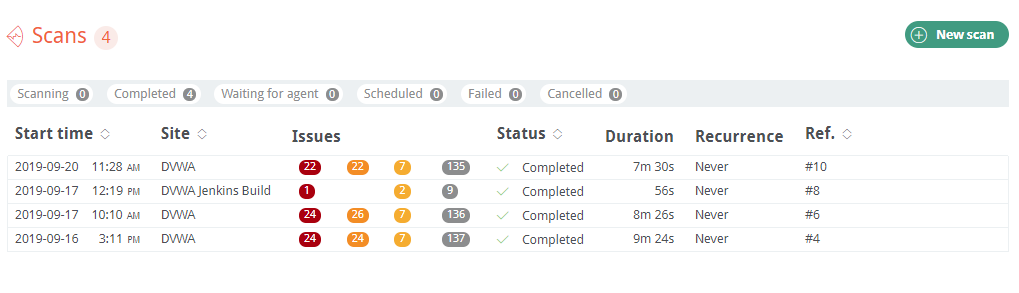
The Scans will also only report scans under the sites the user is allowed to access:
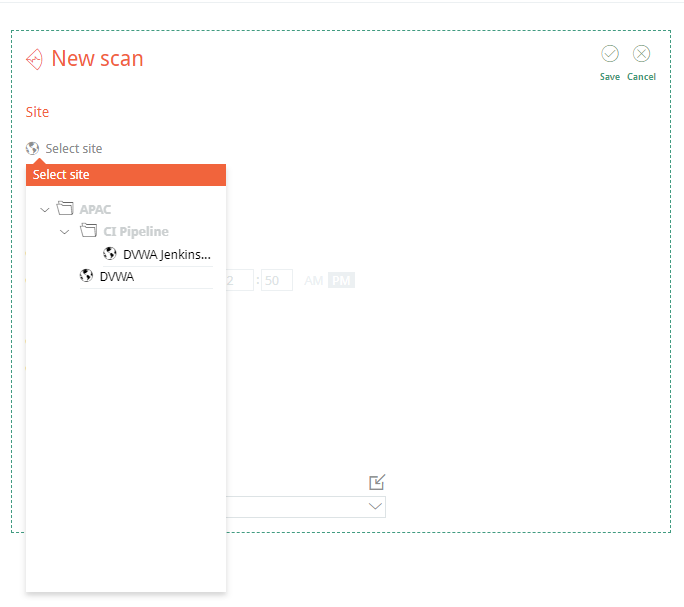
When attempting to create a new scan, the user can only select sites they are allowed to access:
Scans
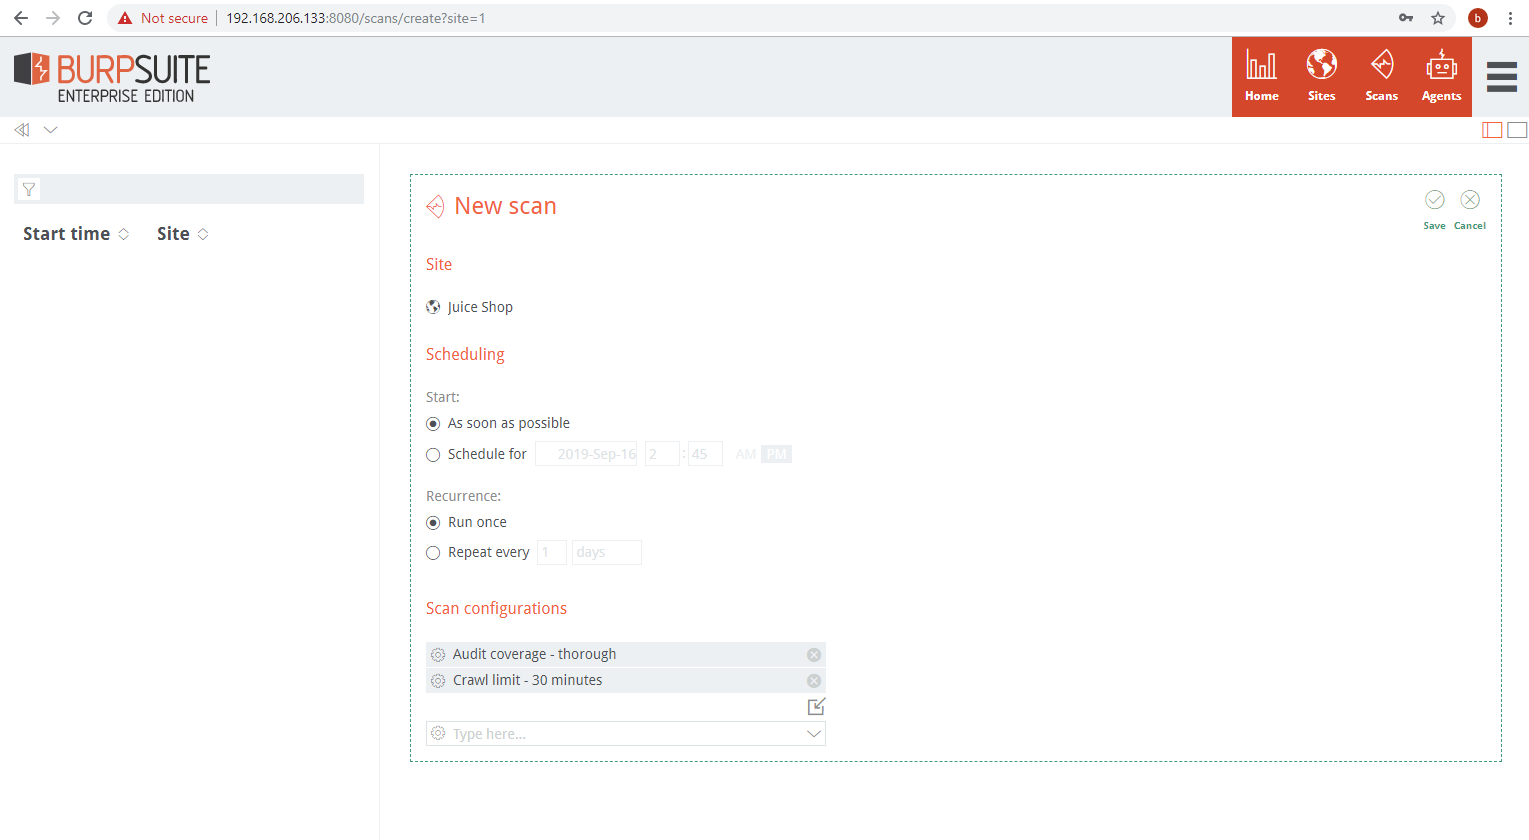
New scans can be created at the Site level. The scan configuration can also be updated from what’s in the base configuration at the Site level. Scheduling can be used to schedule recurring scans or a single scan in the future.
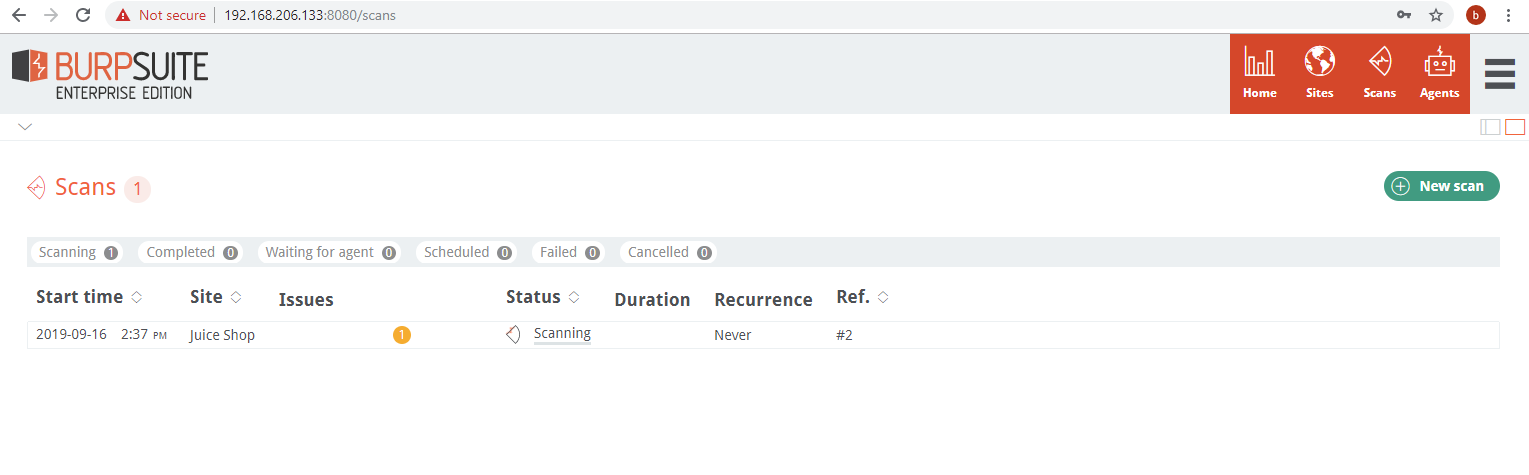
New scans are added to the scan queue.
Click on scan to access scan details.
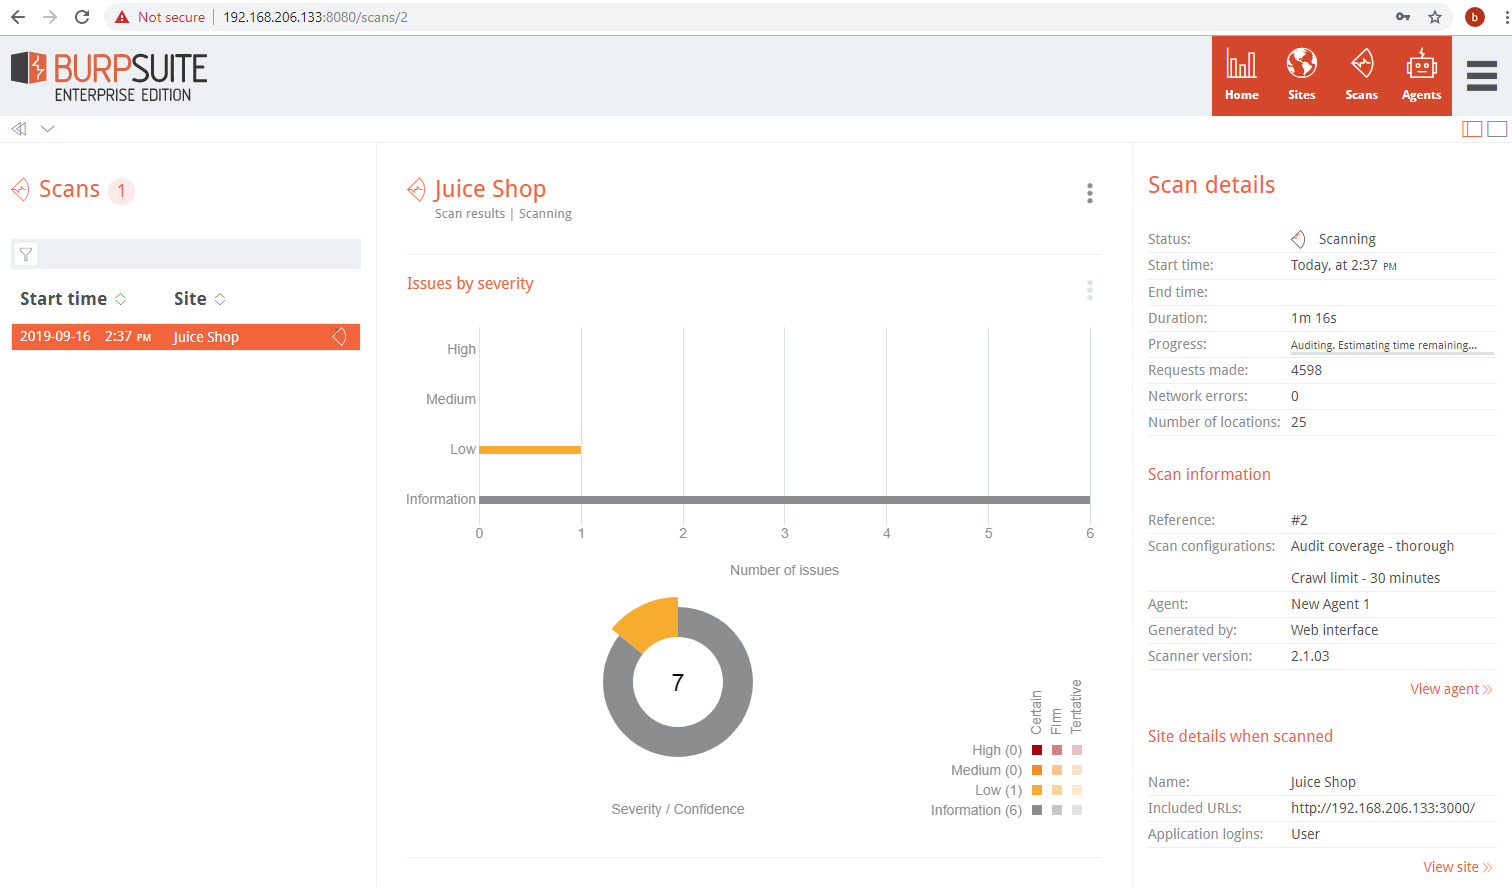
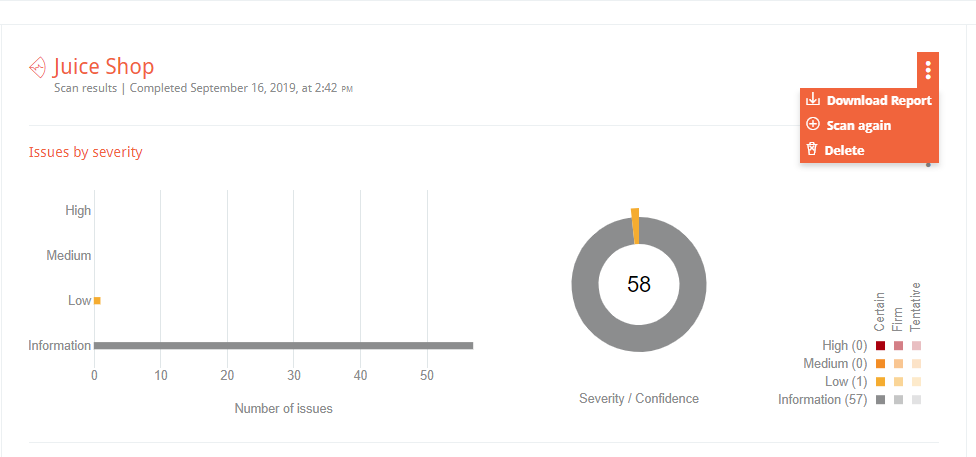
HTML reports can be downloaded for each scan by clicking on the options icon:
Issues are updated in real-time as they are discovered.

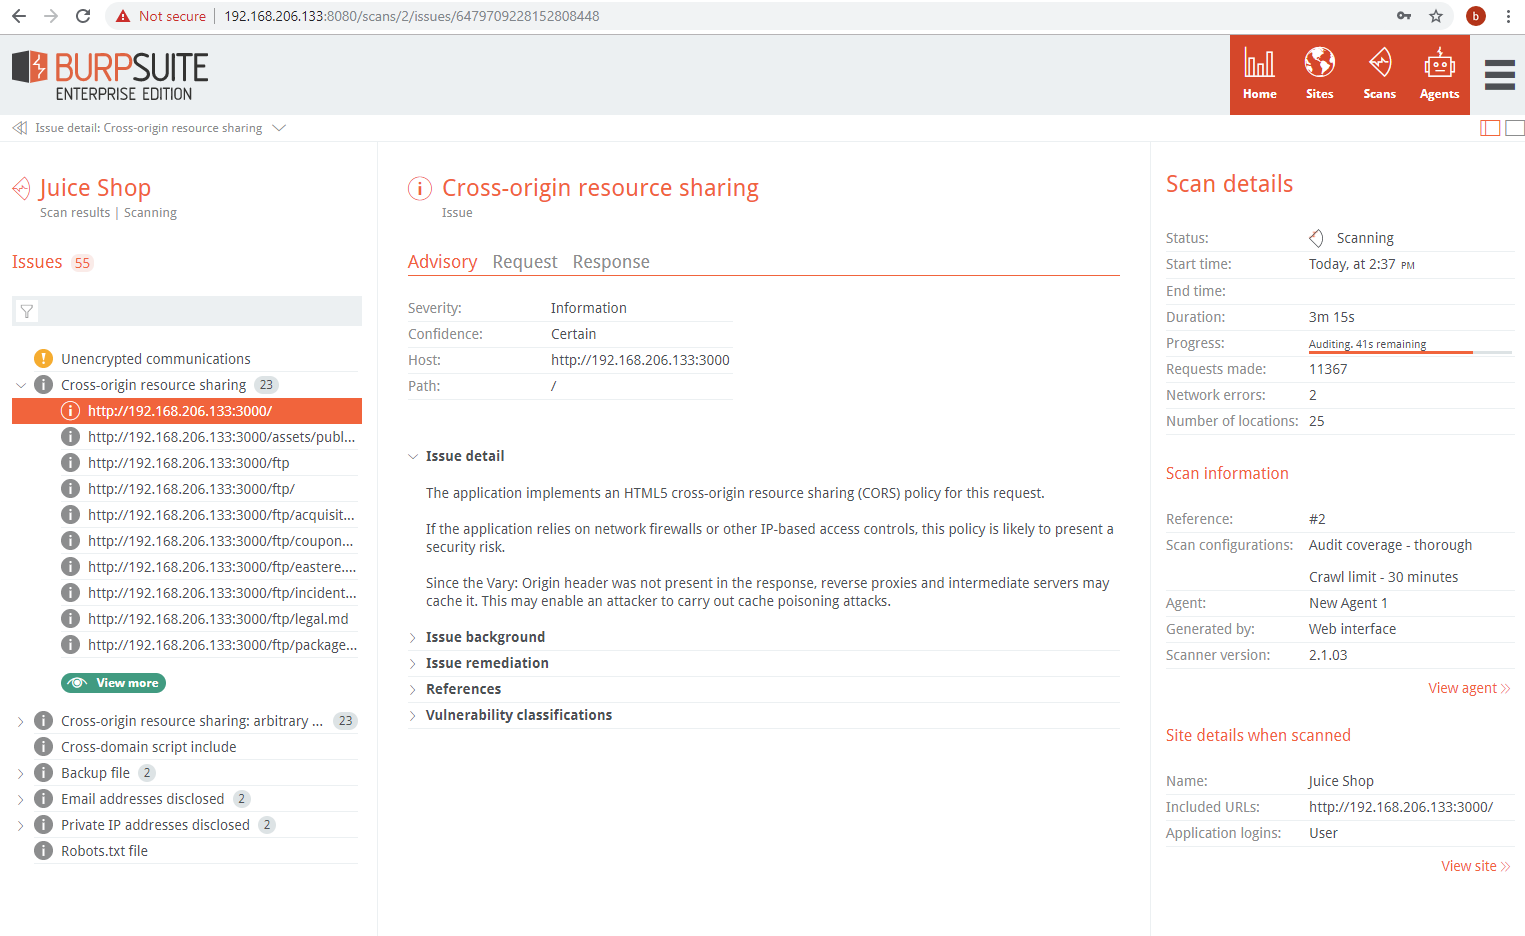
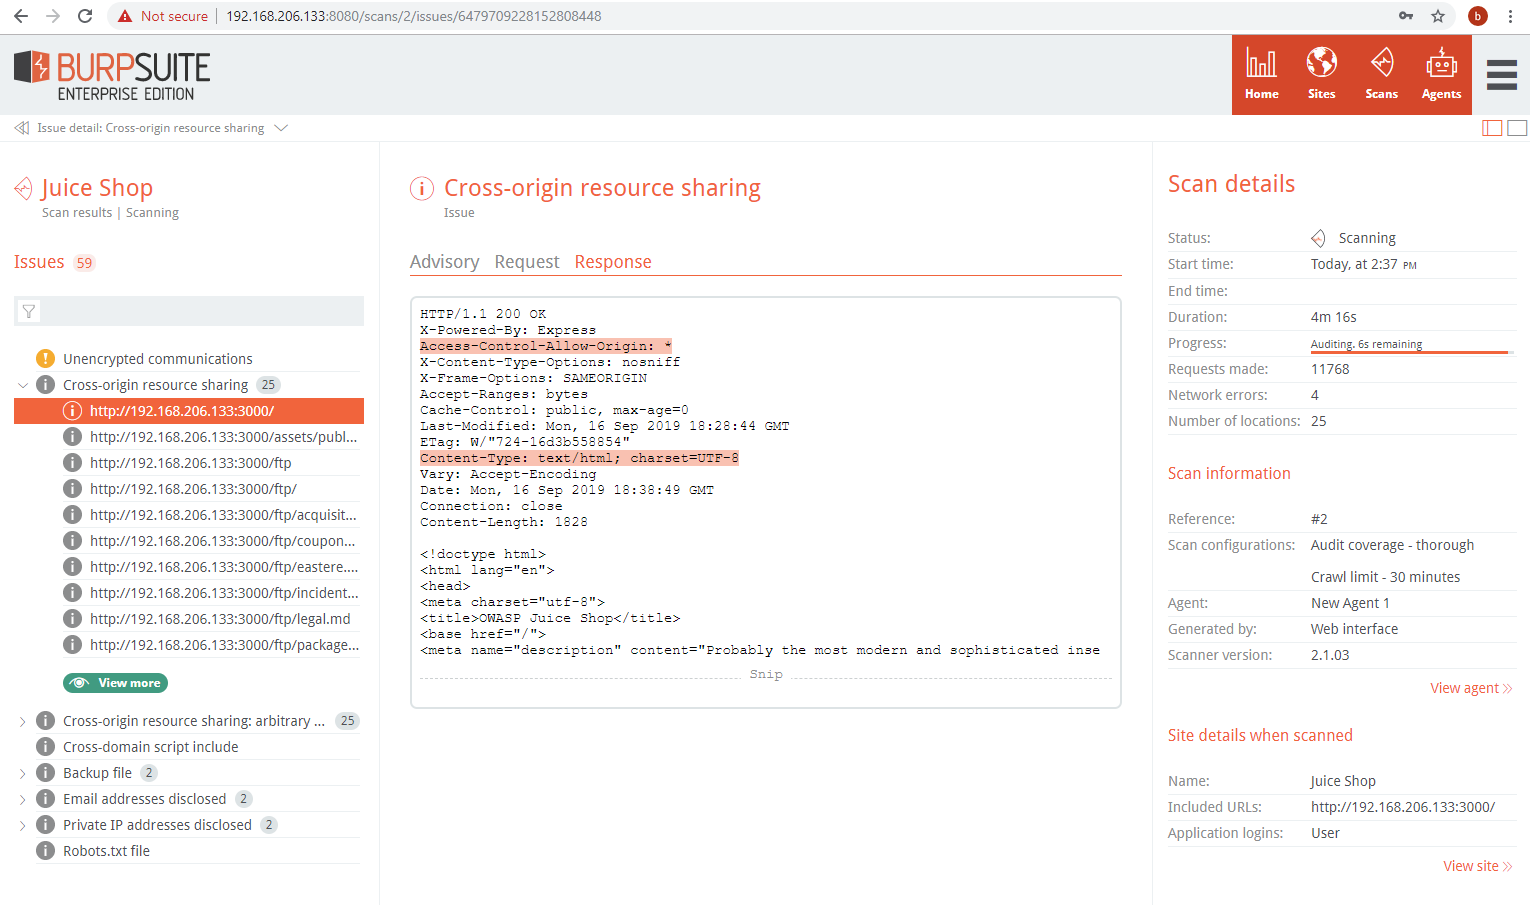
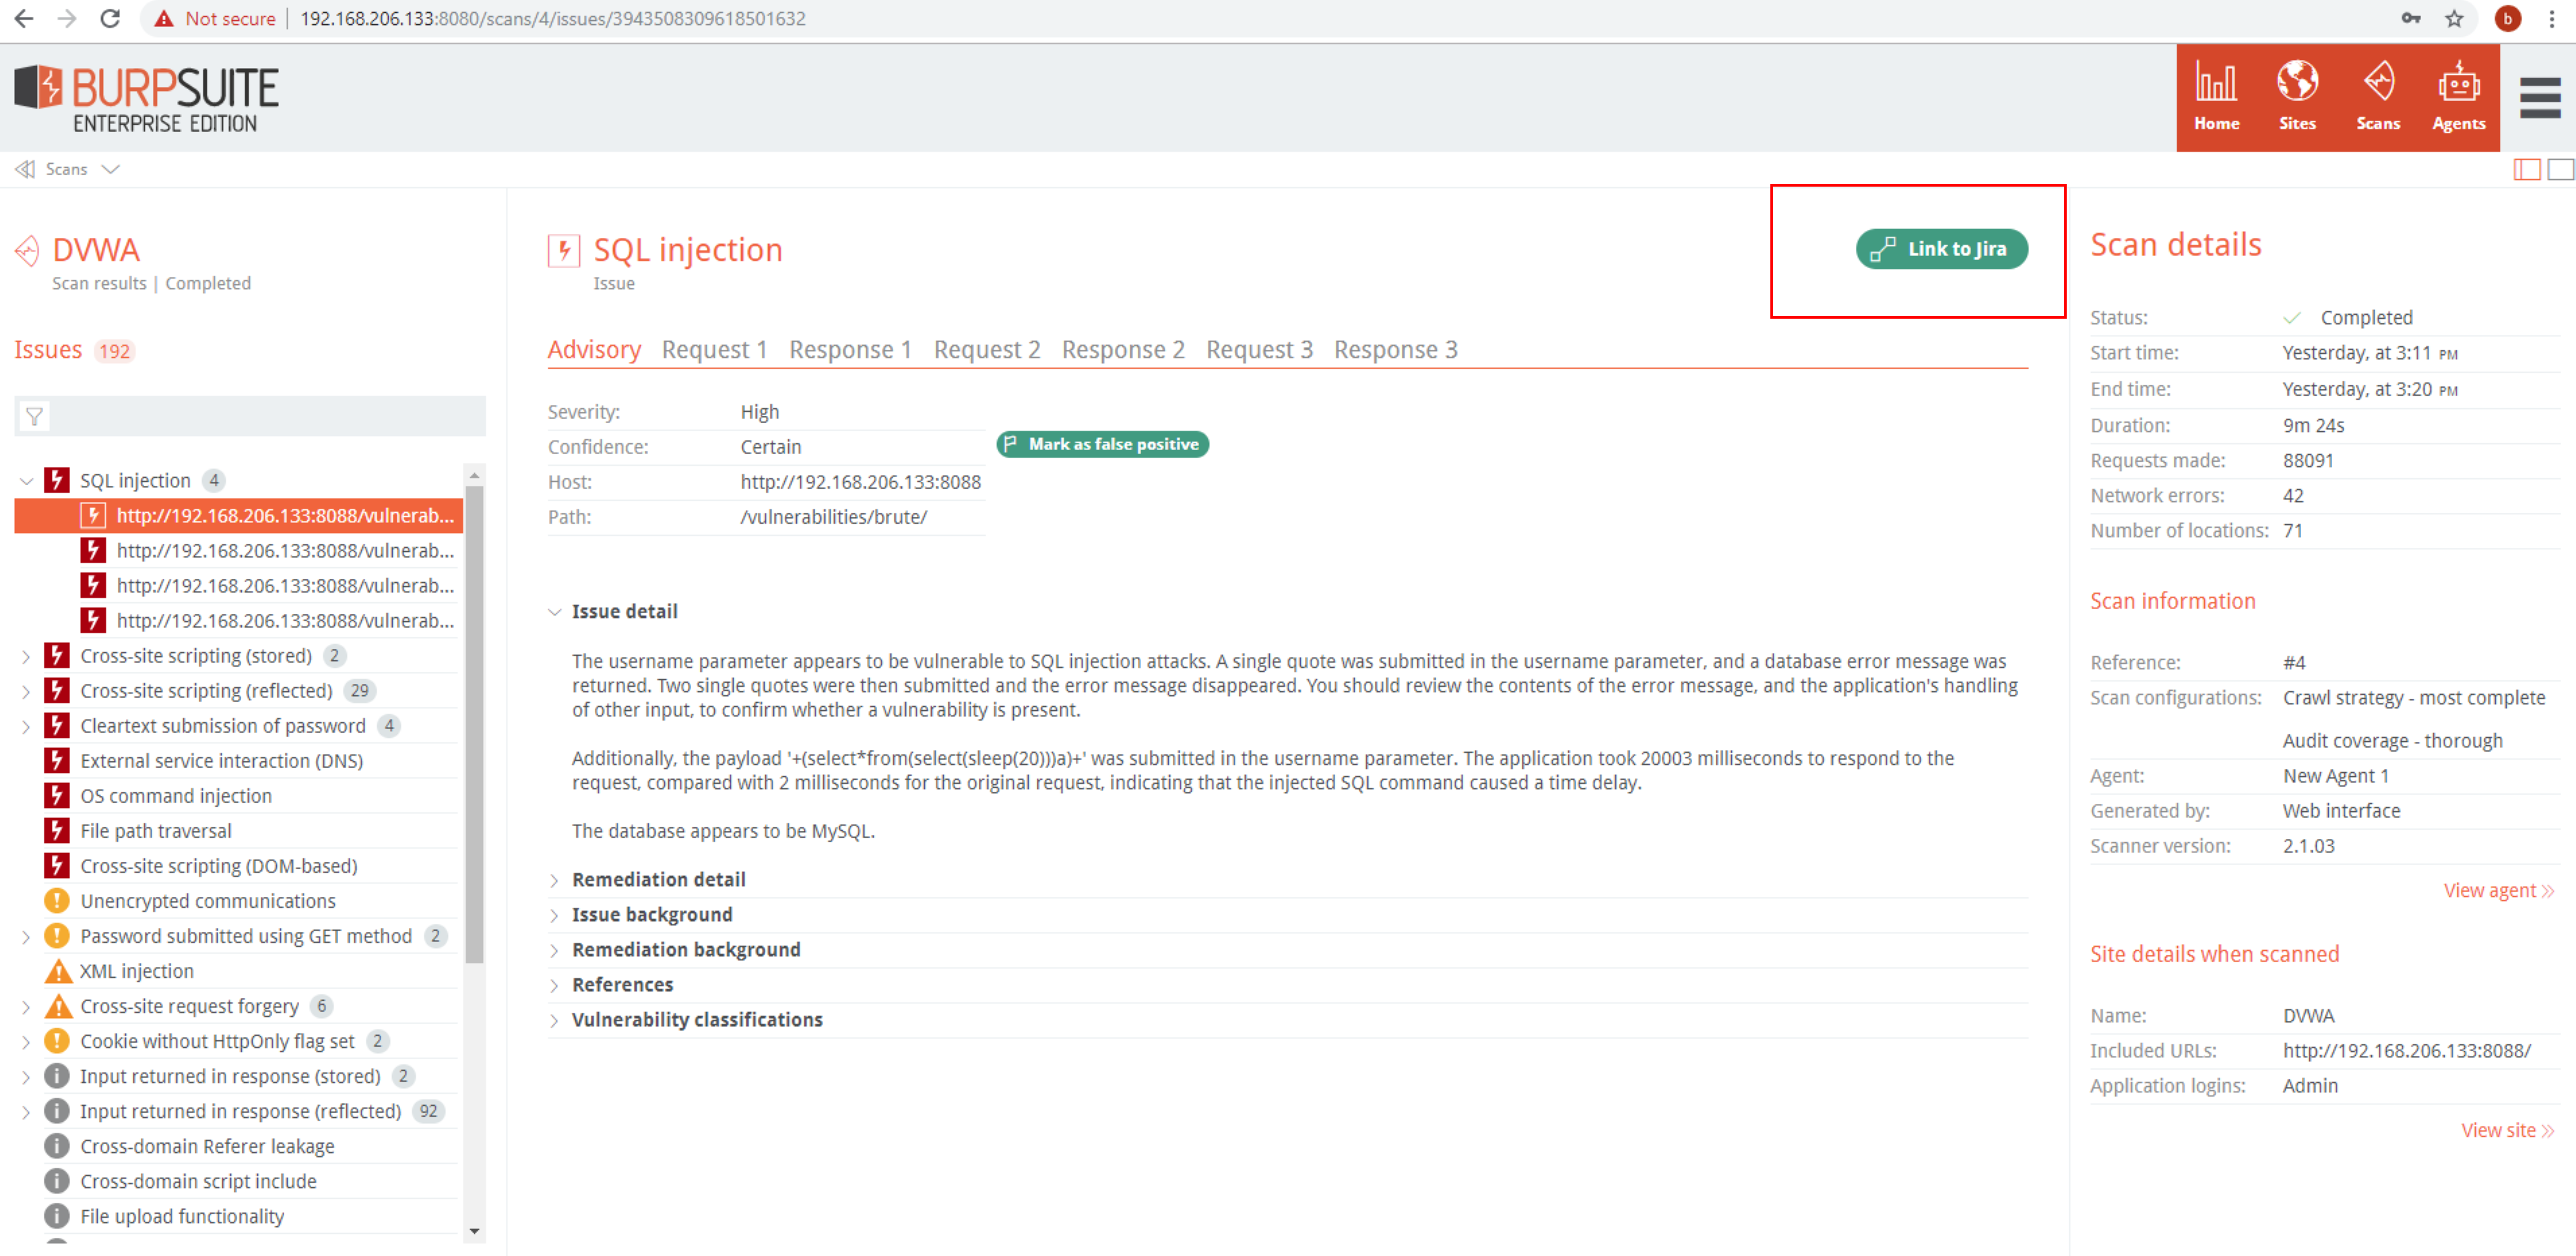
Click on an issue to access the Issue Details:
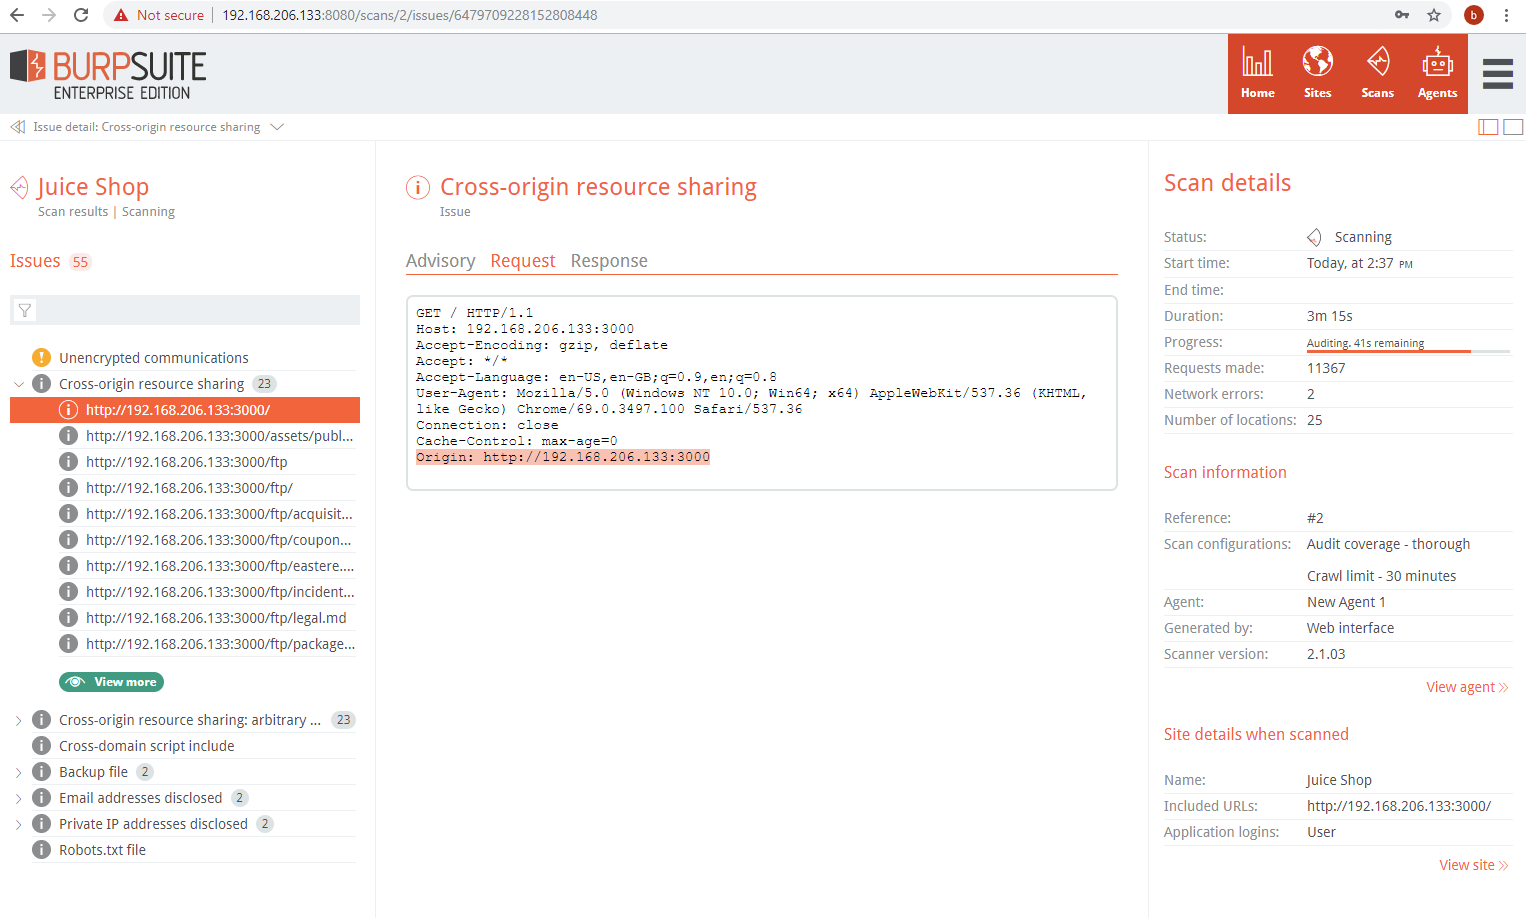
The Request tab contains the full request with the scan payload highlighted:
The Response tab contains a snippet of the response and highlights the string or RegEx pattern that confirms the vulnerability:
Issues can be marked as false positives and the vulnerability counts in dashboards and other reporting are reduced:

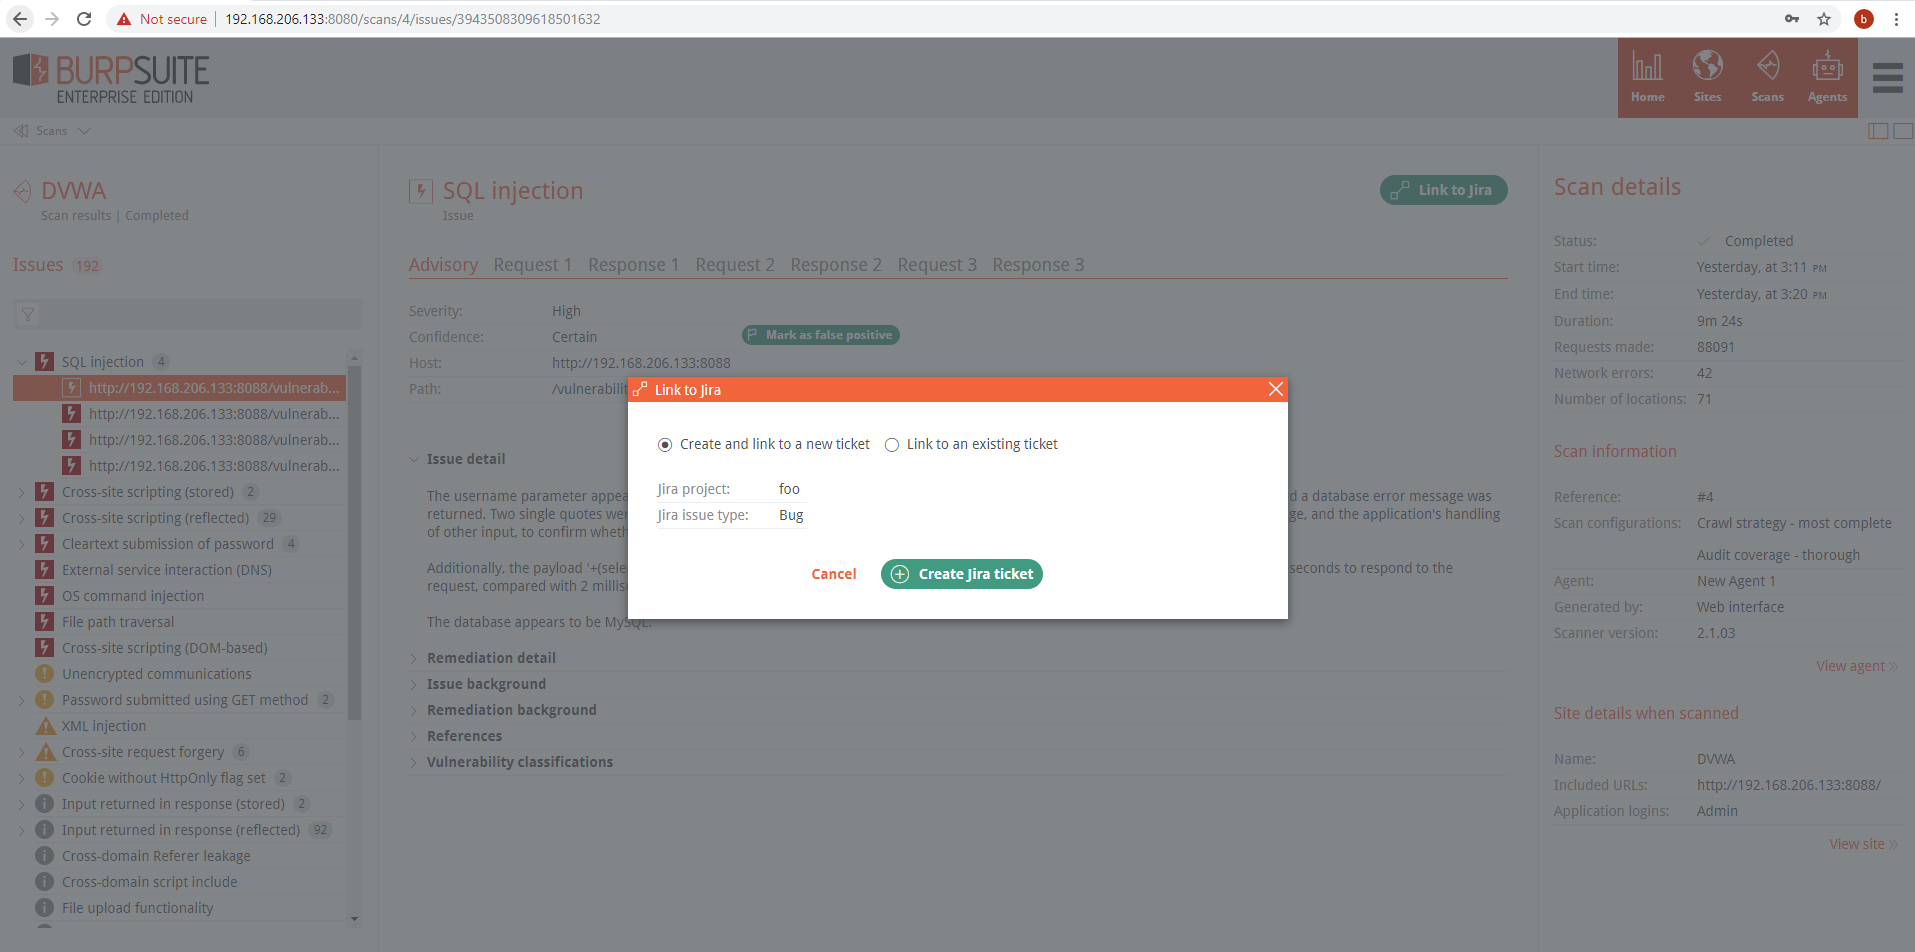
The ‘Link to Jira’ button will appear in each issue after JIRA integration is setup in Settings. This will allow linking issues to Jira tickets. This is mostly a manual process, however there is a setting to automatically link to Jira if it’s for a new issue type.
If multiple project/ticket configurations are configured in the Jira Integration settings, it can be selected here by a drop-down menu.
You can currently only link/unlink to Jira tickets.
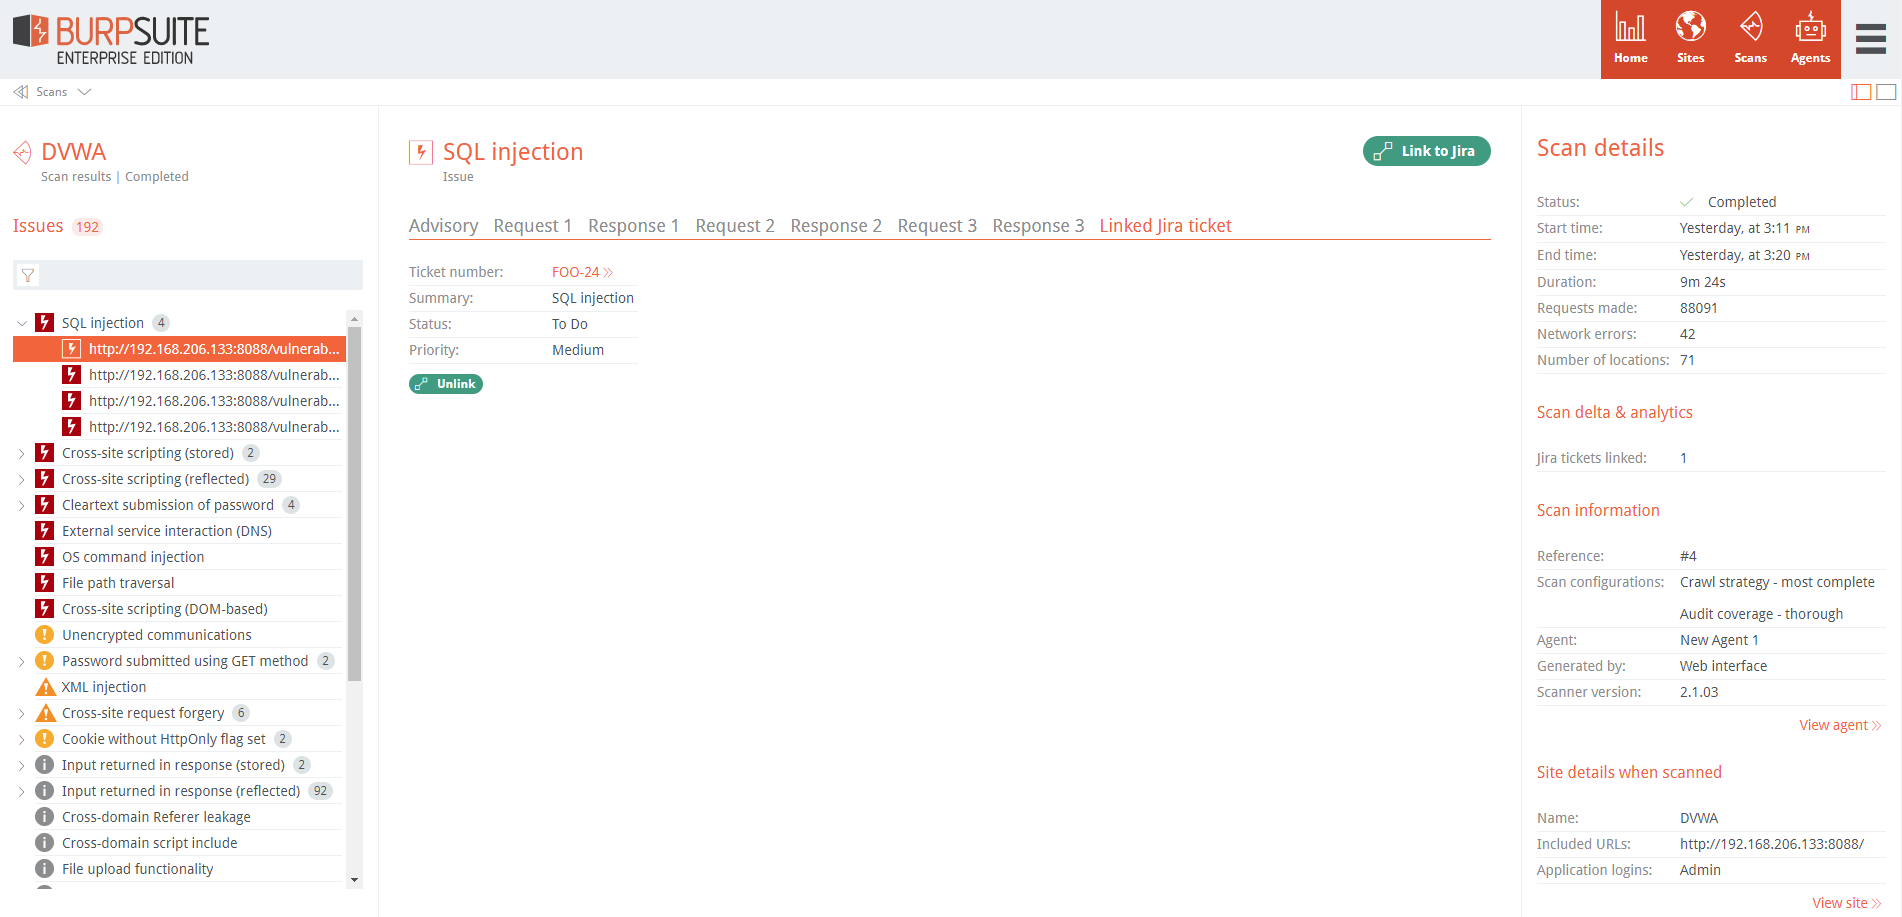
A Bug ticket will be added to Jira project’s backlog where it can then be reviewed and assigned to a sprint or other project workflow.

The HTTP request and response data is not currently added to the Jira ticket. Only a link is provided back to the issue within Burp Enterprise. This may be a problem if the development team assigned to address the issue doesn’t have an account within Burp Enterprise to access the ticket. Manually downloading the HTML report and saving to the Jira ticket may be required to provide the development team in these instances.
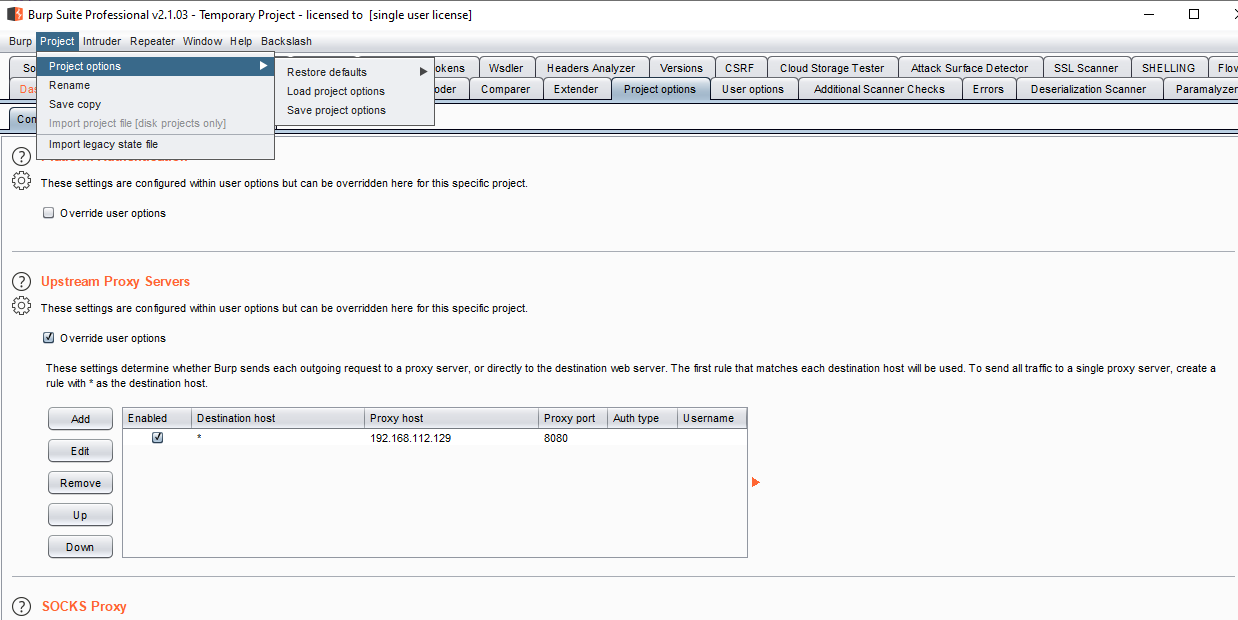
If a scan is not returning results as expected, there may be an issue with how the scan agent is trying to authenticate or crawl the application. It may be helpful to proxy the scan agent’s traffic to observe how it is crawling the application. This can be done by using Burp Suite Pro to setup an Upstream Proxy in Project Options like so:

The upstream proxy IP address and port should be reachable from the scan agent. Also, it is important that the upstream proxy is configured in Project Options and not User Options.
You would then save the project options as a .json file:
The project options file may look similar to the following:
{
    "project_options":{
        "connections":{
            "hostname_resolution":[],
            "out_of_scope_requests":{
                "advanced_mode":false,
                "drop_all_out_of_scope":false,
                "exclude":[],
                "include":[],
                "scope_option":"suite"
            },
            "platform_authentication":{
                "credentials":[],
                "do_platform_authentication":true,
                "prompt_on_authentication_failure":false,
                "use_user_options":true
            },
            "socks_proxy":{
                "dns_over_socks":false,
                "host":"",
                "password":"",
                "port":0,
                "use_proxy":false,
                "use_user_options":true,
                "username":""
            },
            "timeouts":{
                "domain_name_resolution_timeout":300000,
                "failed_domain_name_resolution_timeout":60000,
                "normal_timeout":120000,
                "open_ended_response_timeout":10000
            },
            "upstream_proxy":{
                "servers":[
                    {
                        "destination_host":"*",
                        "enabled":true,
                        "proxy_host":"192.168.112.129",
                        "proxy_port":8080
                    }
                ],
                "use_user_options":false
            }
        },
…
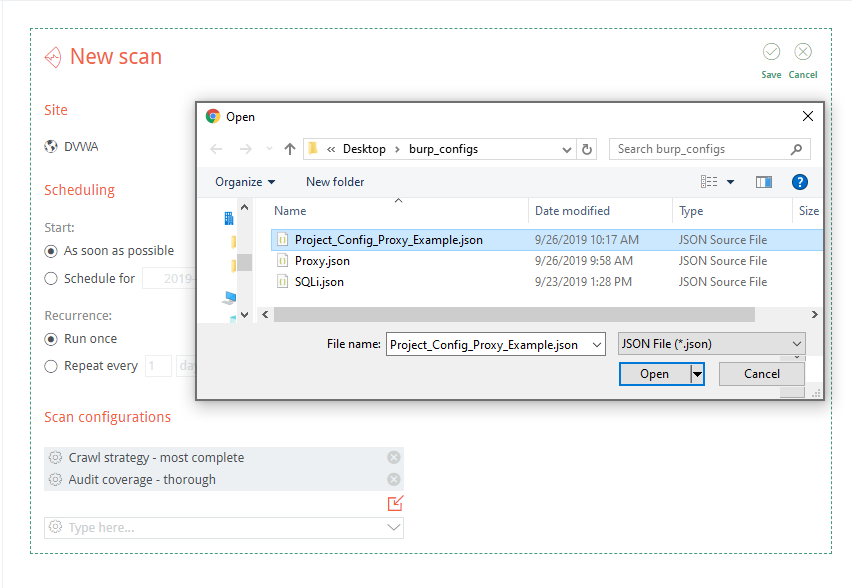
This file can then be added to a new scan’s scan configurations in Burp Enterprise:
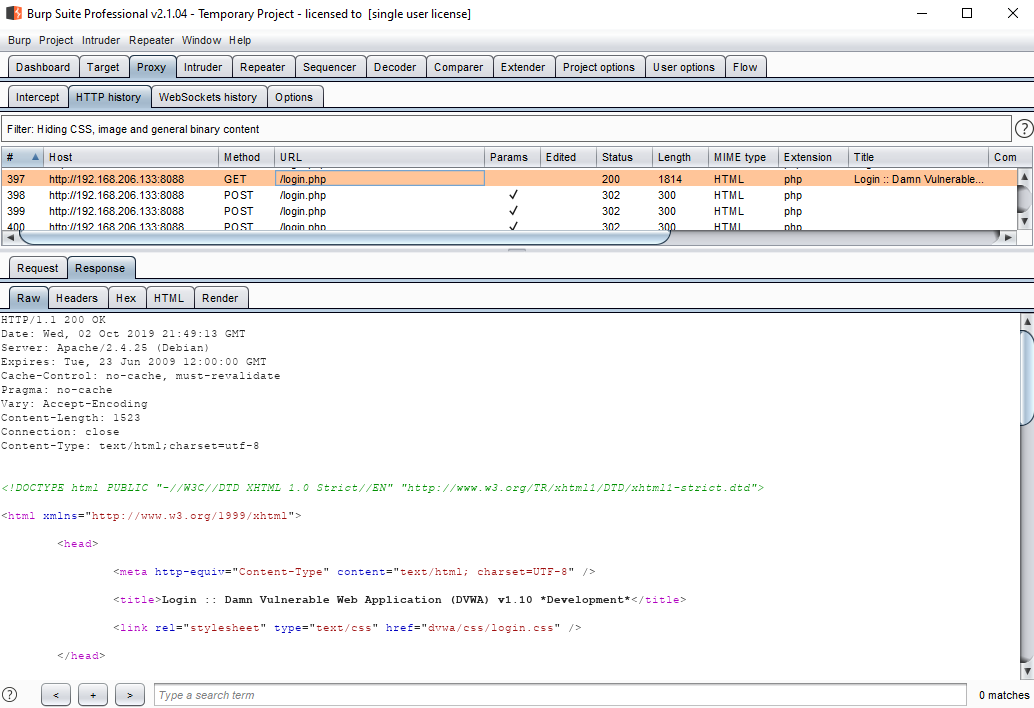
With a Burp listener setup at the IP address and port that was previously defined, scan traffic can then be proxied:
Integrating With Jenkins
If you aren’t familiar with Jenkins, it’s a commonly used open source CI automation server with excellent plugin support to help build, deploy, and automate testing of software projects. I was able to quickly spin up a Jenkins docker container using the following command:
sudo docker run -p 8088:8080 -p 50000:50000 jenkins/jenkins:lts
From there, it’s as simple as just following the standard Jenkins setup instructions. Notice I change the binding port from 8080 to 8088 to avoid port-binding conflicts of running this all within the same VM.
Integrating Burp Enterprise with Jenkins is incredibly easy using the provided Jenkins CI Integration plugin from Portswigger.
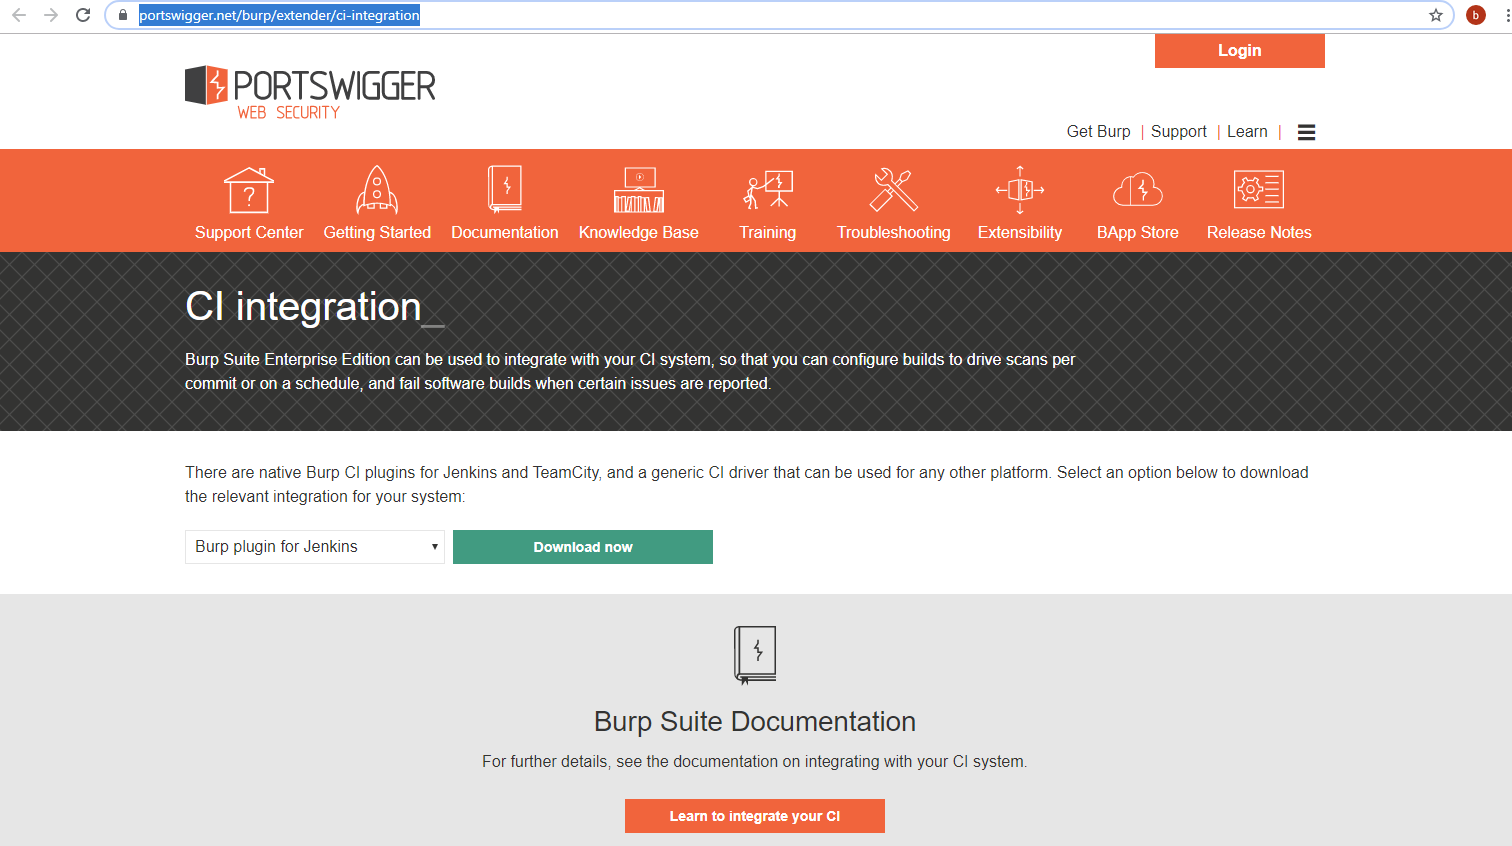
It should also be noted that Burp Enterprise has plugin support for Team City and a Rest API for manually integrating into other CI platforms and processes.
To add the Burp Enterprise plugin to Jenkins, the following instructions are provided with the plugin and should be executed as a Jenkins administrator:
- click “Manage Jenkins” on the main page
- navigate to “Manage Plugins”
- navigate to the “Advanced” tab
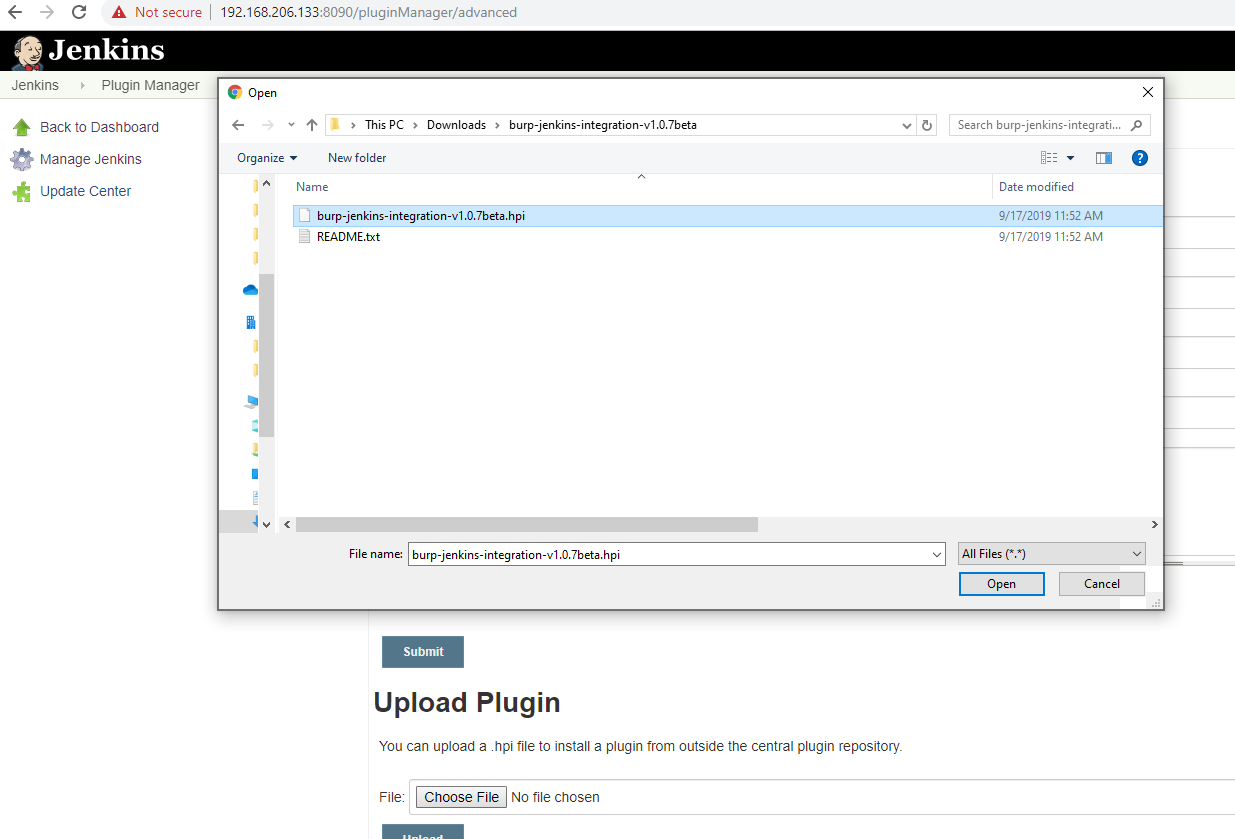
- under the “Upload Plugin” section, click “Choose file” and select the provided hpi file
- click “Upload”
- Jenkins must be restarted to use the plugin
As you can see the plugin is added to Jenkins with just a simple file upload of the .hpi plugin file:
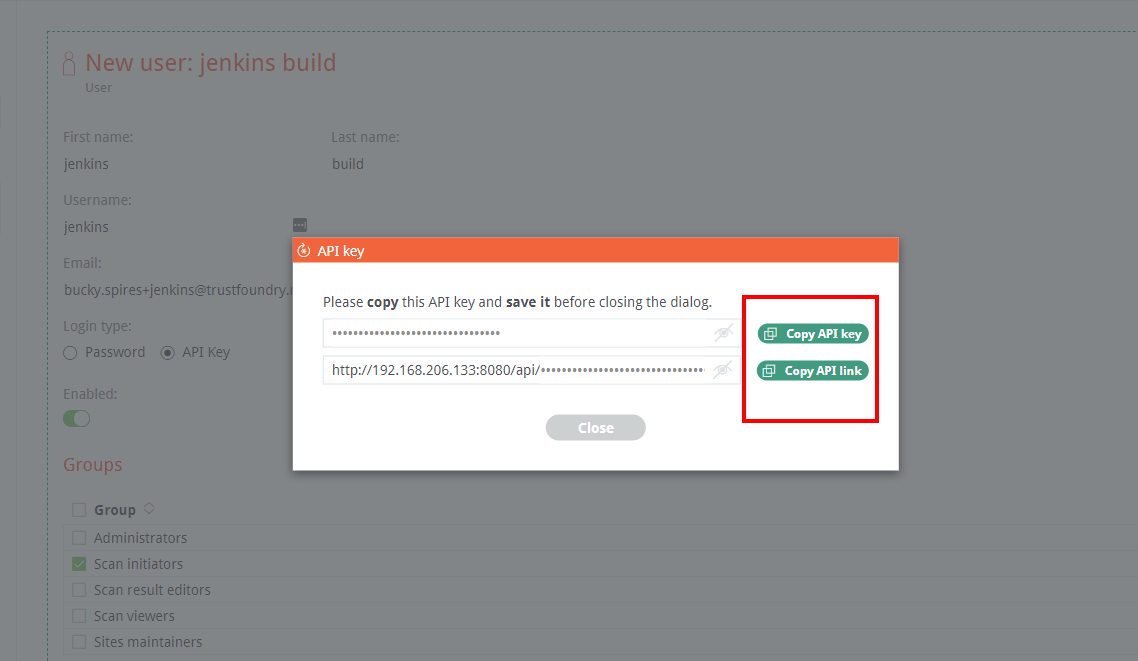
Back in Burp Enterprise, you’ll need to create a new user for build-initiated scans (API Key login type) and add the user to the Scan Initiators default group:

You’ll need to copy the API Key and Link to some scratch space as these will be needed later in setup when we get to the Jenkins build settings:
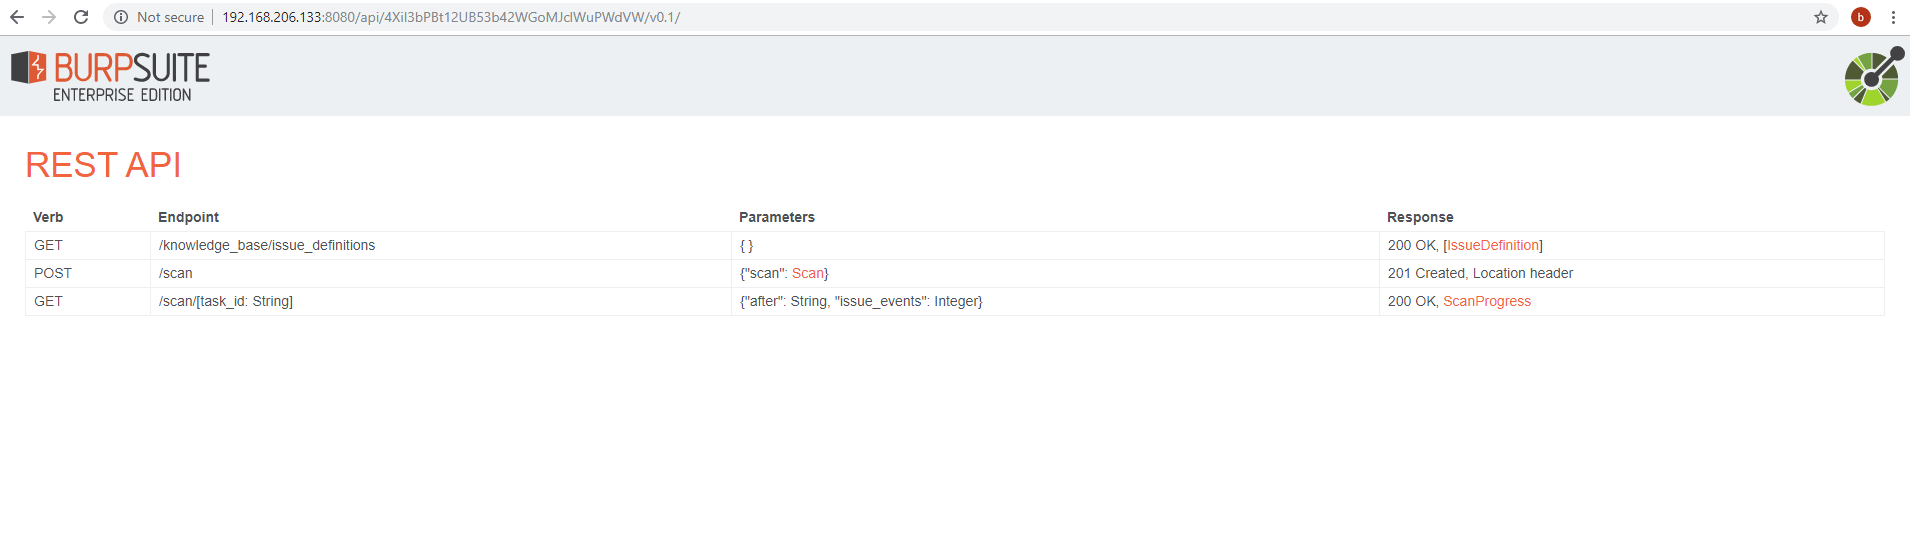
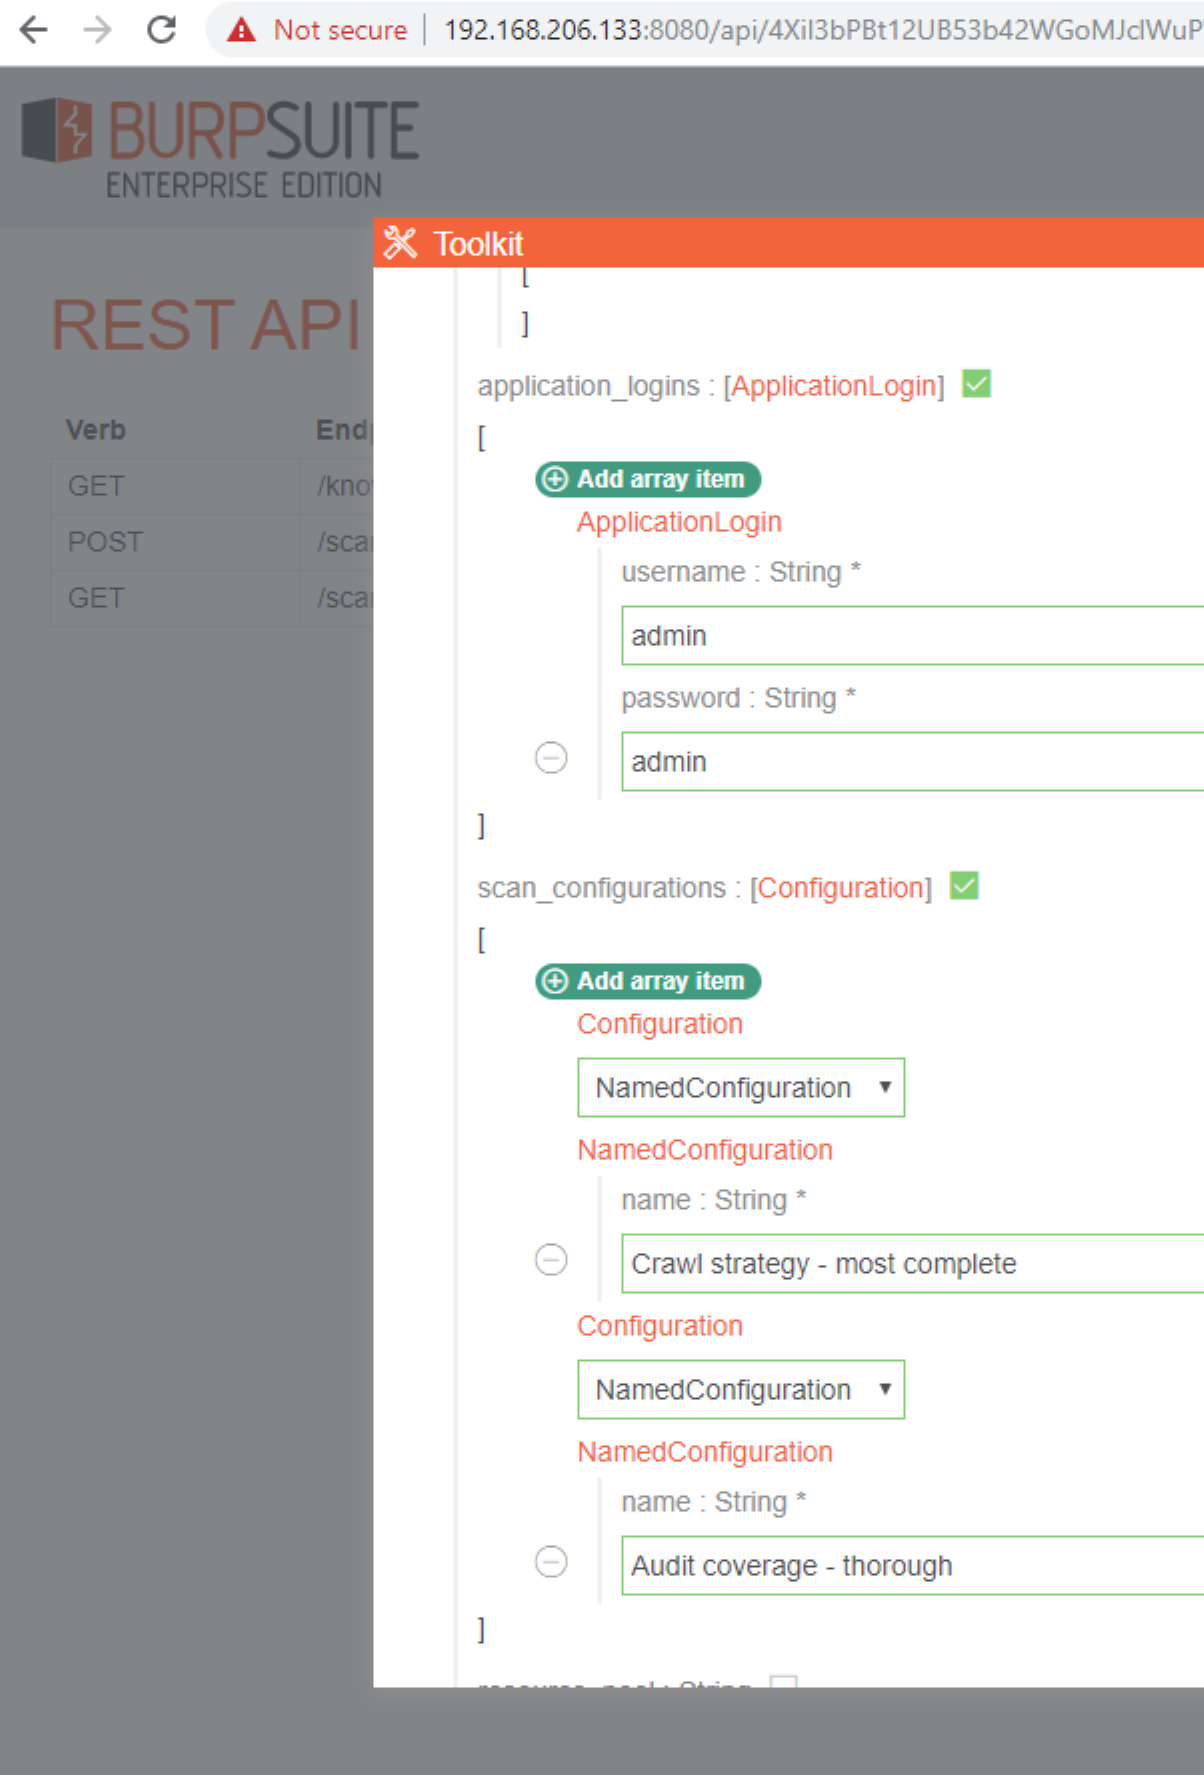
You can go for an unauthenticated scan with default settings for the Jenkins build or you can visit the API Link, configure a more granular scan, and just copy the JSON scan settings to use within the Jenkins build. I walk through configuring the more granular scan settings here. For more granular scan settings visit API Link and click on POST to configure scan settings.
You will need to provide the target URLs, Scan Name, and Scope of Included/Excluded URLs at a minimum:
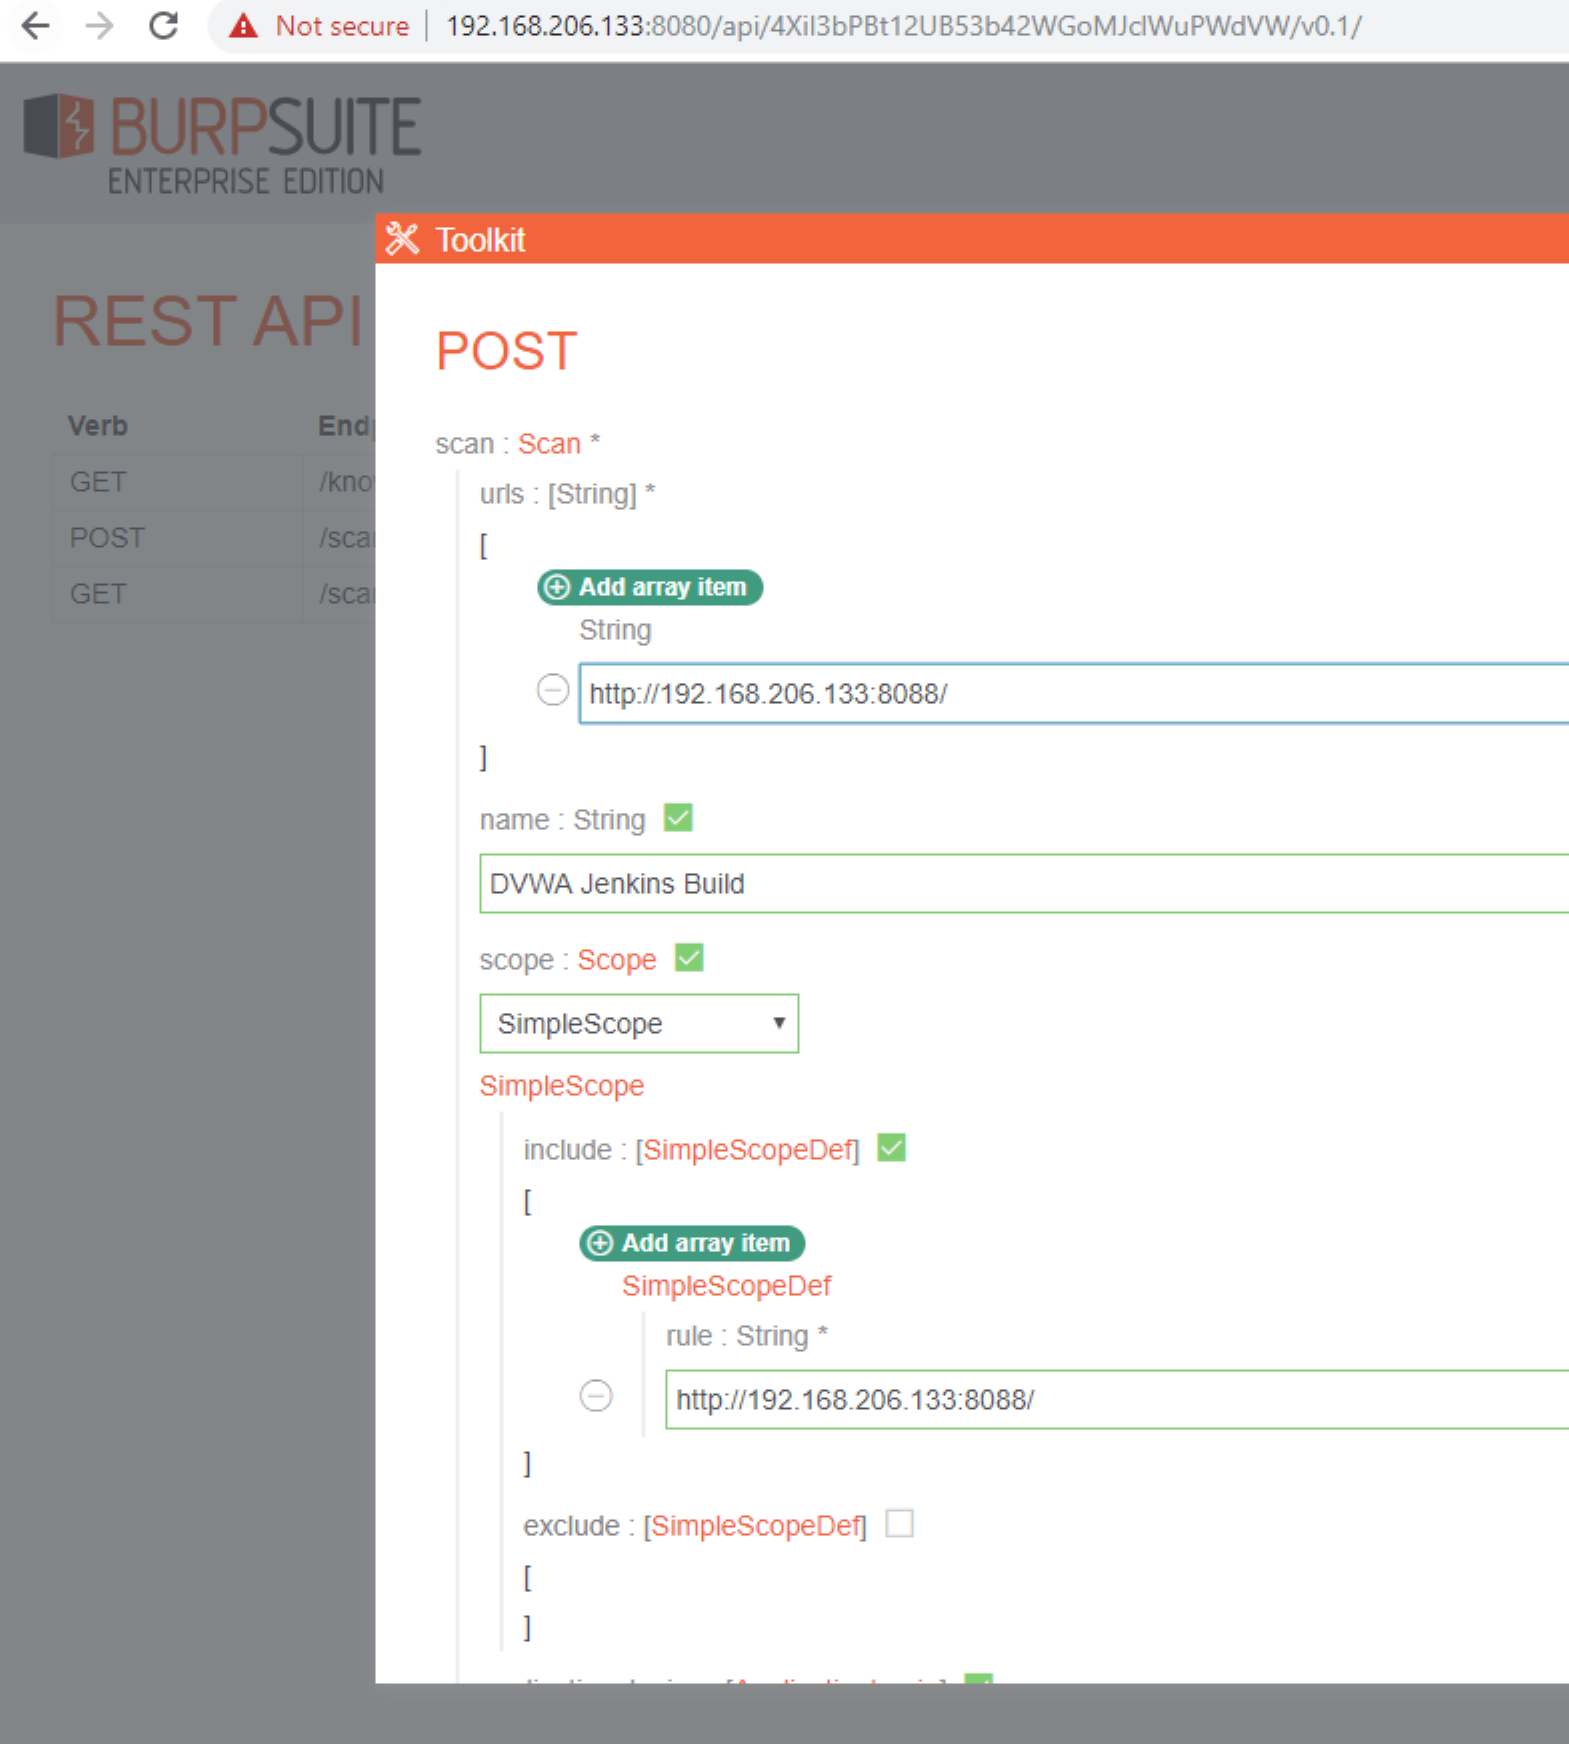
The Application Login credentials and scan configuration settings can also be provided which will allow more granular control over the scan. The scan configuration names are the same configurations that are provided in the web interface. You can just copy and paste the configuration names from there.
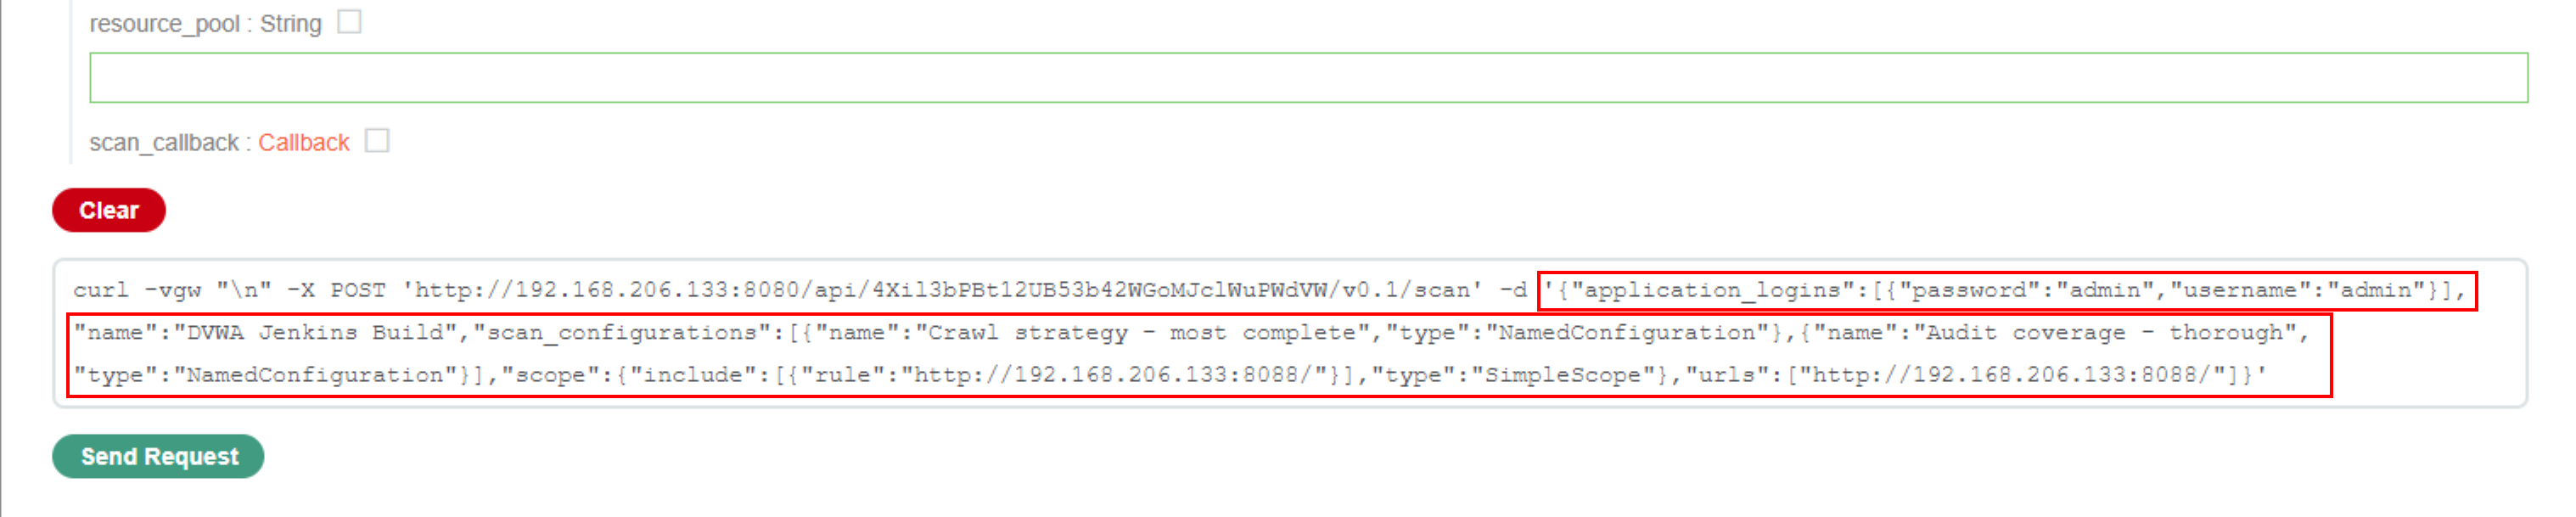
You can then copy the generated JSON settings from the curl request at the bottom of this page. Save this in your scratch space as well since it will be needed for the Jenkins build settings.
Back in Jenkins you’ll need to do the following steps according to the plugin instructions:
- select an existing project and configure its settings
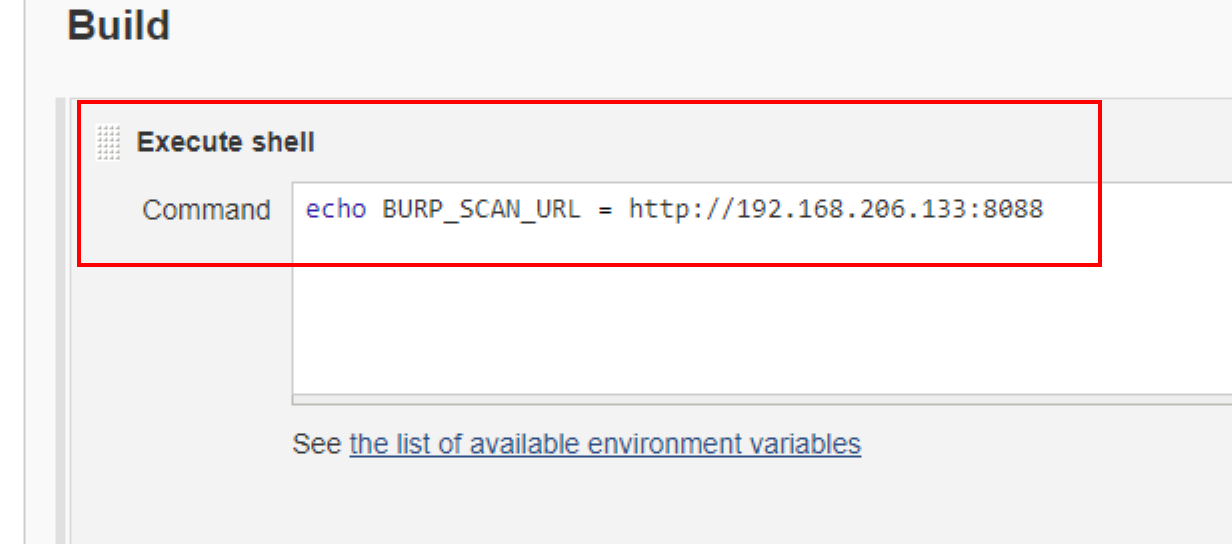
- add an “Execute shell” or “Execute Windows batch command” build step,
depending on your platform, specifying content of:
echo BURP_SCAN_URL = http://my-target-server.com
- add a “Burp scan” build step, specifying your API URL with the API key
- click “Save”
If dynamic URLs are required (e.g. docker containers are created as part of the build) then the build output may contain multiple URLs in the above form, all of which will be aggregated and scanned.
If you don’t want to have more granular control over authentication (the scan will be unauthenticated) and scan policies, you can just stop after the previous steps.
If you want to use the more granular settings configured in the Burp Rest API, add a “Burp Scan” build step and configure with previously copied API Link and API JSON scan settings.
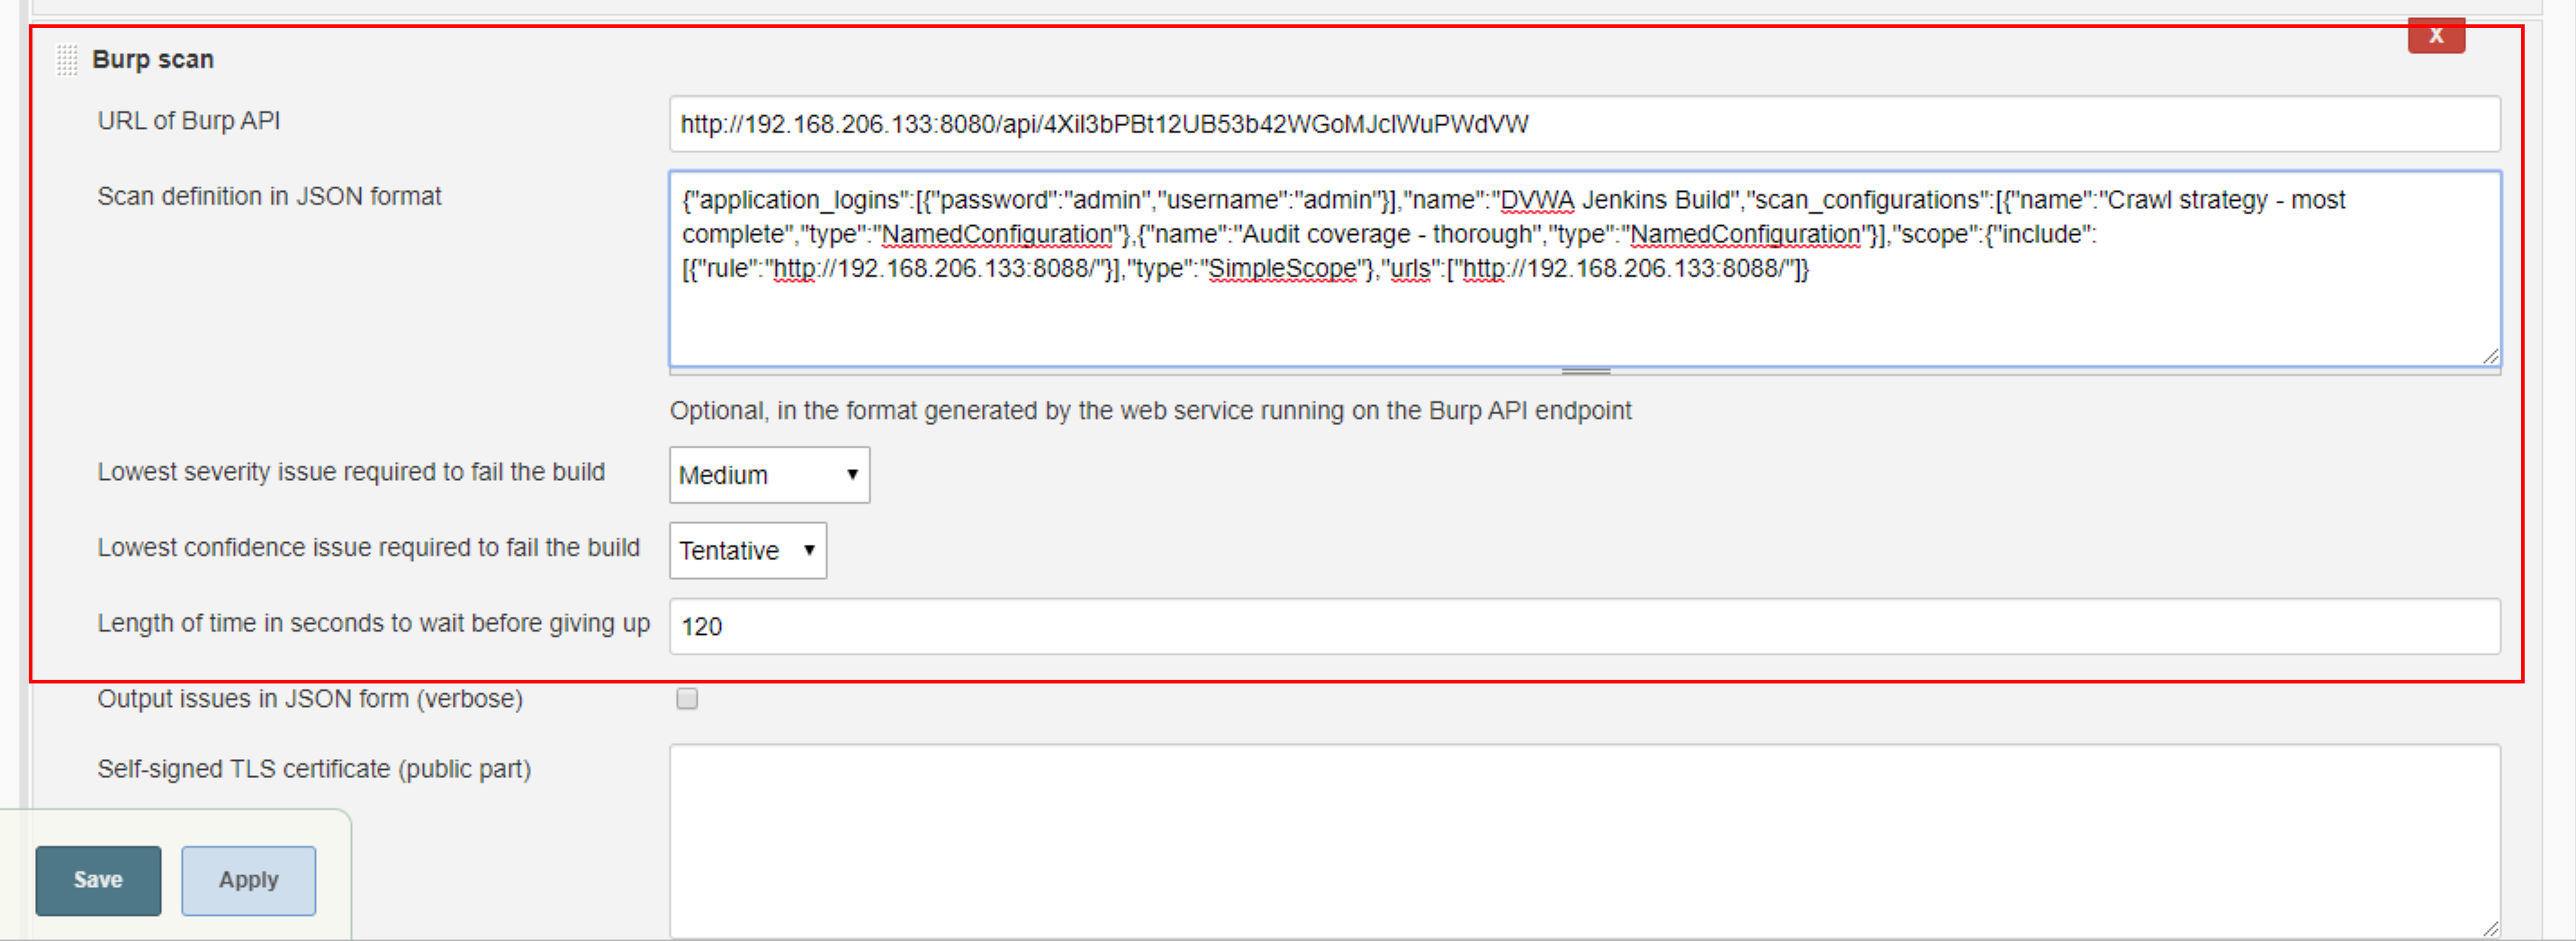
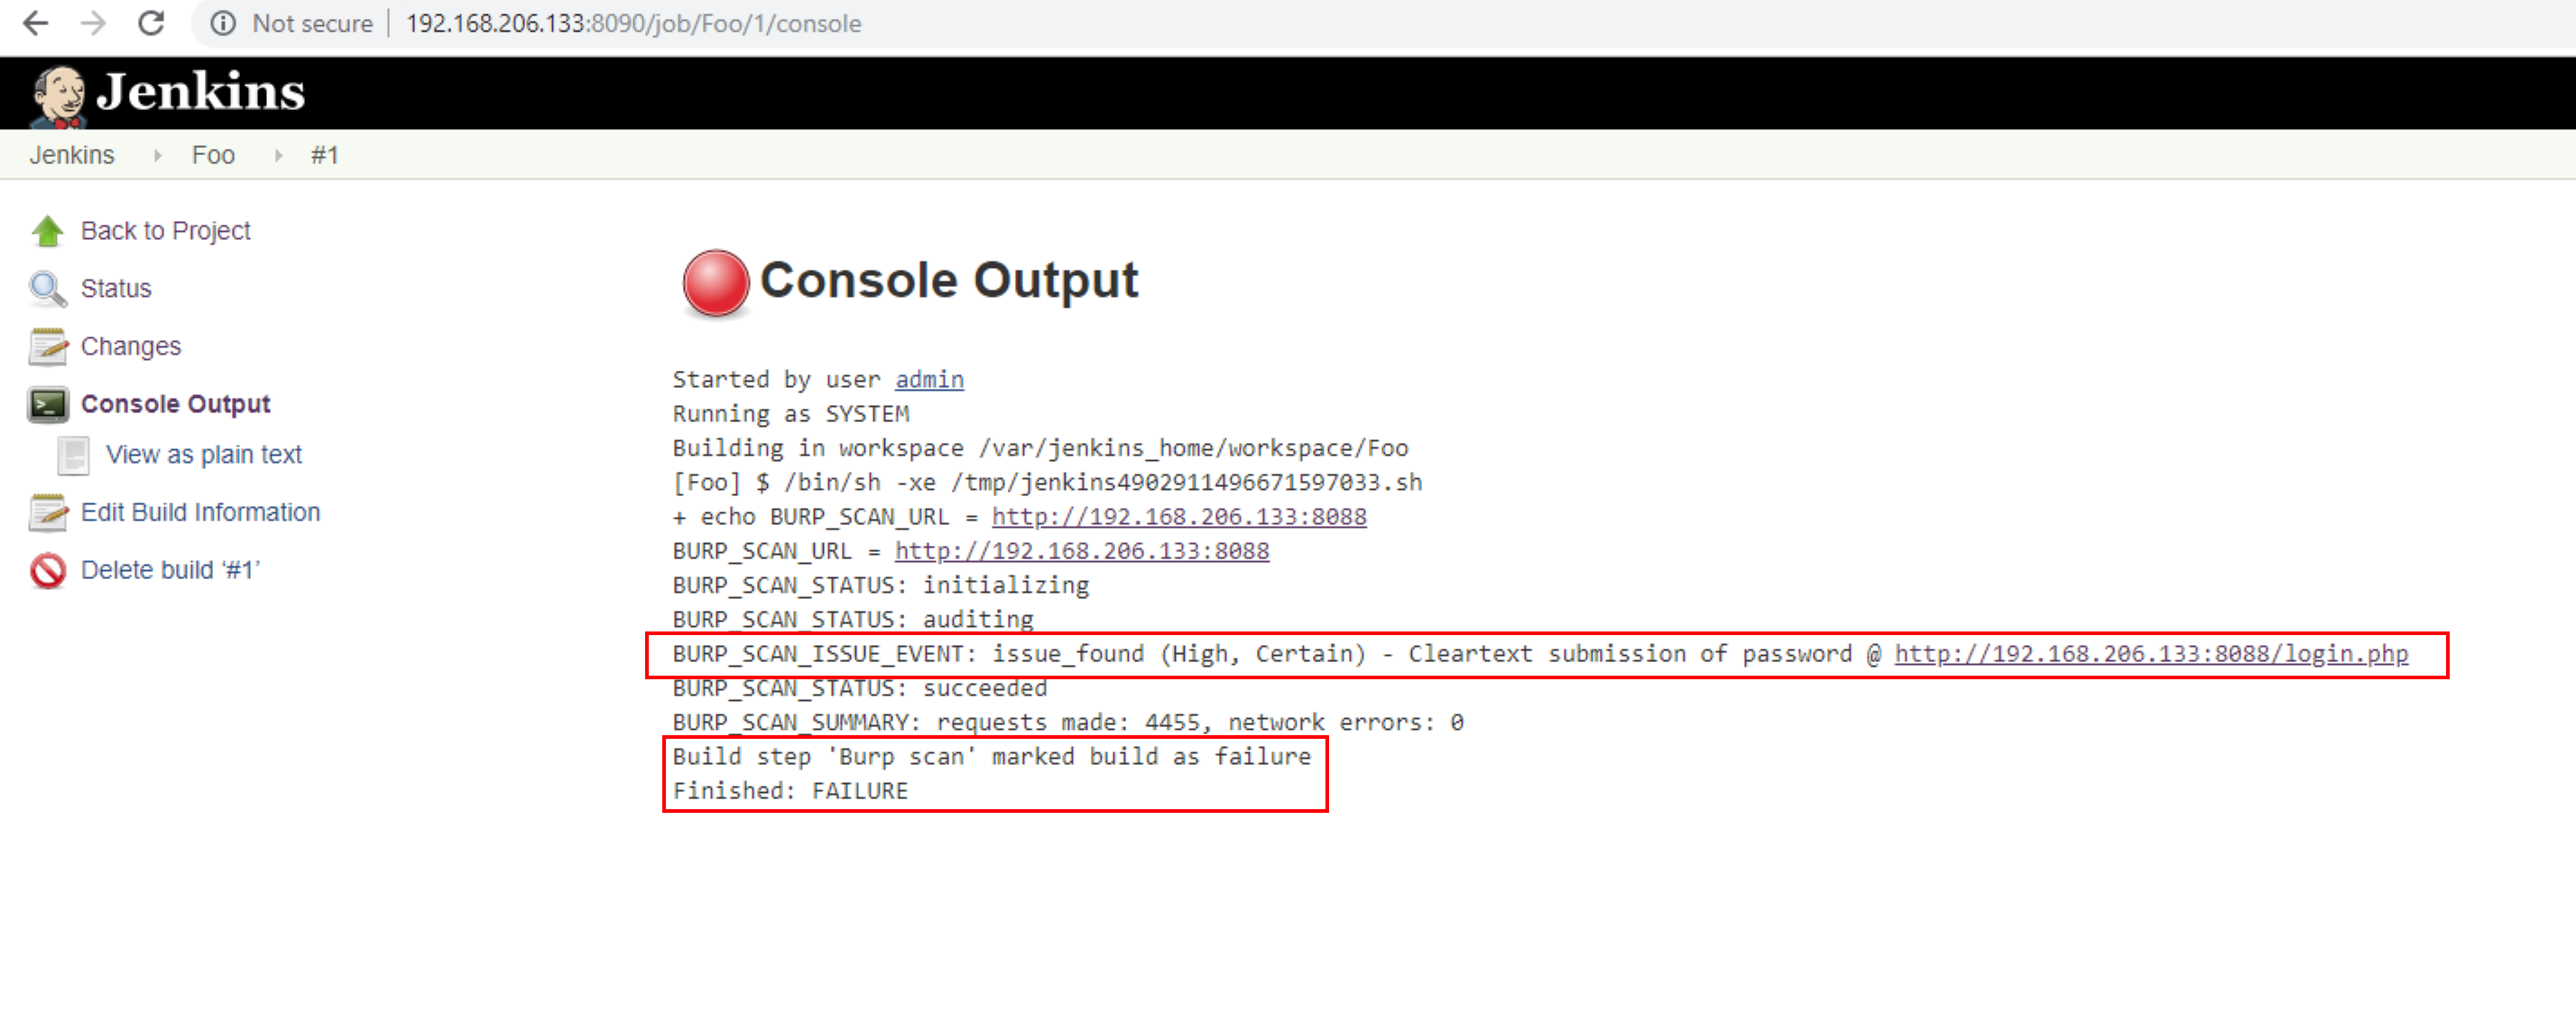
When the build executes, it will fail or succeed depending on the severity of findings in the scan. Here we have “Lowest severity issue required to fail the build” set to Medium. We can see here our build has failed.

View the Console Output to see the build-initiated scan’s details and why the build failed. The scan completes after the first High severity issue was discovered.
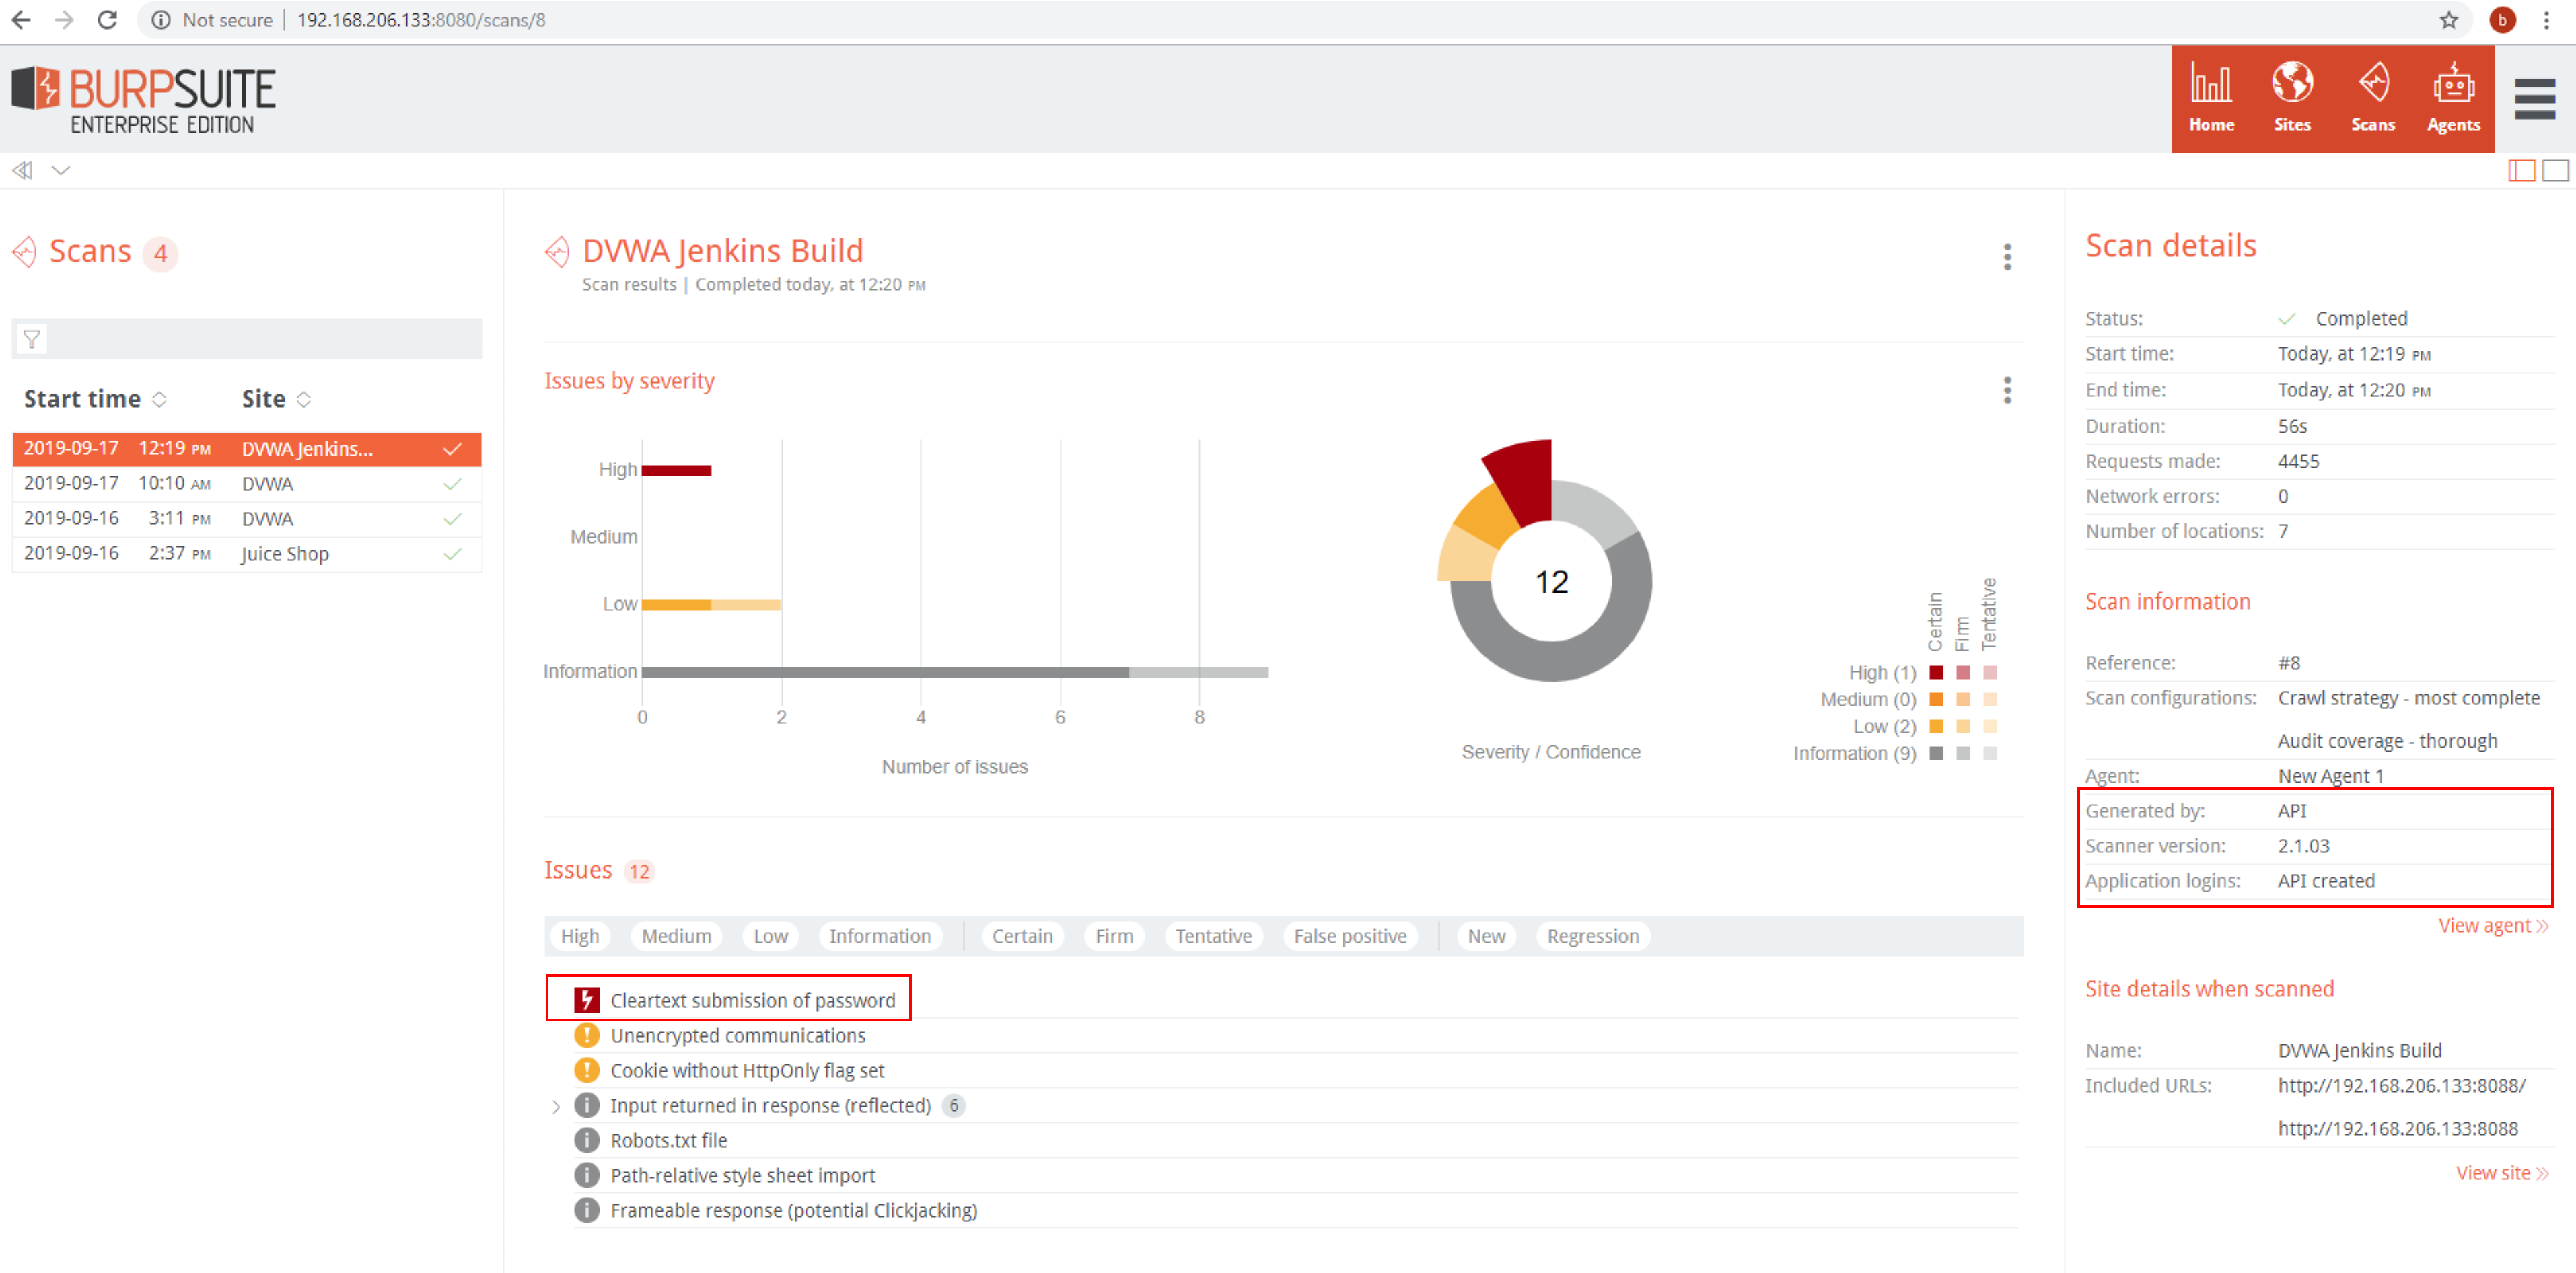
Back within Burp Enterprise you can see the scan details for the Jenkins build-initiated scan:
Conclusion
As can be seen Burp Suite Enterprise Edition is a powerful addition to an enterprise application security program with a host a features to integrate with existing CI and SDLC processes. Some additional features I would like to see in future releases are:
- Improved crawling and authentication functionality for complex application workflows. While most applications will have a variety of differences that can impede crawling and authentication, the ability to configure or upload crawl and authentication macros would be a good interim solution for this as Burp Enterprise agents improve coverage of more complex workflows.
- The ability to import Burp Pro scans with custom findings would help solve cases where the current scanner agent is unable to crawl or authenticate the application. This would also assist in more complex application testing scenarios such as API testing where there is not a frontend application to crawl.
- More extensive reporting options and formats. While the ability to download chart and table images from the dashboards will assist with custom reporting, it would be nice to have Burp Enterprise either work with custom report templates or provide a reporting API or raw data formats where other reporting tools, such as Dradis or PlexTrac, could be integrated with the reporting workflow.